June 2025
 With mid-winter approaching in Aotearoa / New Zealand, thoughts turn towards the heavens in a search for the star cluster of Matariki, which heralds the Māori New Year, a time for Māori and others to remember those who have passed, celebrate the present and plan for the future. I like to develop new weaving ideas and this year, to celebrate Matariki, I’ve worked on a woven star, the instructions for which I’m sharing here, with illustrations for guidance. Try weaving a star, either on cardboard as shown here or on a piece of weaving. Another suggestion is to weave nine stars in different sizes representing the nine stars of Matariki and attach them to a backing to make a Matariki wall chart.
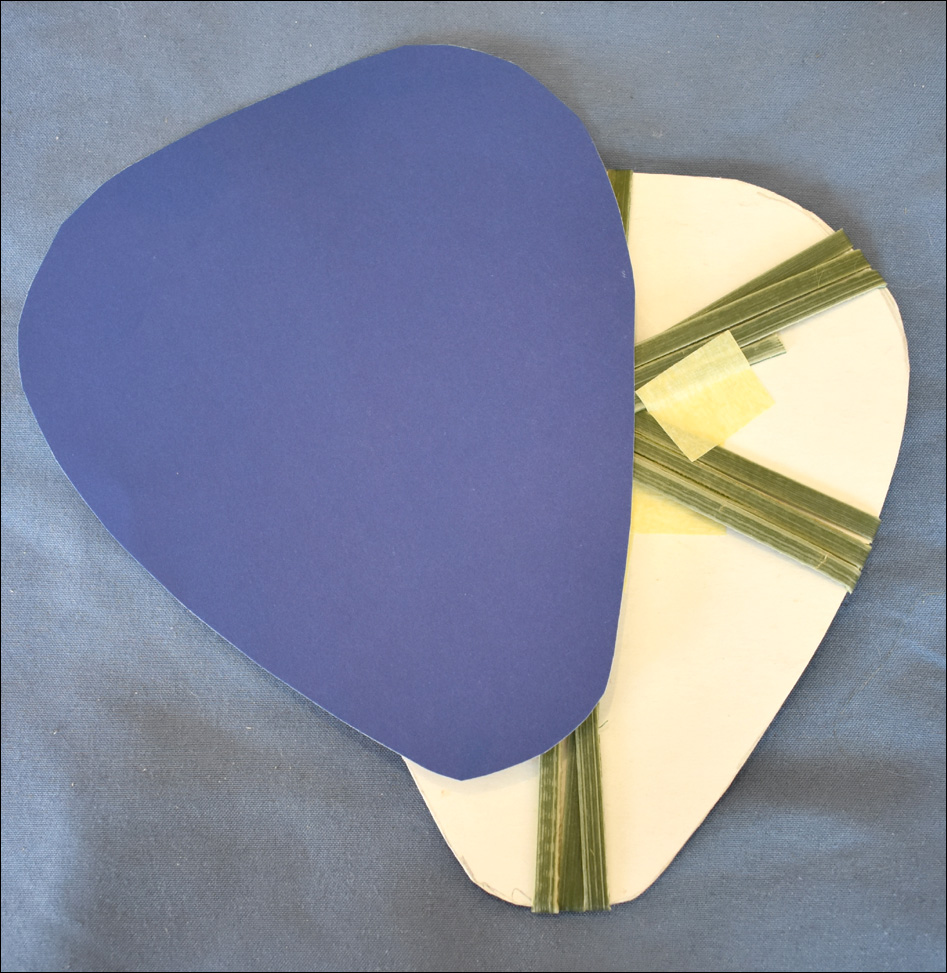
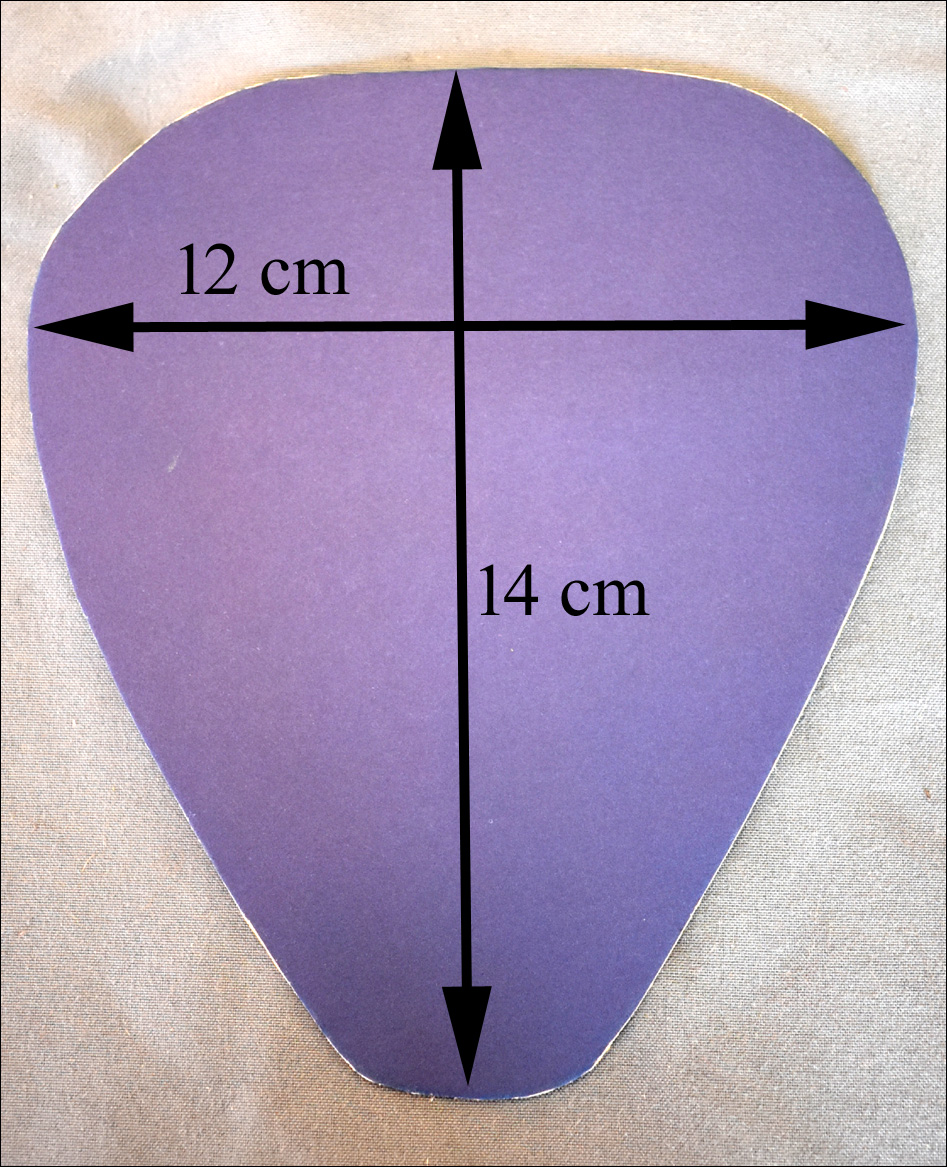 The star is made by wrapping thin flax strips around a cardboard shape as shown here. The strips stay in the right place on this shape — I found that a circle is too round for the strips to be able to hold in place while being wrapped. To start, draw this shape on a piece of dark-coloured cardboard and cut it out. Your shape can be smaller or bigger than this one, which is 12 cm across and 14 cm high. Prepare three long strips of flax 4mm wide and soften them by pulling a knife along the underside of the flax. If the shape much bigger, then you’ll need to cut more strips as one strip won’t be long enough to wrap around the shape three times.
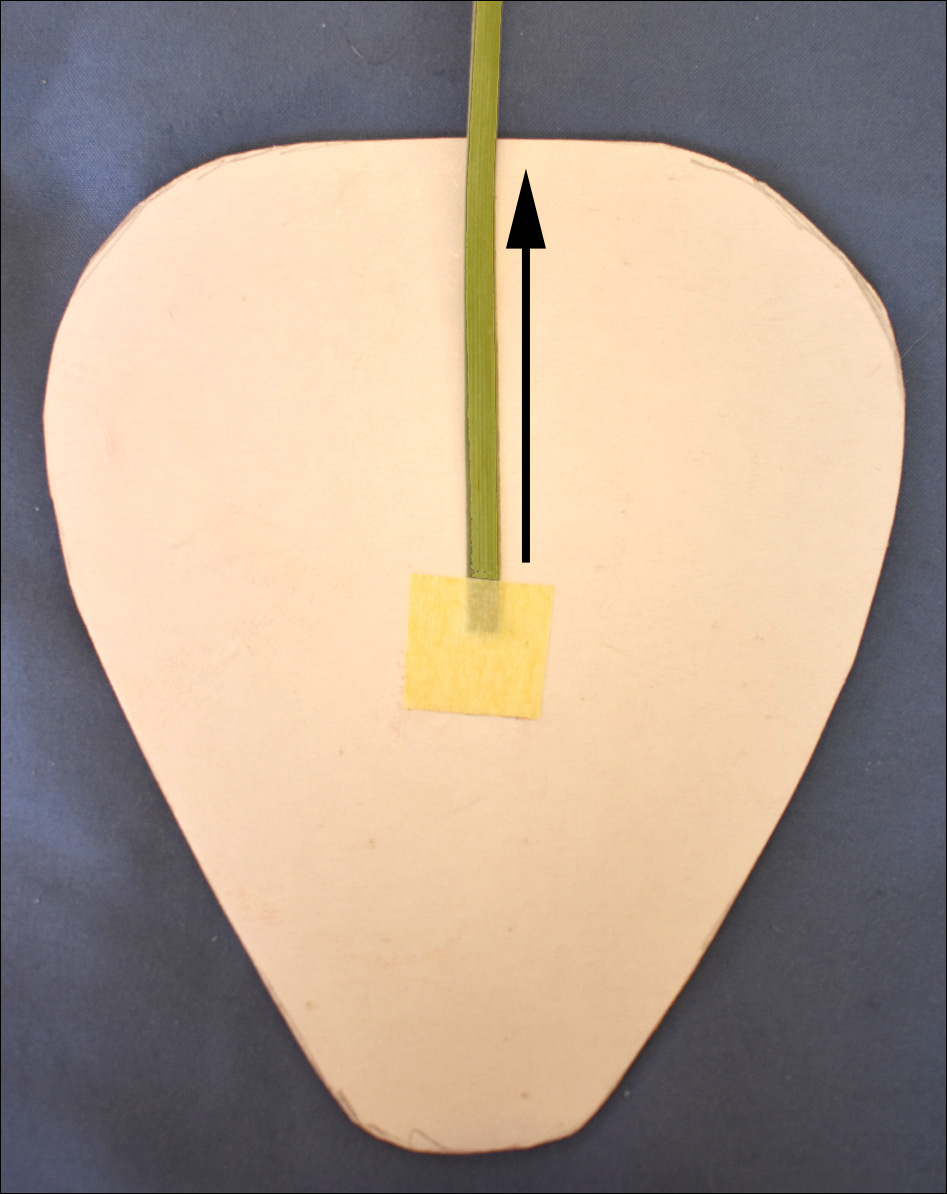
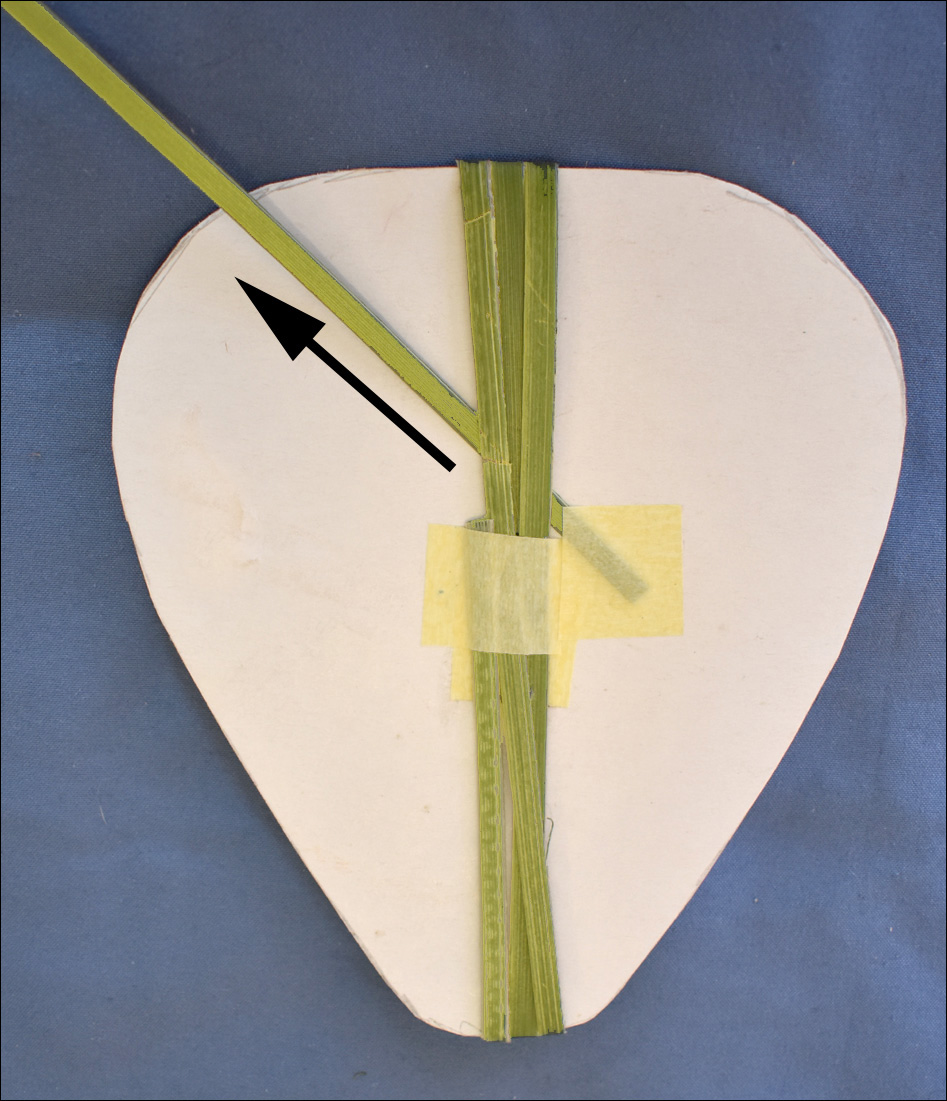
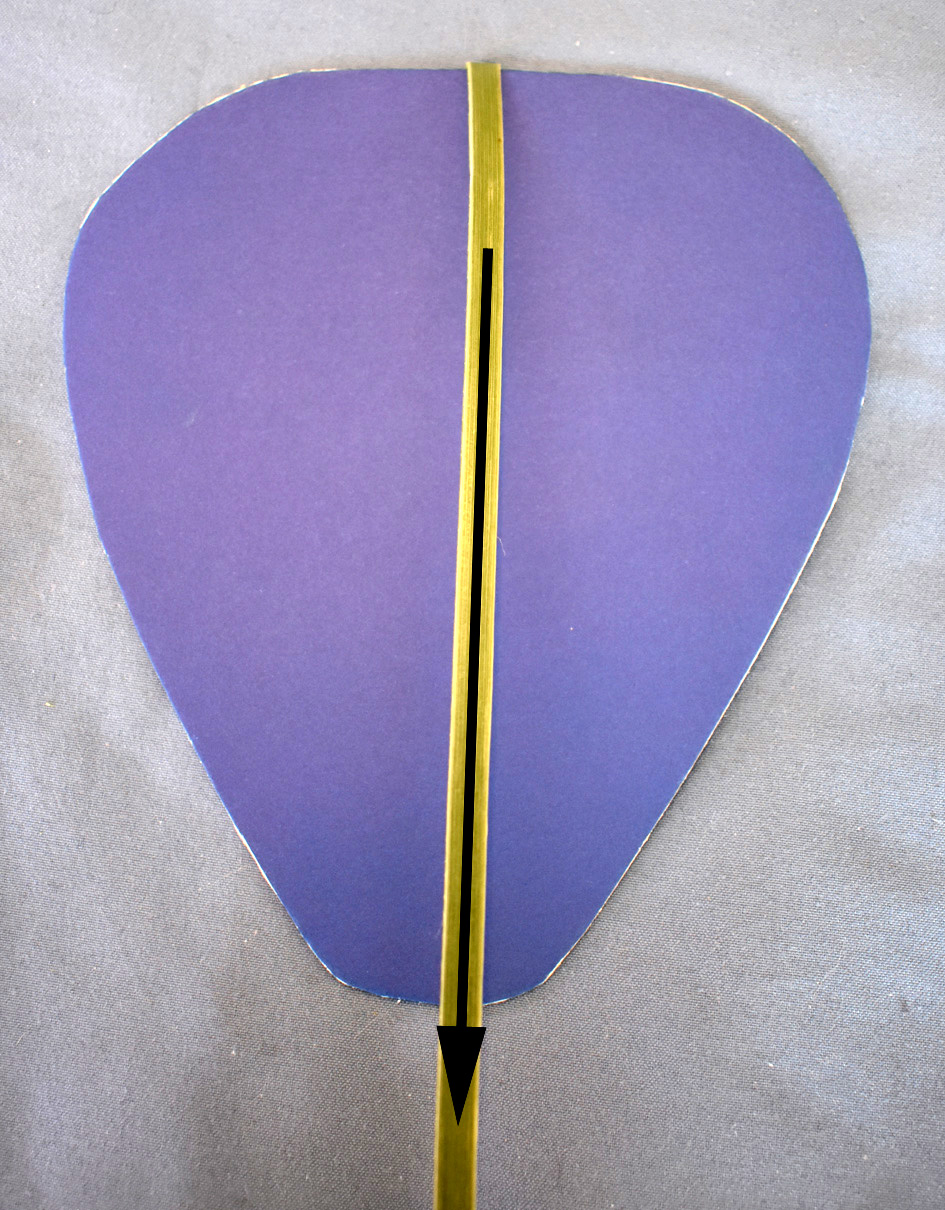 Take one of the strips of flax and attach it with tape to the back of the cardboard shape as shown here on the left. Attach it in the middle of the shape with the long end going up to the top. Fold it over to the front of the shape, shown here on the right, and take it straight down to the base of the cardboard shape.
 Next, fold the strip around the back of the cardboard shape and take it up to the top.
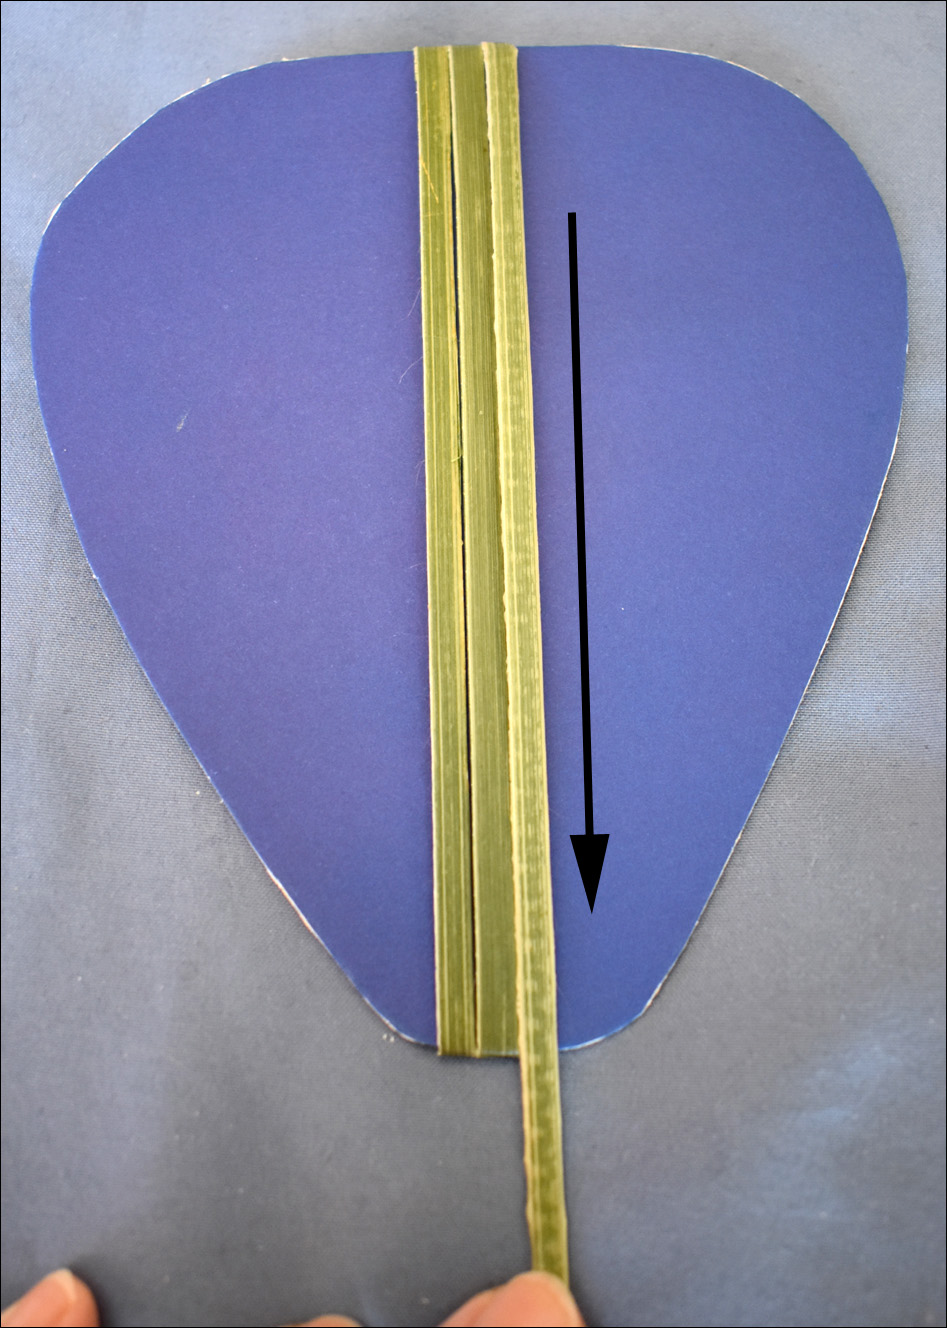 Now, bring the strip over to the front of the shape and back down again. Take it around the cardboard shape one more time, so that there are three strips sitting side by side on the front of the shape.
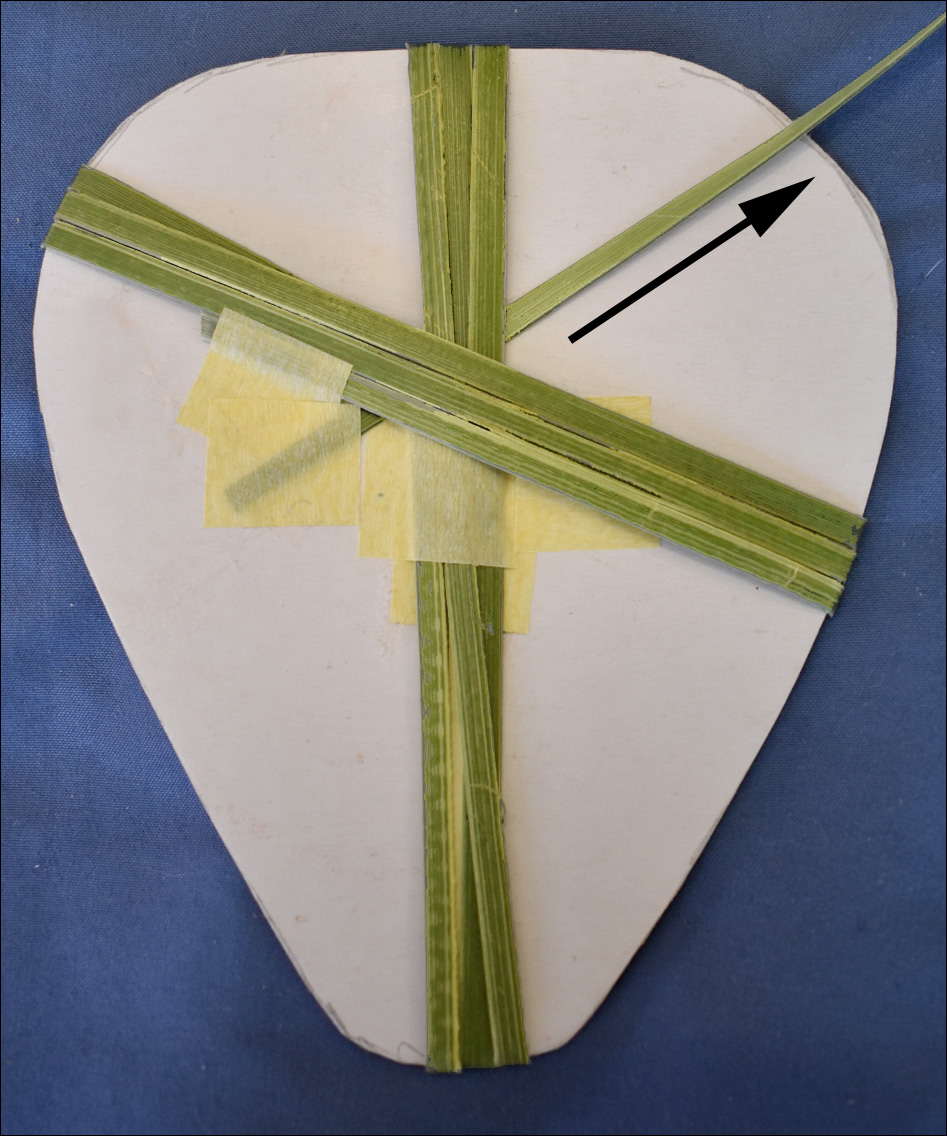
 Wind the strip around to the back and pull the strip up to tighten it all the way around. Tape the end in place. Take the second thin strip of flax and tape it in place on the back of the cardboard. Tape it so that it is on an angle pointing out to the left and it will come over to the front of the cardboard shape at the top right.
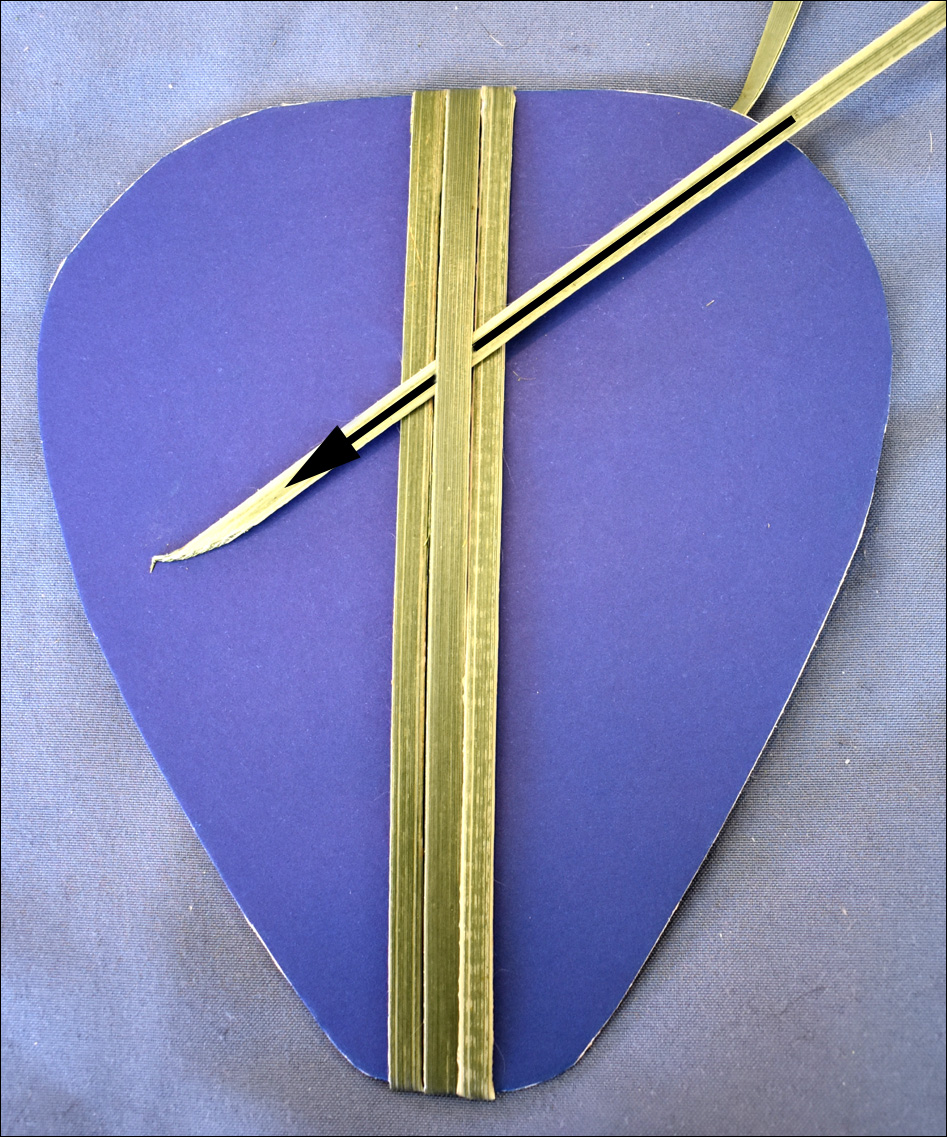 Bring the new strip down over the front of the cardboard shape and then weave it under the middle strip of the three strips. It can be useful to have a small instrument like a curved needle to lift the middle strip up to assist the new strip to slide easily underneath.
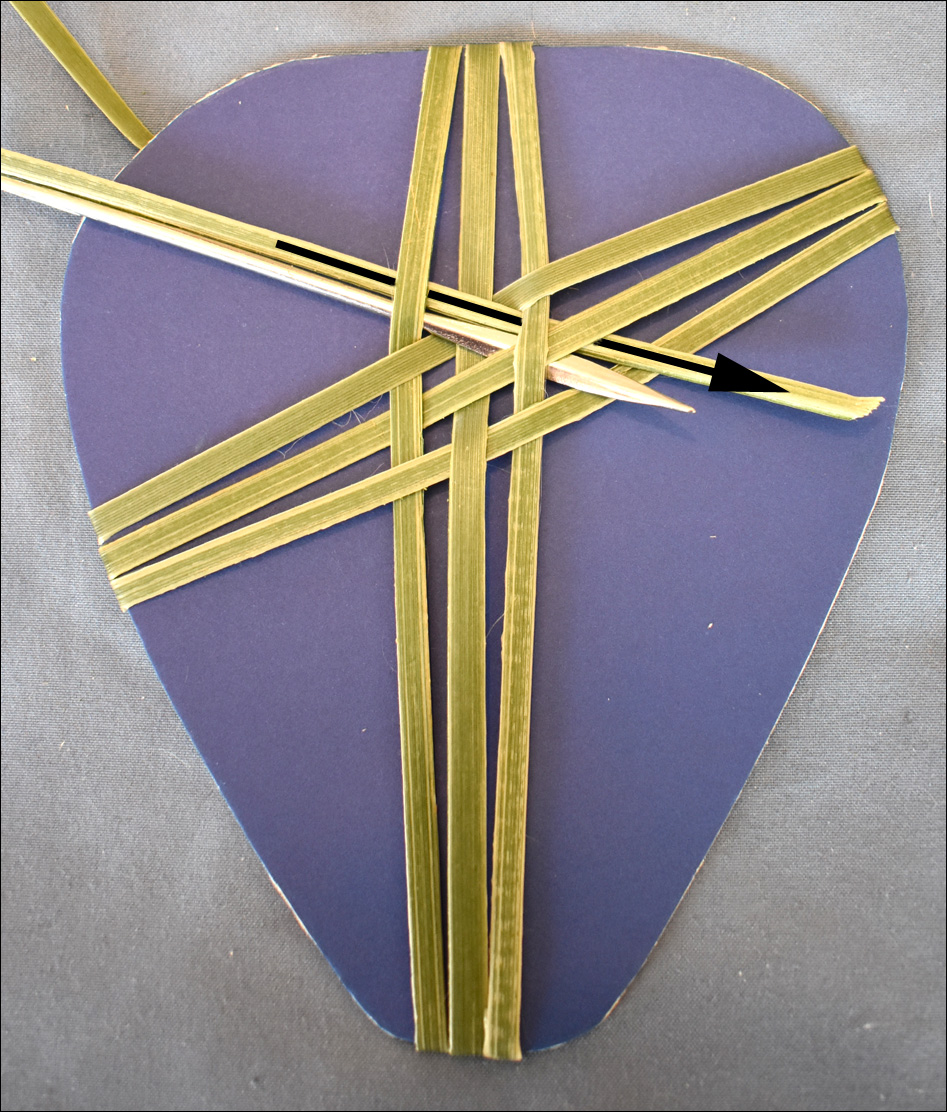
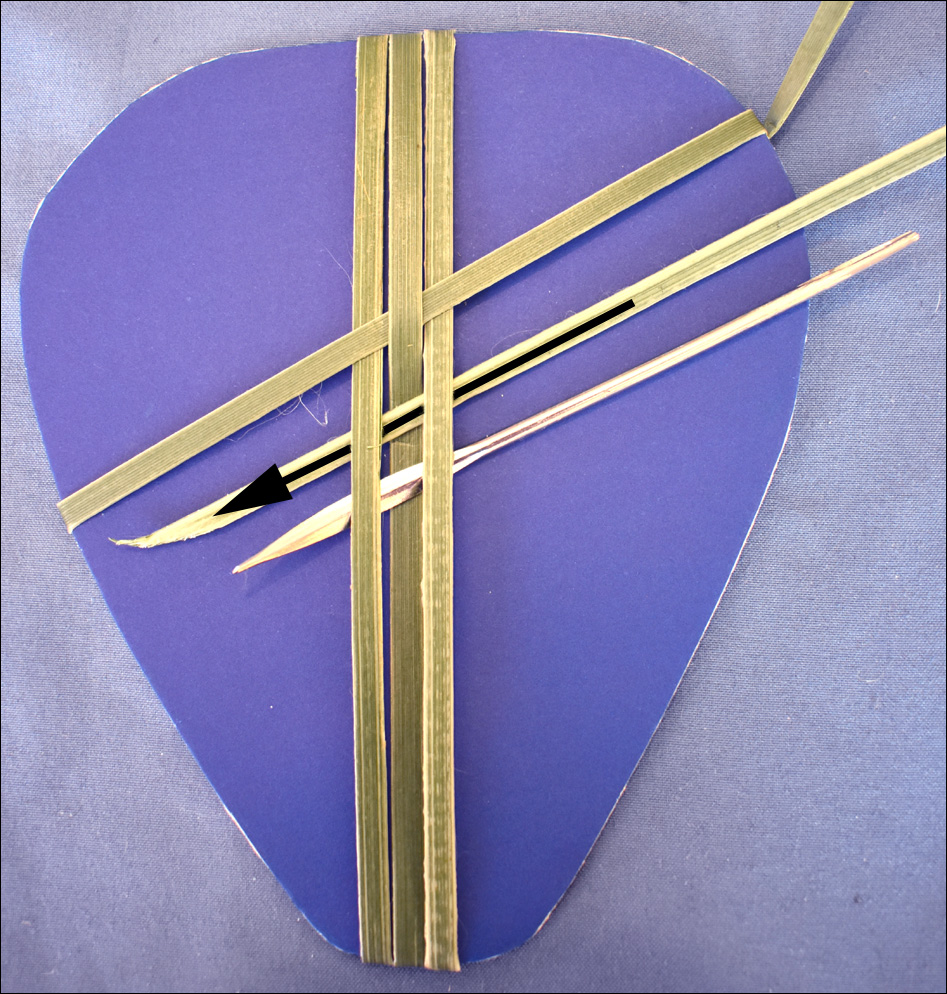 Take the new strip nearly halfway down the side of the cardboard shape, fold it to the back, and then bring it around to the front again. Weave it under the first strip, over the second and under the third strip. Again I’ve used a curved needle to hold the vertical strips in place so the the new strip slides easily underneath. Pull the new strip all the way through, keeping it tight up against the previous strip. Take the strip around the back of the cardboard shape, and bring it to the front, beside the previous strip.
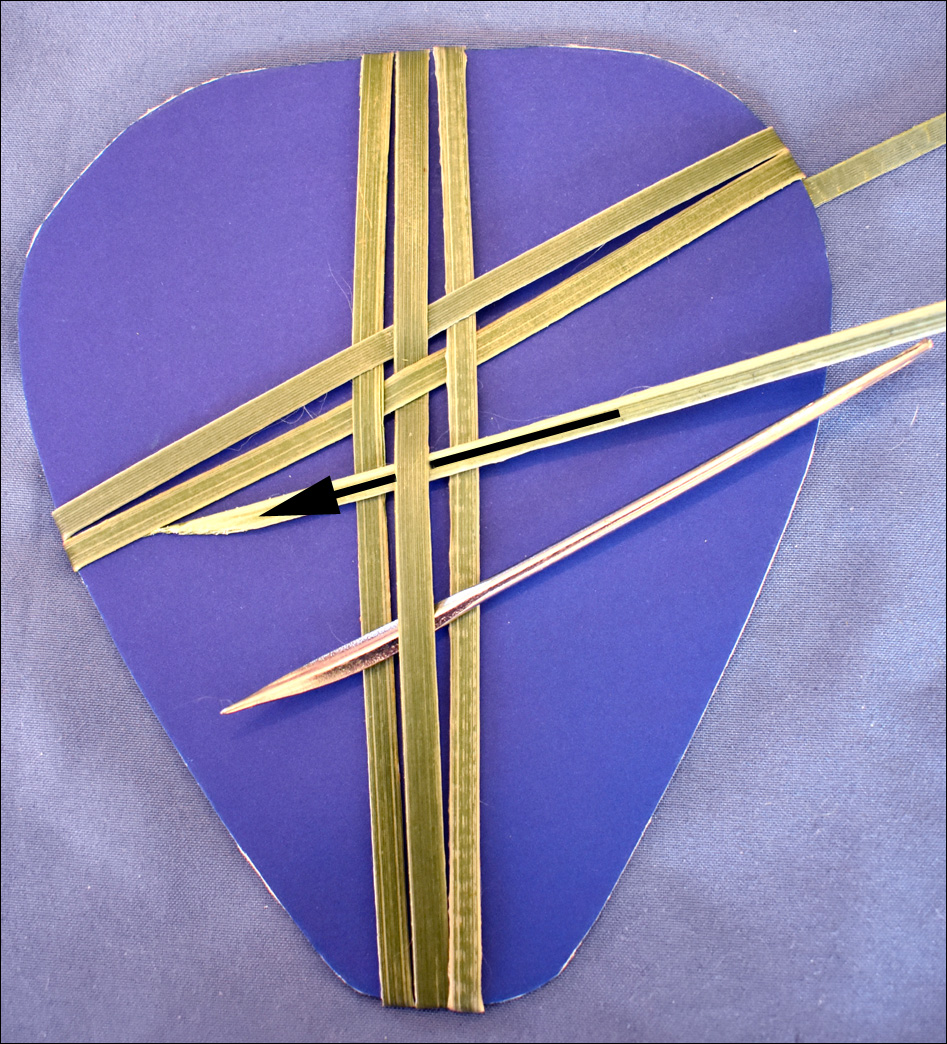
 Weave the strip under the middle strip, pull it fully through and take it around to the back of the cardboard shape. Pull the strip up tight, make sure the strips are sitting neatly together on the front, and tape the end in place on the back. The weaving on the front of the cardboard shape will now look like this image on the right.
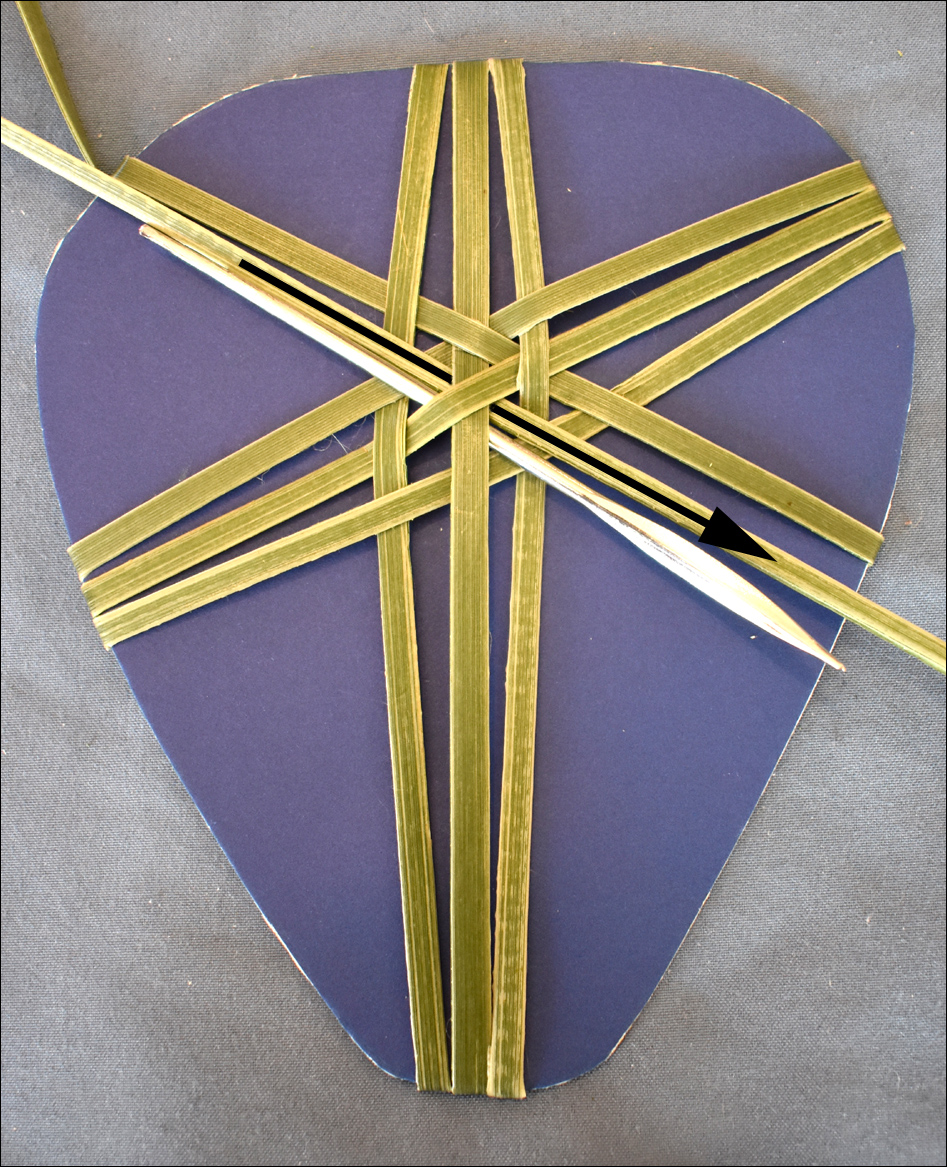
 Tape the third thin strip of flax on the back of the cardboard shape, postioning it so that it is on an angle pointing out to the right, and coming over to the front of the cardboard shape at the top left. Bring the new strip down over the front of the cardboard shape, weave it under one strip, over two strips, under two strips and over one strip. Note that each set of the two strips that is being woven under is made up of one strip from the first set of strips wound around the cardboard shape and one strip from the second set of strips wound around the cardboard shape.
 Pull the weaving strip up tight, take it around the back of the cardboard shape and around to the front again so that it is alongside the previous strip. Weave the strip over two strips, under two strips, and over two strips.
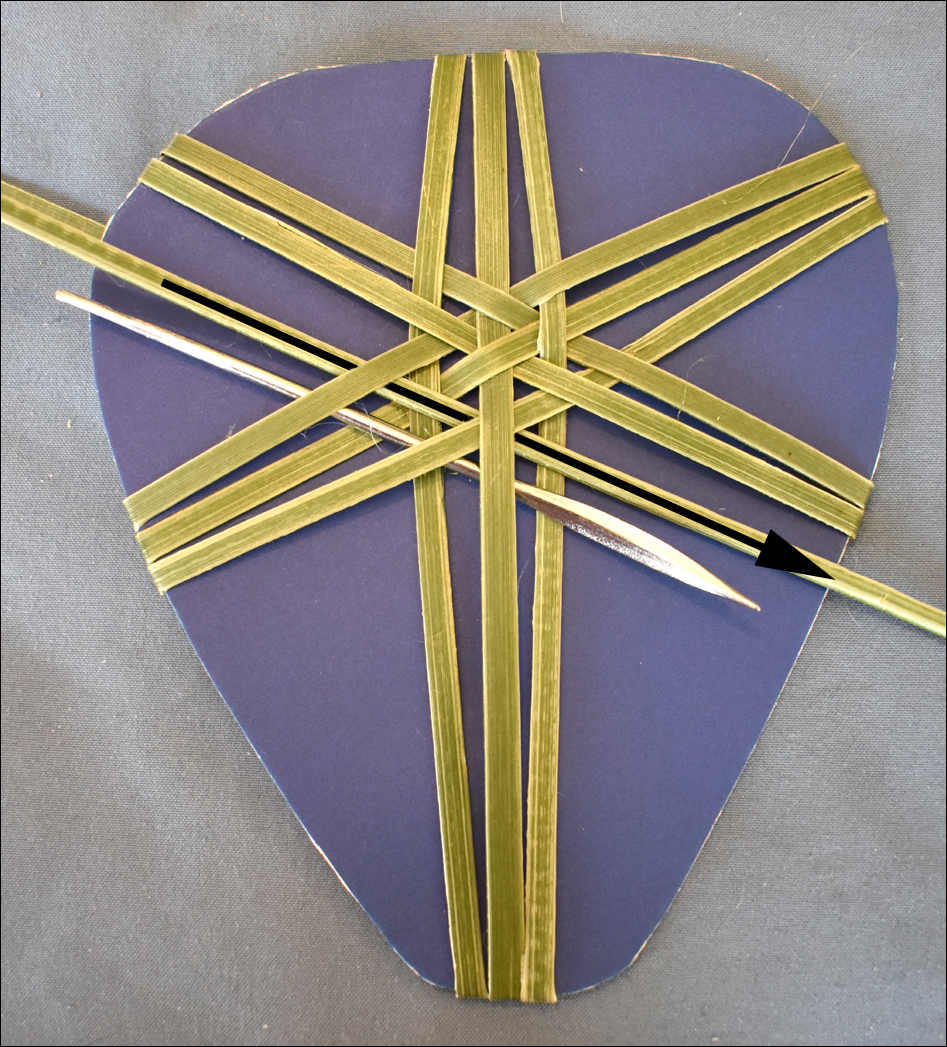 Pull the weaving strip up tight, take it around the back of the cardboard shape and back around to the front so that it is alongside the previous strip. Weave the strip under one strip, over two strips, under two strips, and over one strip. Take the strip around to the back and tape it in place.
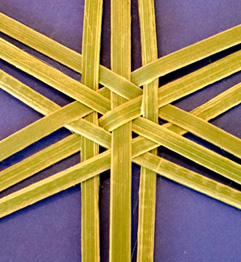 Adjust the strips so that they are sitting neatly together to make a pleasing woven star. If the flax strips slip around on the edge of the cardboard shape, tape them in place on the back.
 Tidy up the back of the star by covering the back of the cardboard shape with another piece of card or paper. Alternatively you may want to stick it onto a larger art work or Matariki chart.
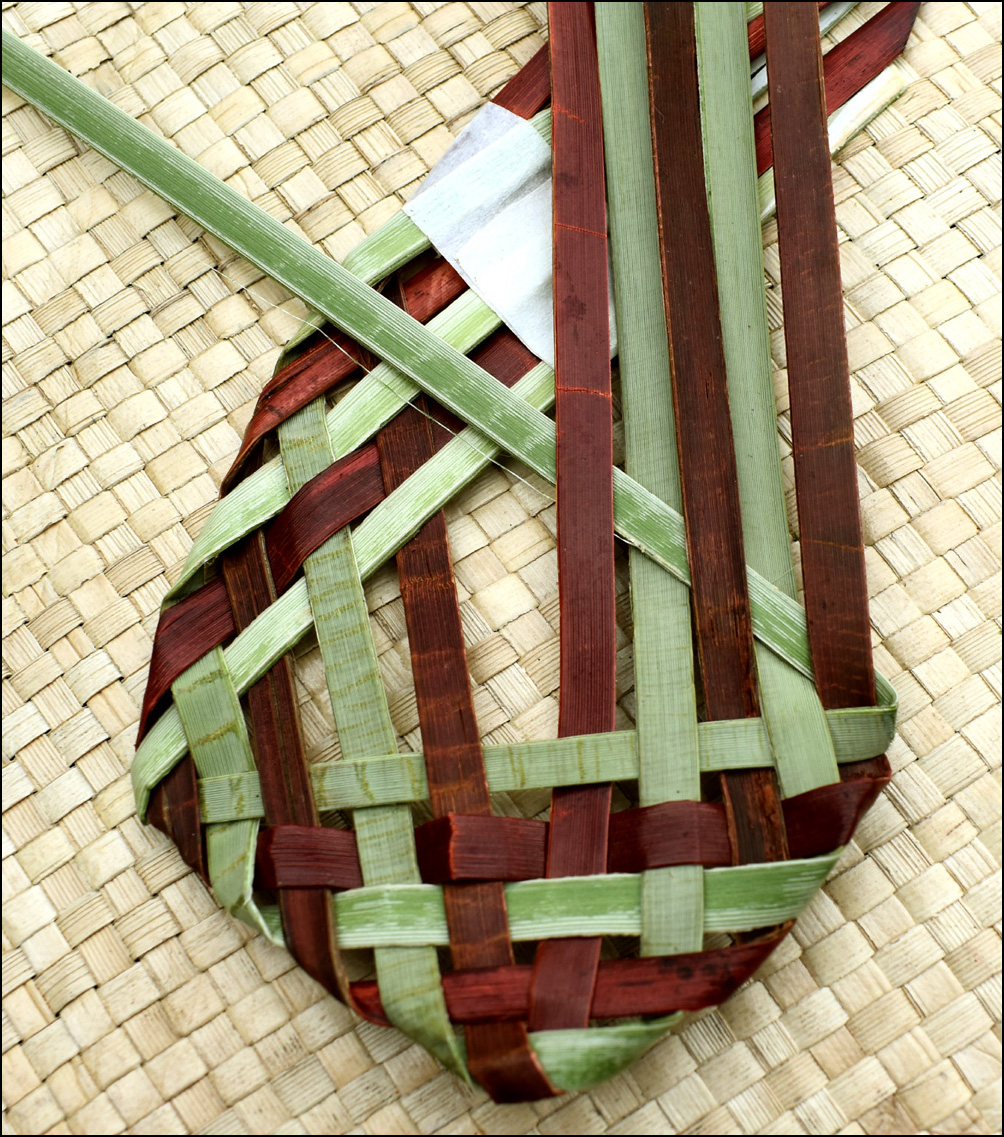
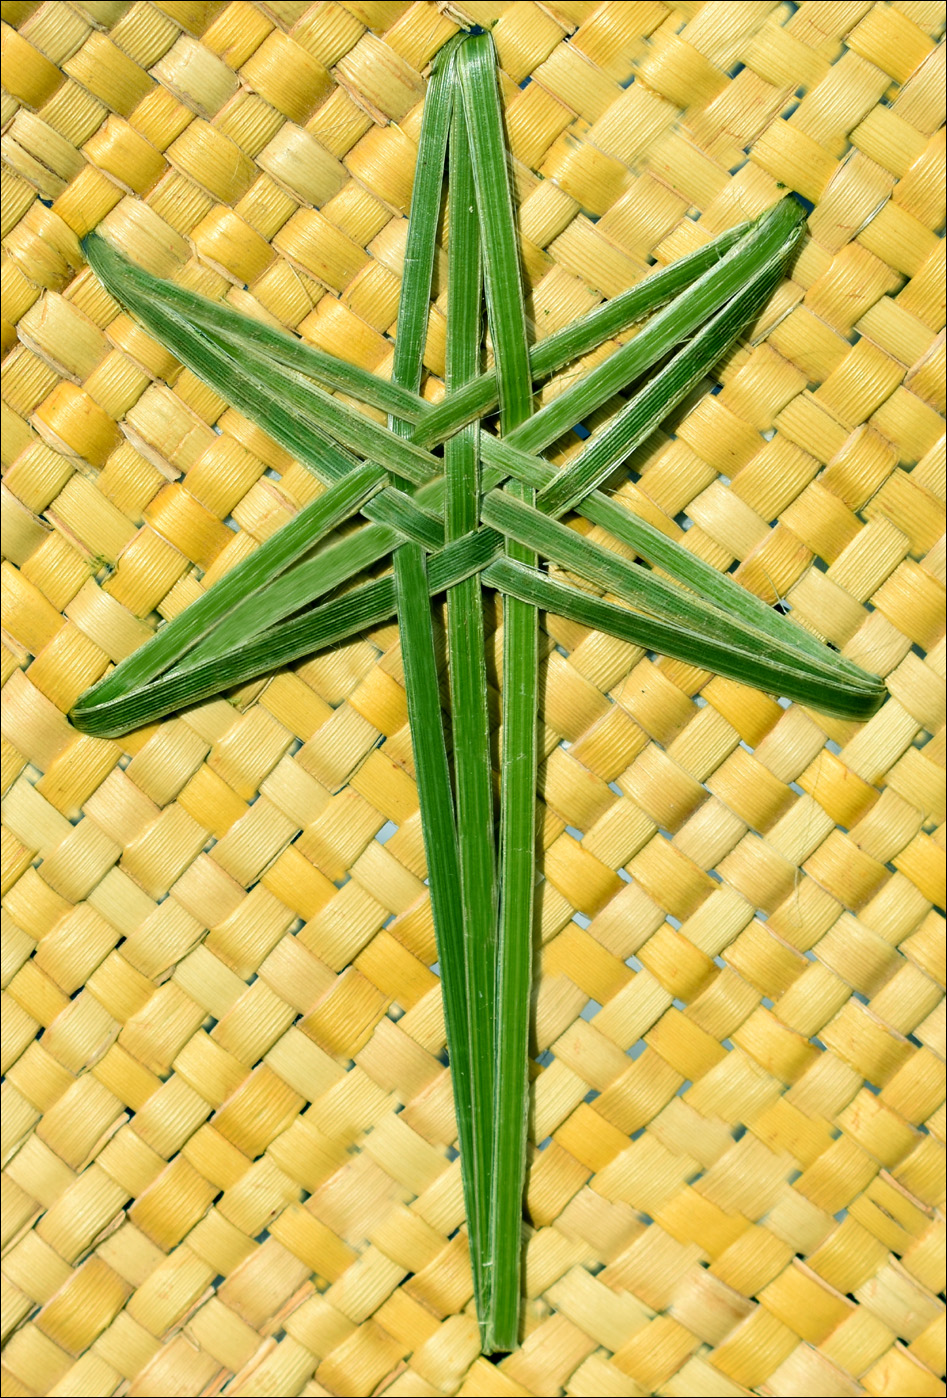 This woven star can also be added to a woven flax piece as shown here. It can be tricky to get the right shape when adding it to weaving so plan it out before you start by using short strips and laying them in place to see which position looks best. When adding the star to the woven background, I’ve used the same gap in the weaving to thread the strip through three times, which makes more detailed points. Weave the ends of the strips in at the back for tidiness. The long point at the base of the star is an integral feature, giving it an elegant appearance. Although I’ve used green flax here, using dyed flax in a contrasting colour will make the star, or stars, stand out more for a better effect.
© Ali Brown 2025.
Scroll down to leave a new comment or view recent comments.
 Recently our weaving group spent a day sharing and comparing weaving harakeke / NZ flax, and pandanus with lauhala weaver, Emily Claspell from Hawaii. Harvesting and preparing harakeke is different to the way pandanus is prepared and Emily was keen to participate in the process of harakeke preparation. Compared to Aotearoa, where harakeke grows in abundance almost everywhere, panadanus isn’t widely available in Hawaii, and unfortunately pandanus plants are disappearing as human habitation encroaches on the plantations.
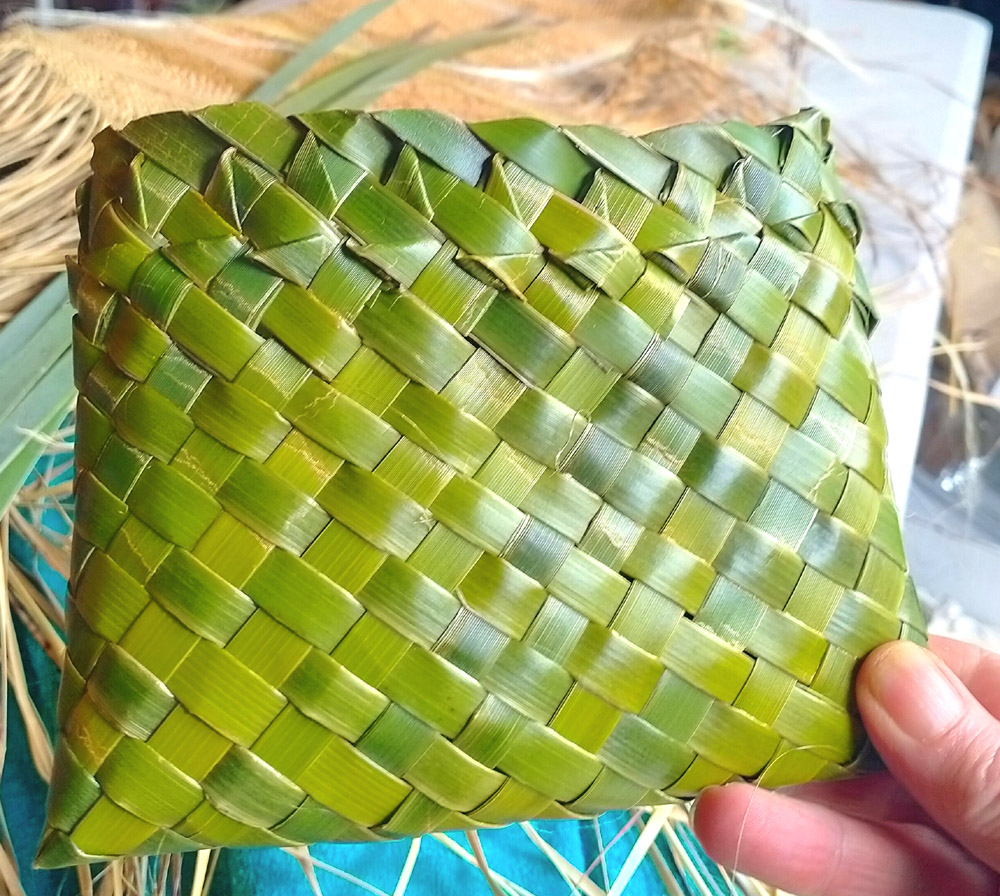 As we each wove a straightforward konae, Emily found that harakeke has ‘more life’ to it, as she put it, than pandanus, and is more slippery to work with, showing why pegs are a very useful item in the harakeke weaver’s kit. An attractive feature of Hawaian weaving is external decoration — Emily used this to decorate the top of her konae. Another decoration, a four-petalled flower, can be seen on the top of the shell of the turtle in the image below, and along the top of a kete.
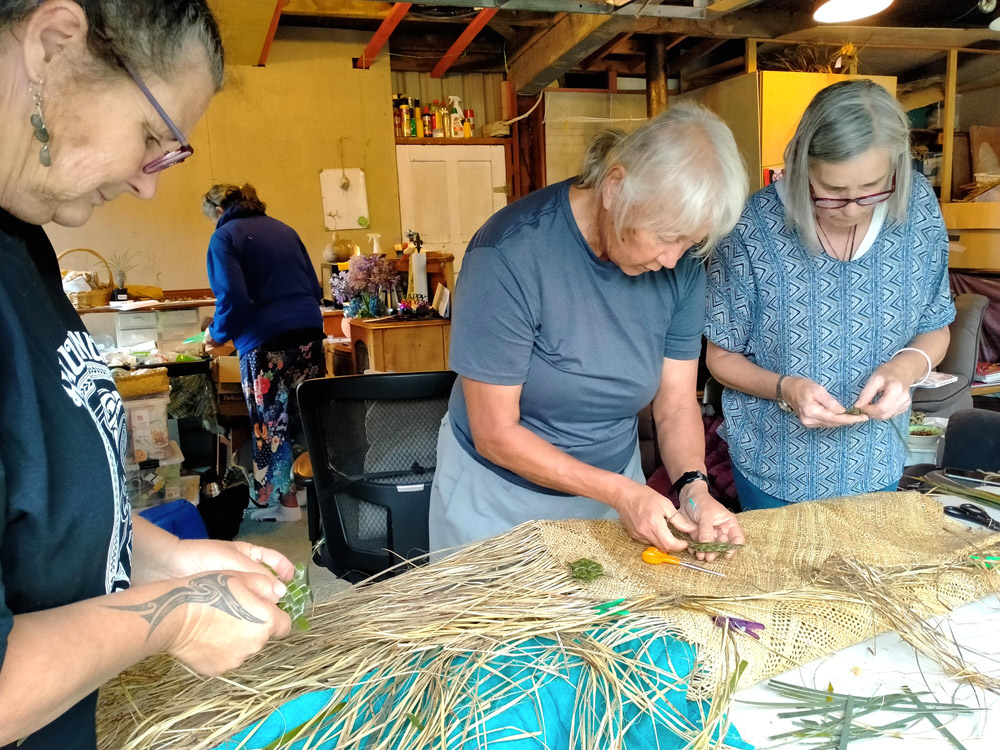 A traditional item that is woven in Hawaii is a turtle.
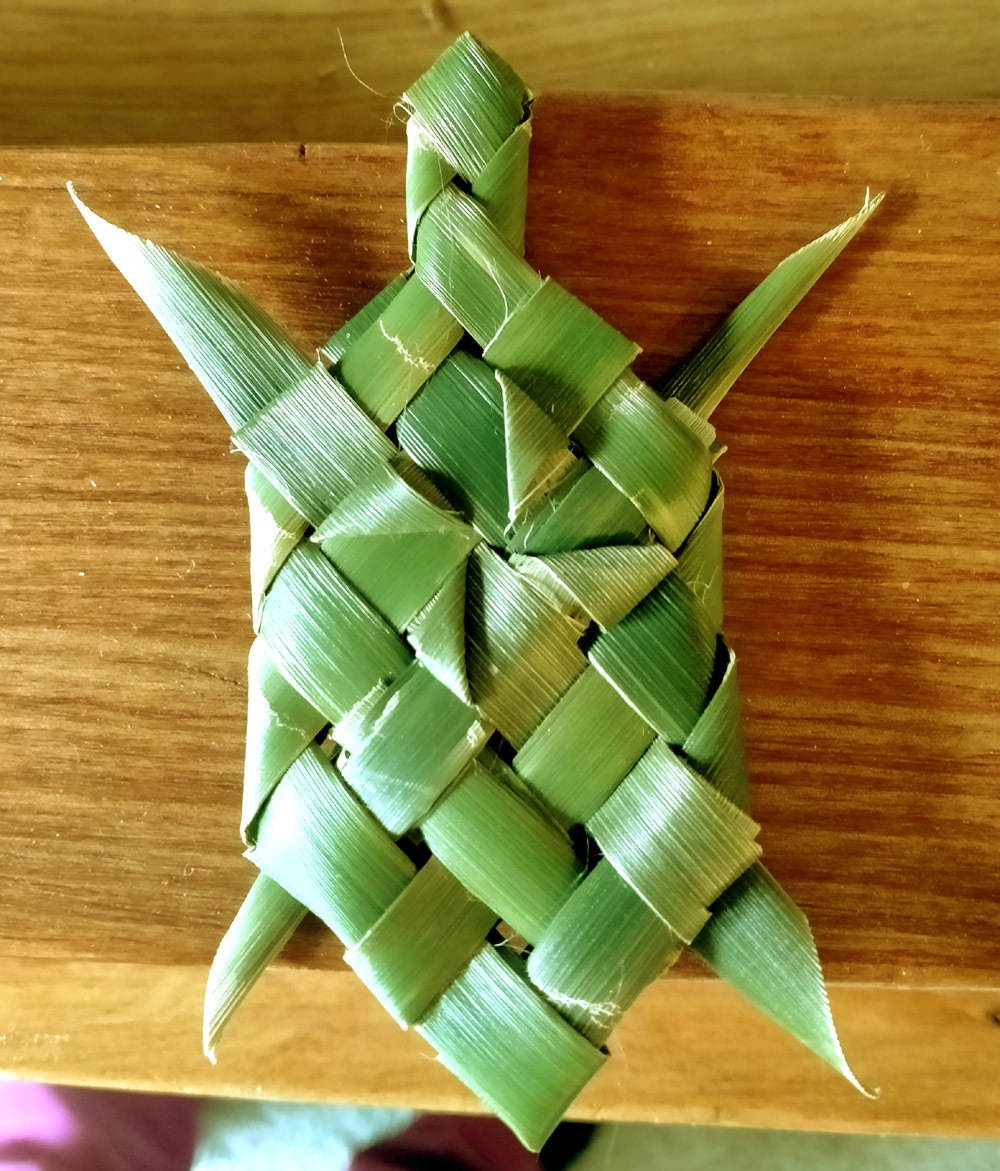 This represents the honu or Hawaiin green sea turtle, which is sacred to many Hawaiian families. For some, honu are spiritual guardians — unfortunately they are endangered in Hawaiin waters. We had fun learning how to weave the turtle and some of us wove more later at home. Finally we spent some time examining the completed sections of the sail we are weaving for a local waka organisation, and discussing the hiki / join and the puareare / pattern.
 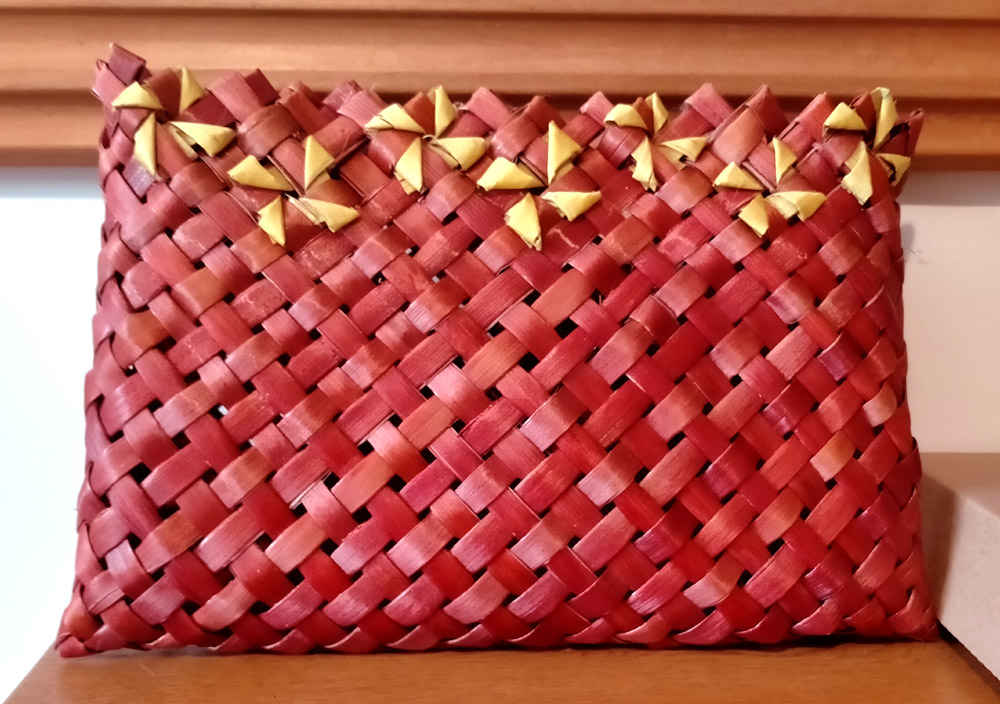 Emily remarked on how raranga has a strong presence in Aotearoa compared to Hawaii, where it can be difficult to find weavers who want to teach others. However there is a group of dedicated weavers who continue to keep the tradition of lauhala weaving alive. The more we share knowledge and ideas, the more the weaving of both harakeke and lauhala flourishes.
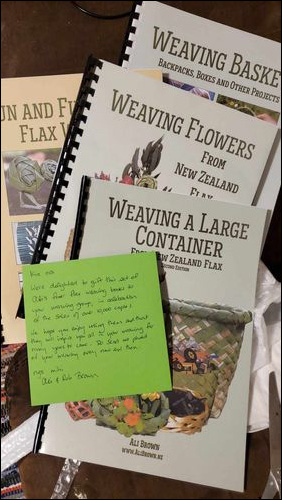
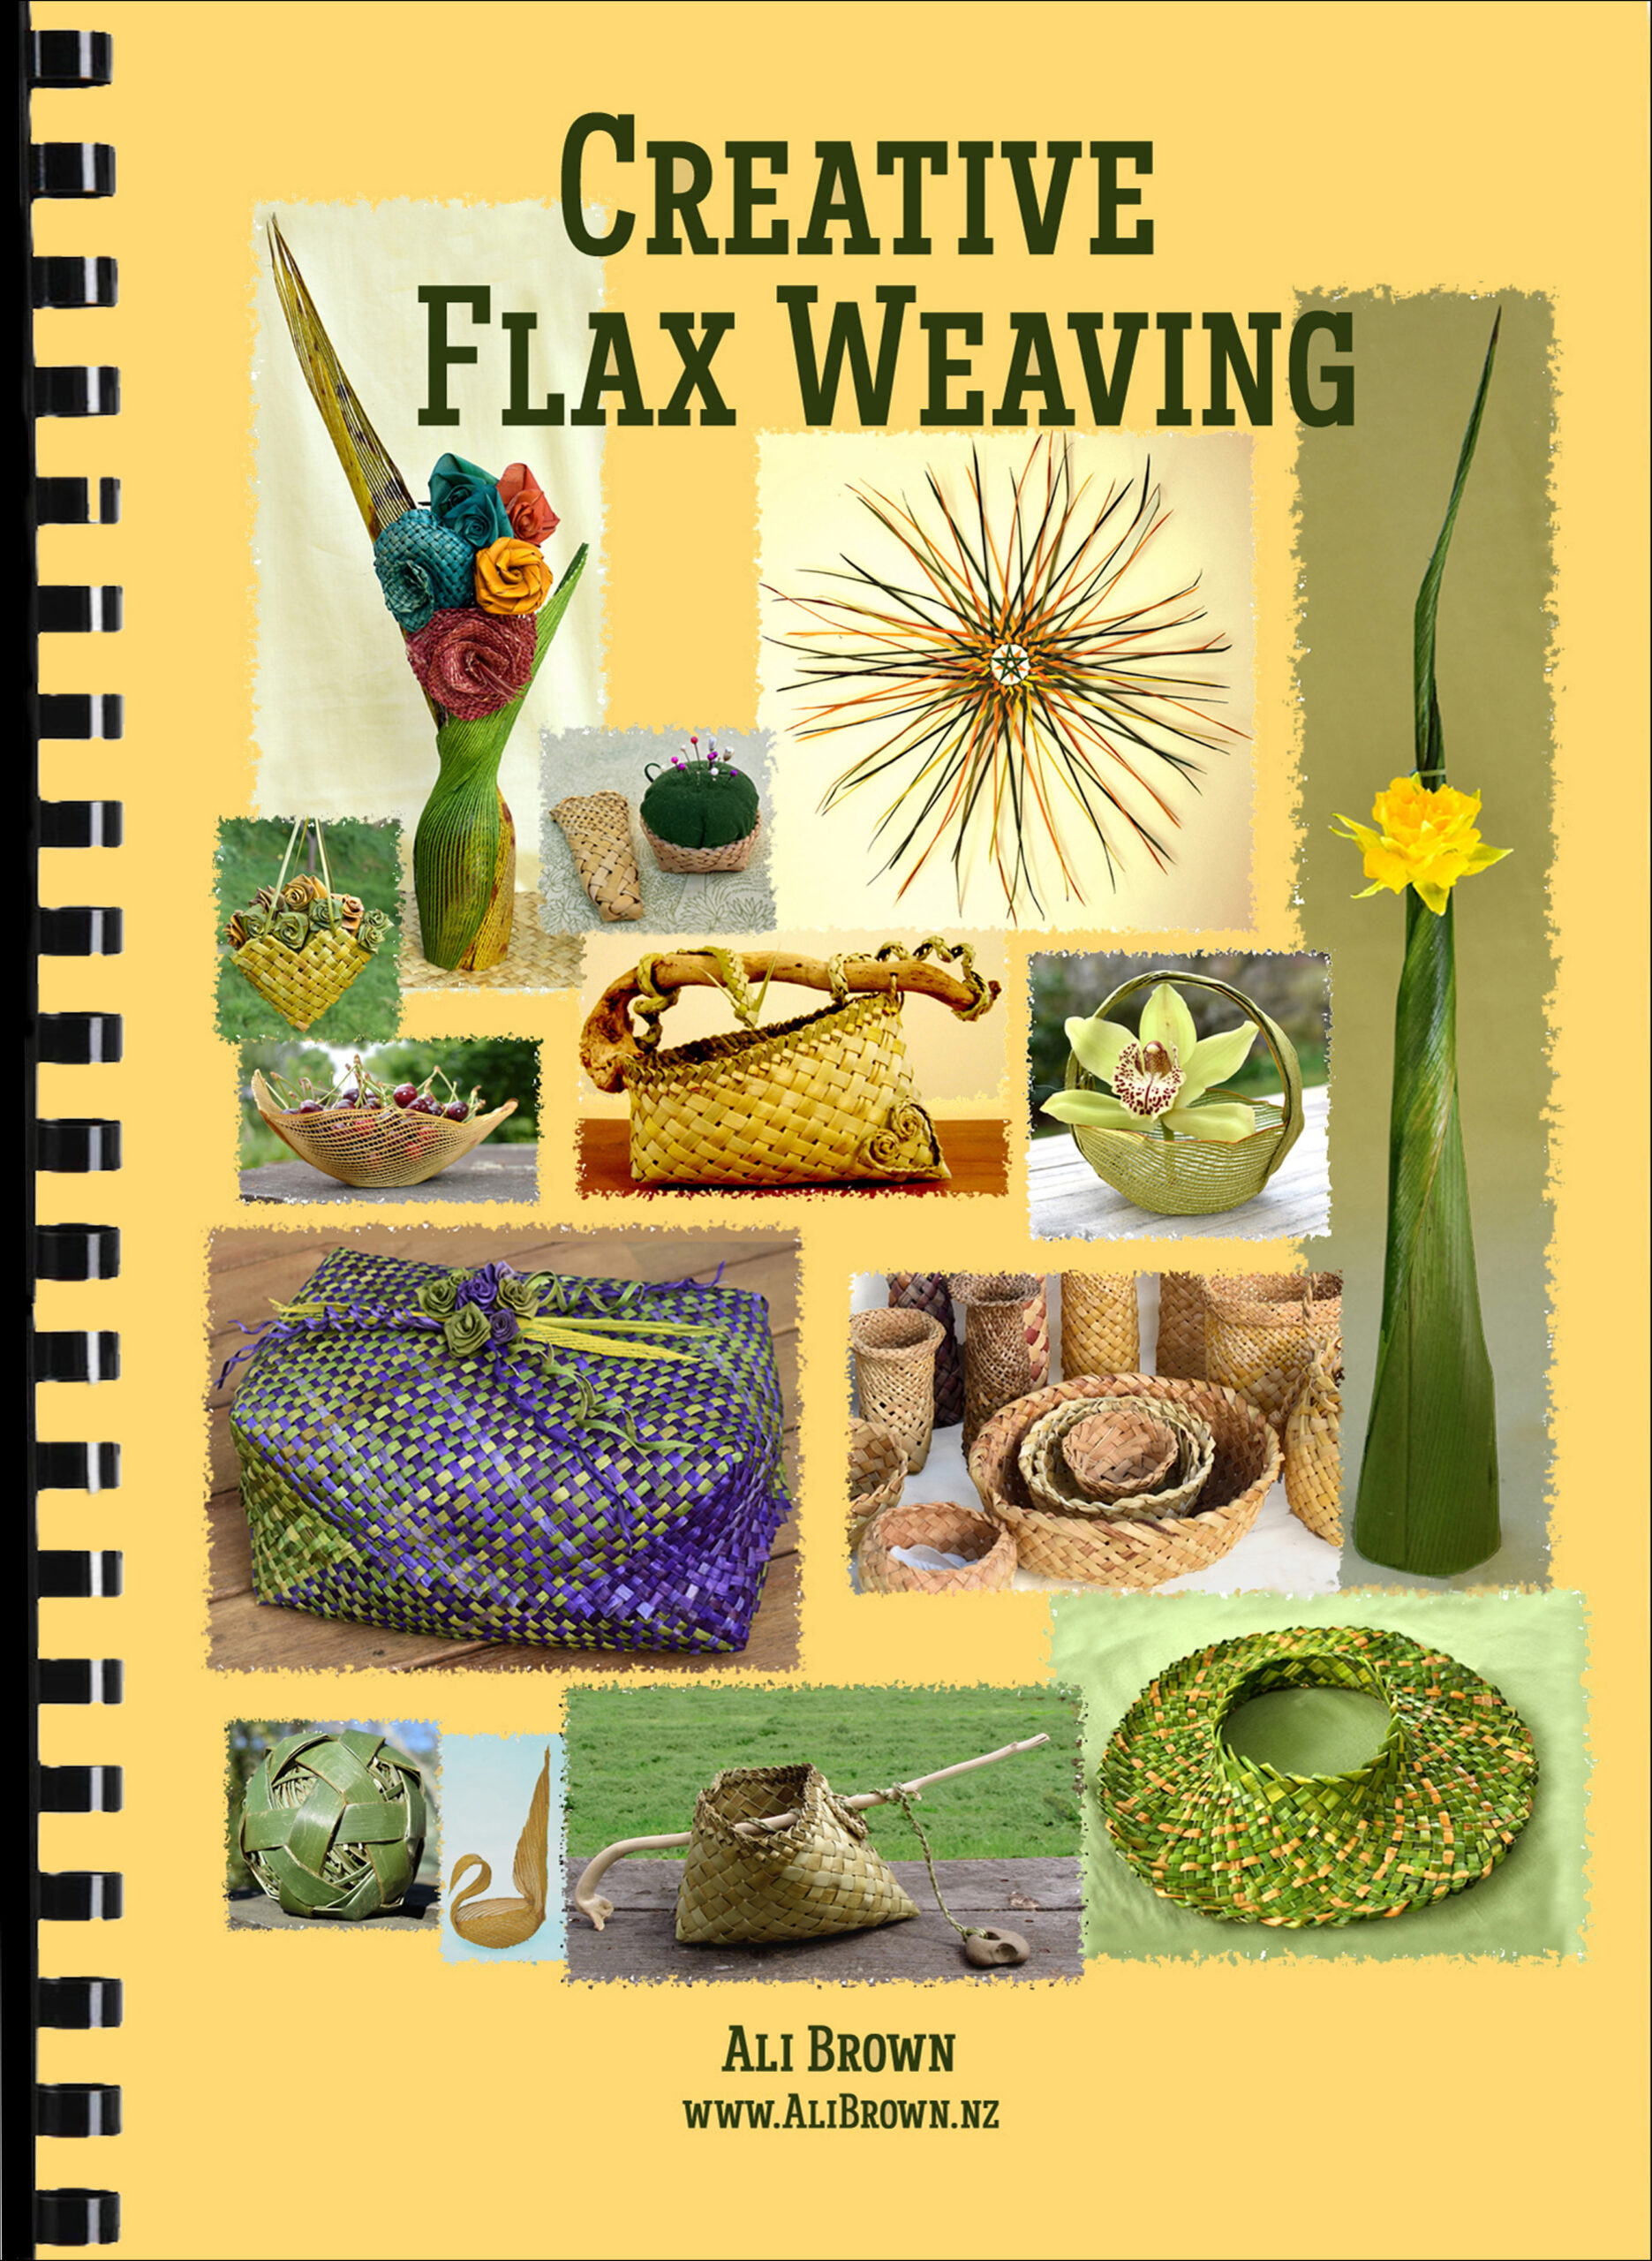 I’m very pleased to announce that my latest book “Creative Flax Weaving” is now available. The projects celebrate the use of harakeke / NZ flax in different ways, from delicate vessels made with netted flax to larger items.
 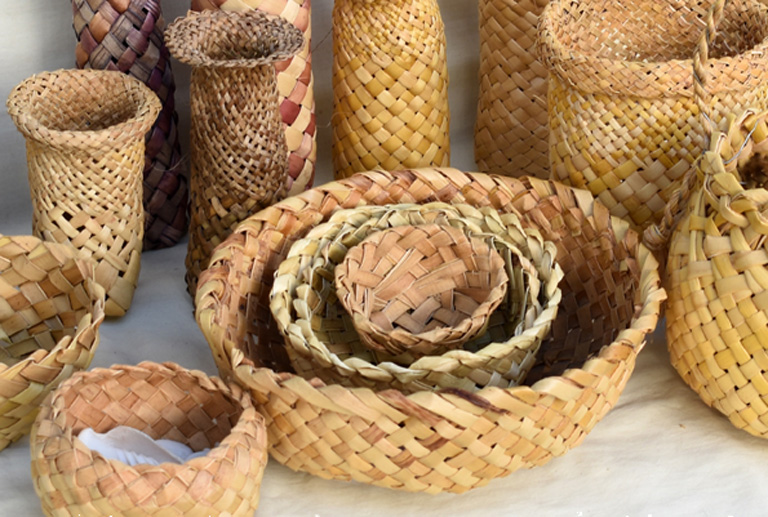 Weaving practical items such as bowls and containers is very satisfying as they are sustainable and useful. There’s no cost for the materials and the time spent weaving them can be relaxing and meditative.
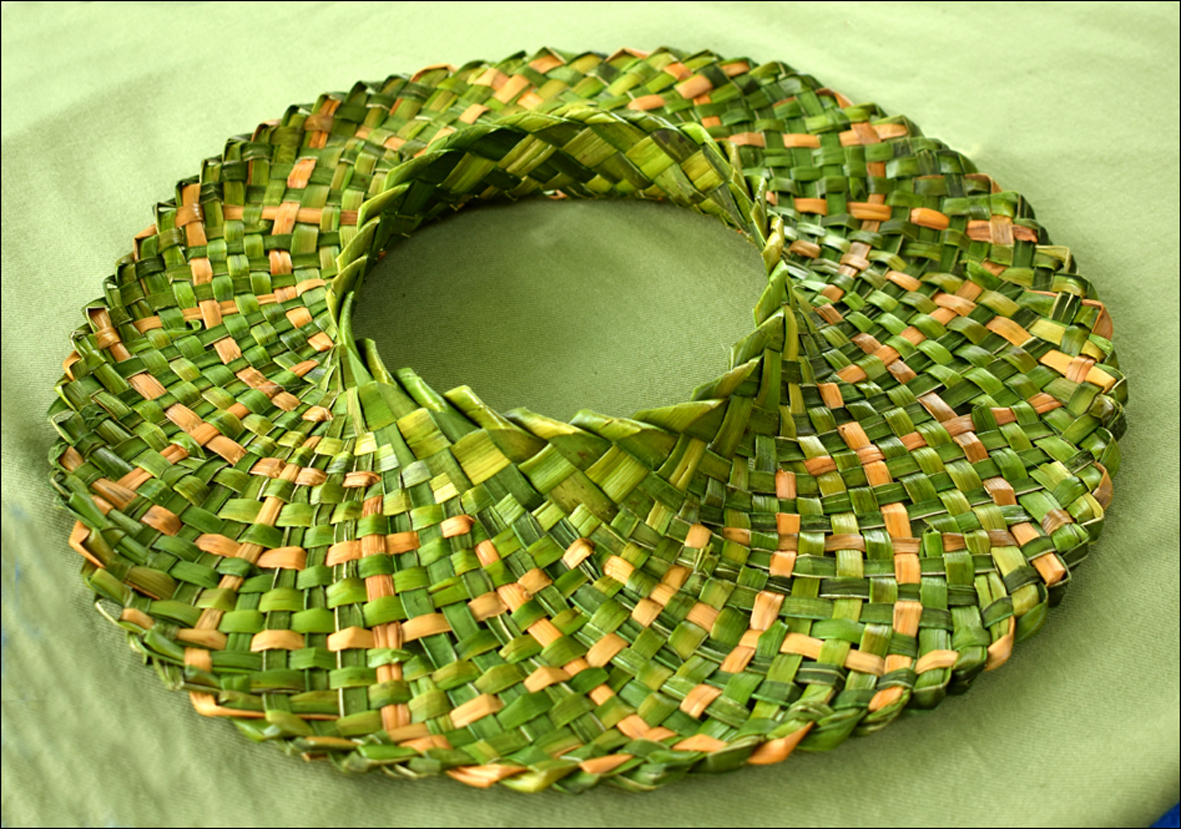 There’s instructions for a basic pōtae / sun visor hat as well as a straightforward circular wall hanging.
 Another project uses a different weaving material, alongside harakeke, in a non-traditional way. This wall hanging project uses lacebark tree, or hoheria, and also in the ribbonwood, or manatu is made up of layers of very thin white strips with many tiny holes that give it a lace-like appearance. This is ideal for representing water flow, such as in a waterfall, combining harakeke tendrils representing surrounding bush. These beautiful strips have traditionally been used by Māori for weaving small fine decorative baskets as well as a material for cloaks.
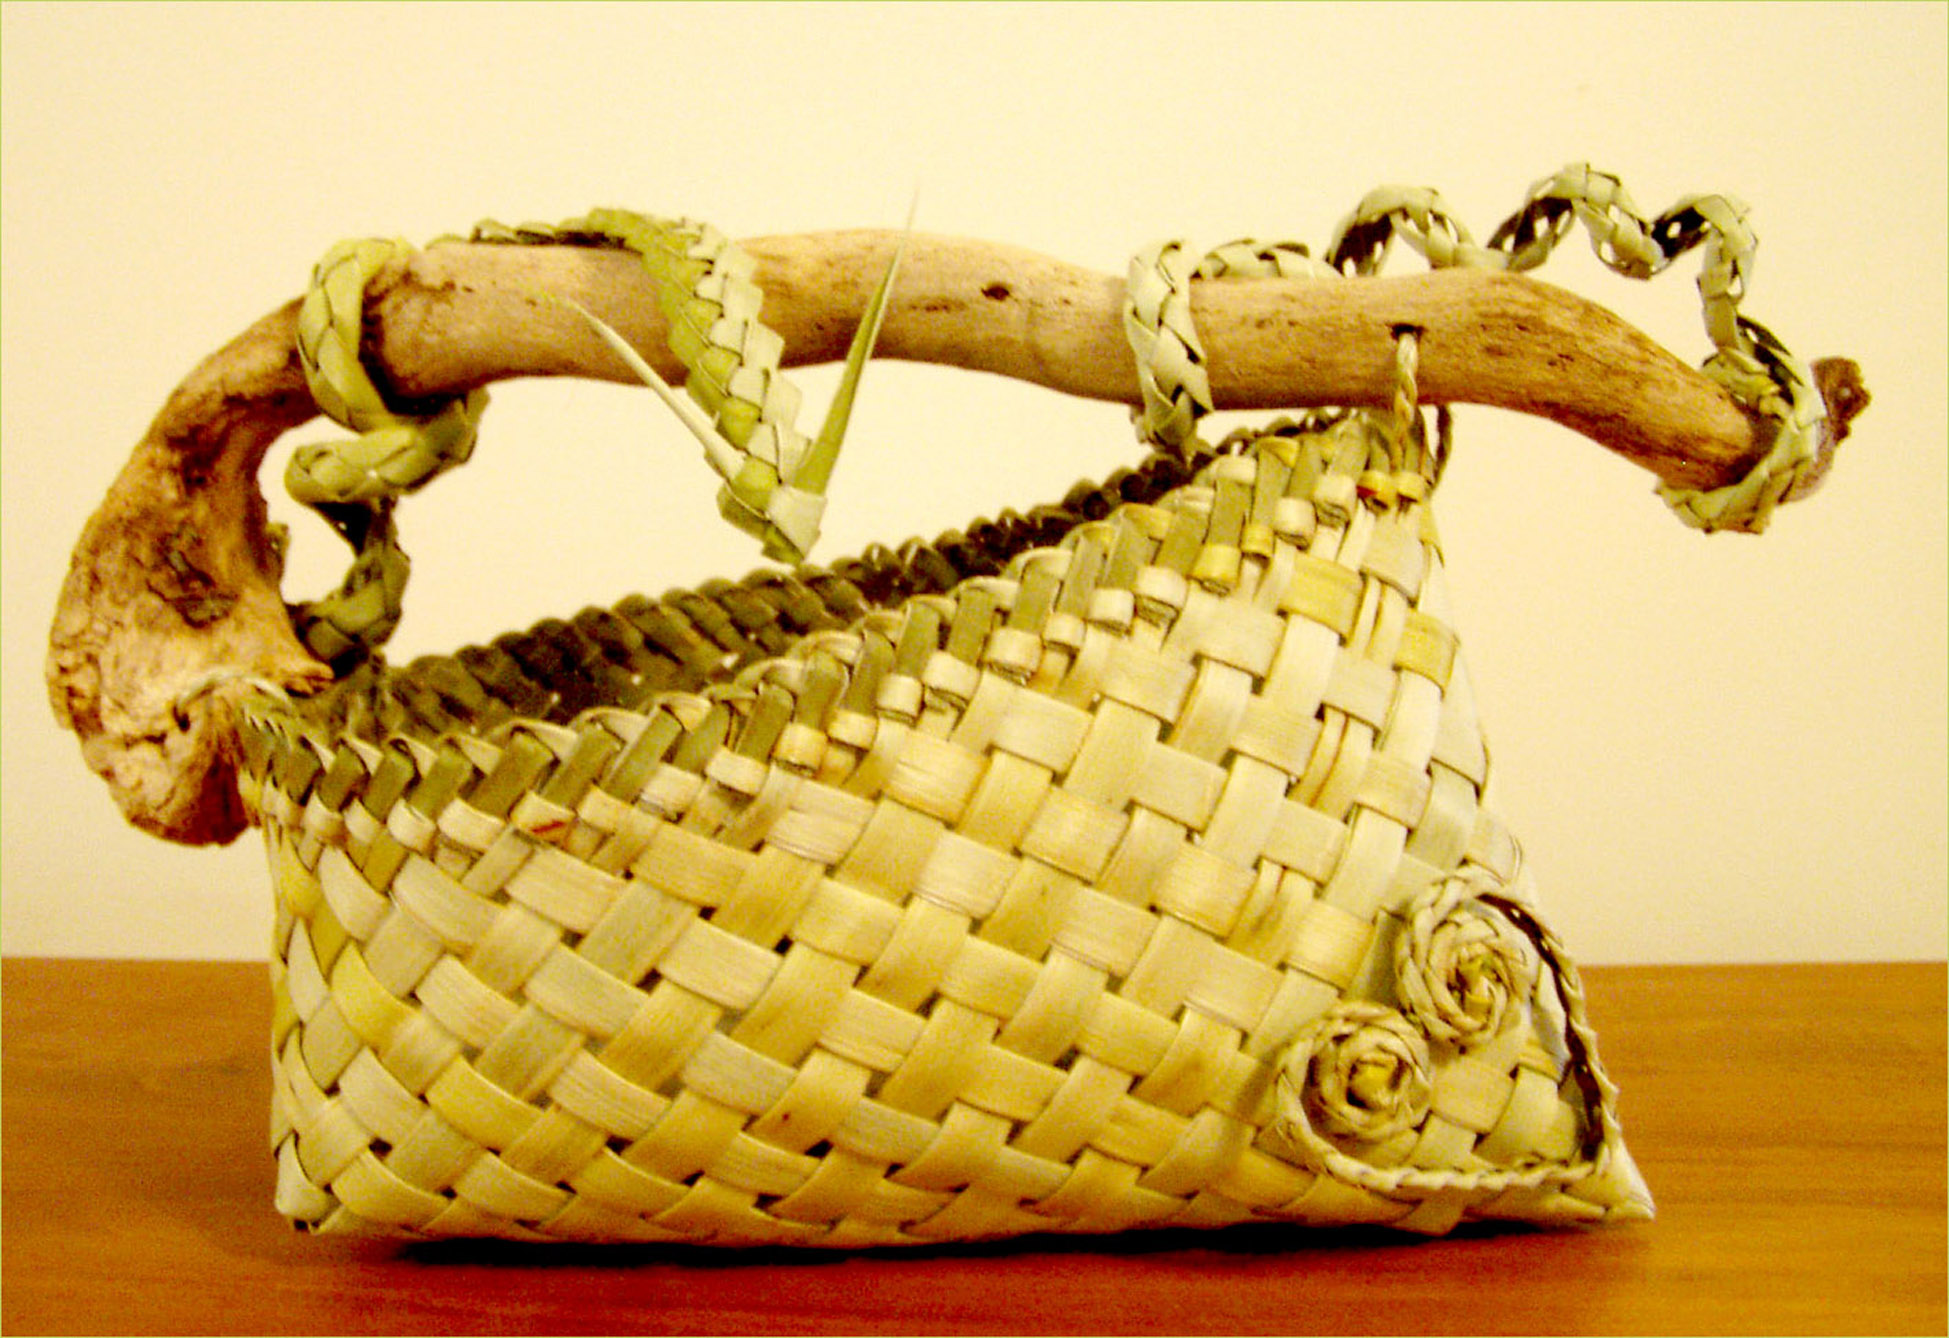 Ever woven a basket with 3 corners? Have a stash of driftwood that is crying out to be used in a project? Find out how to weave these fun baskets, using a piece of driftwood for a handle, in this book.
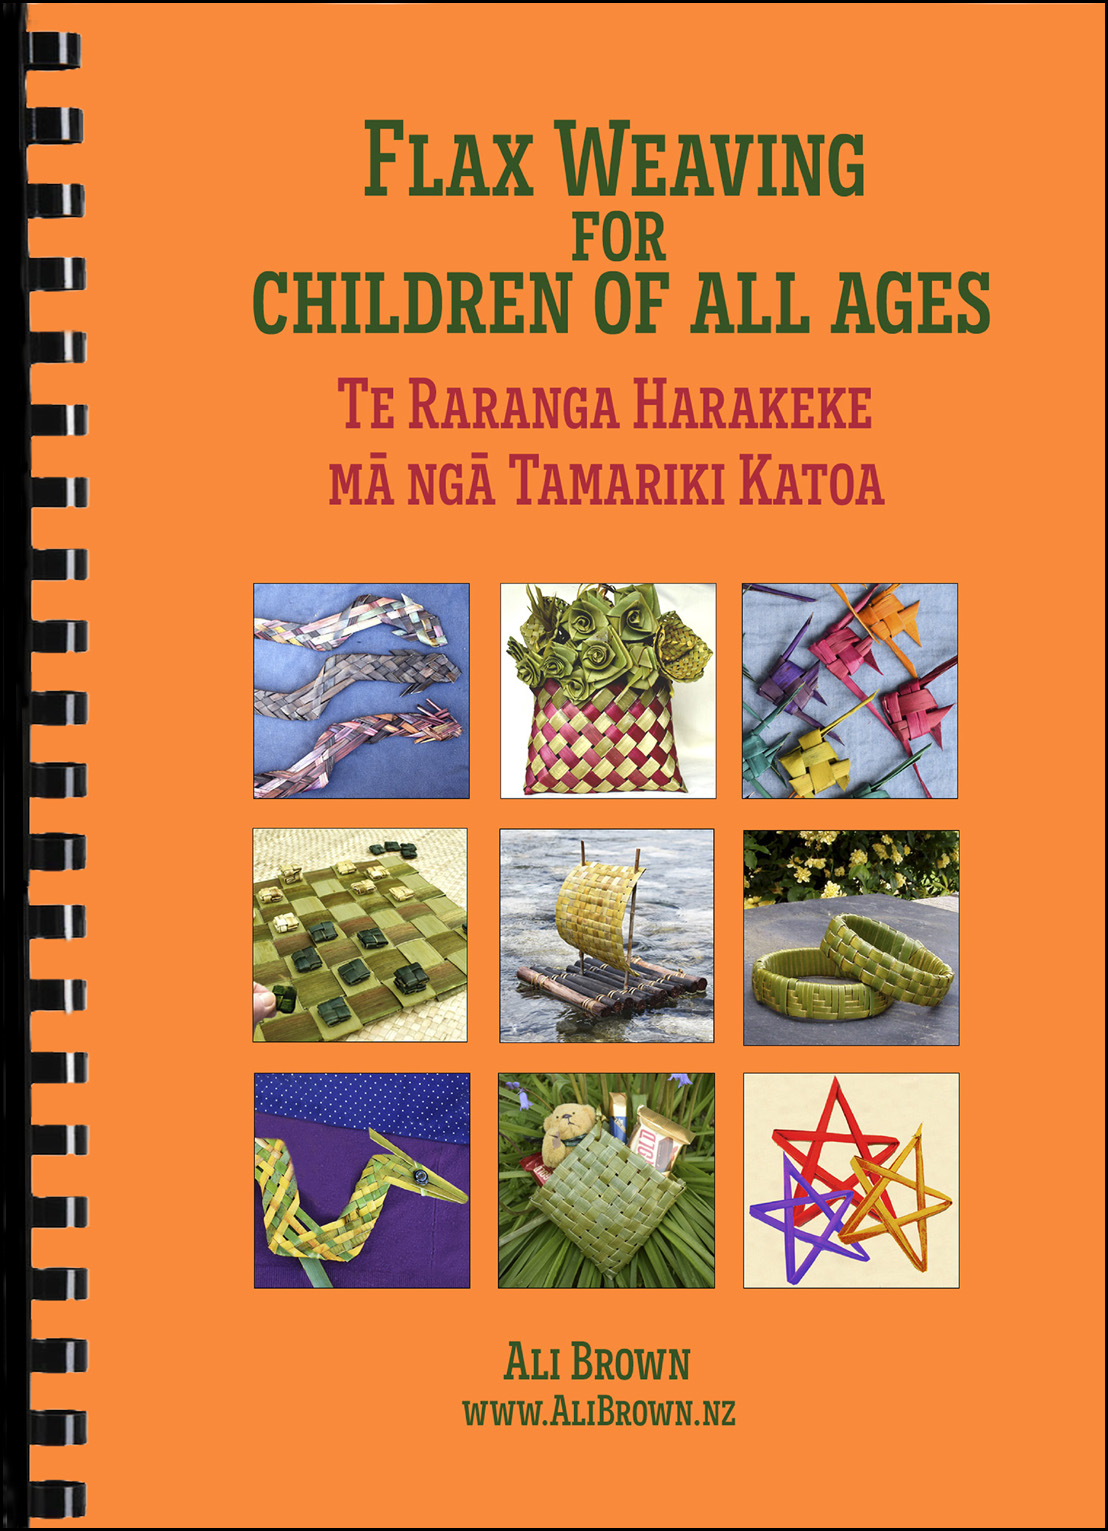 I’m very pleased to announce that my latest book “Flax Weaving for Children of all Ages – Te Raranga Harakeke mā ngā Tamariki Katoa” is now available. The book has a collection of sixteen weaving projects, with variations, which I’ve found to be popular for using in short workshops — for children and young adults, for people with different abilities, for older people and for any weaver when there’s only a little time for weaving and find their fingers are itching to weave. The book includes some basic te reo Māori kupu / words used in flax weaving, which gives people the opportunity to learn some weaving terms while taking part in weaving. As the title says, it’s for everyone, not just children. There’s a child in all of us! 🙂
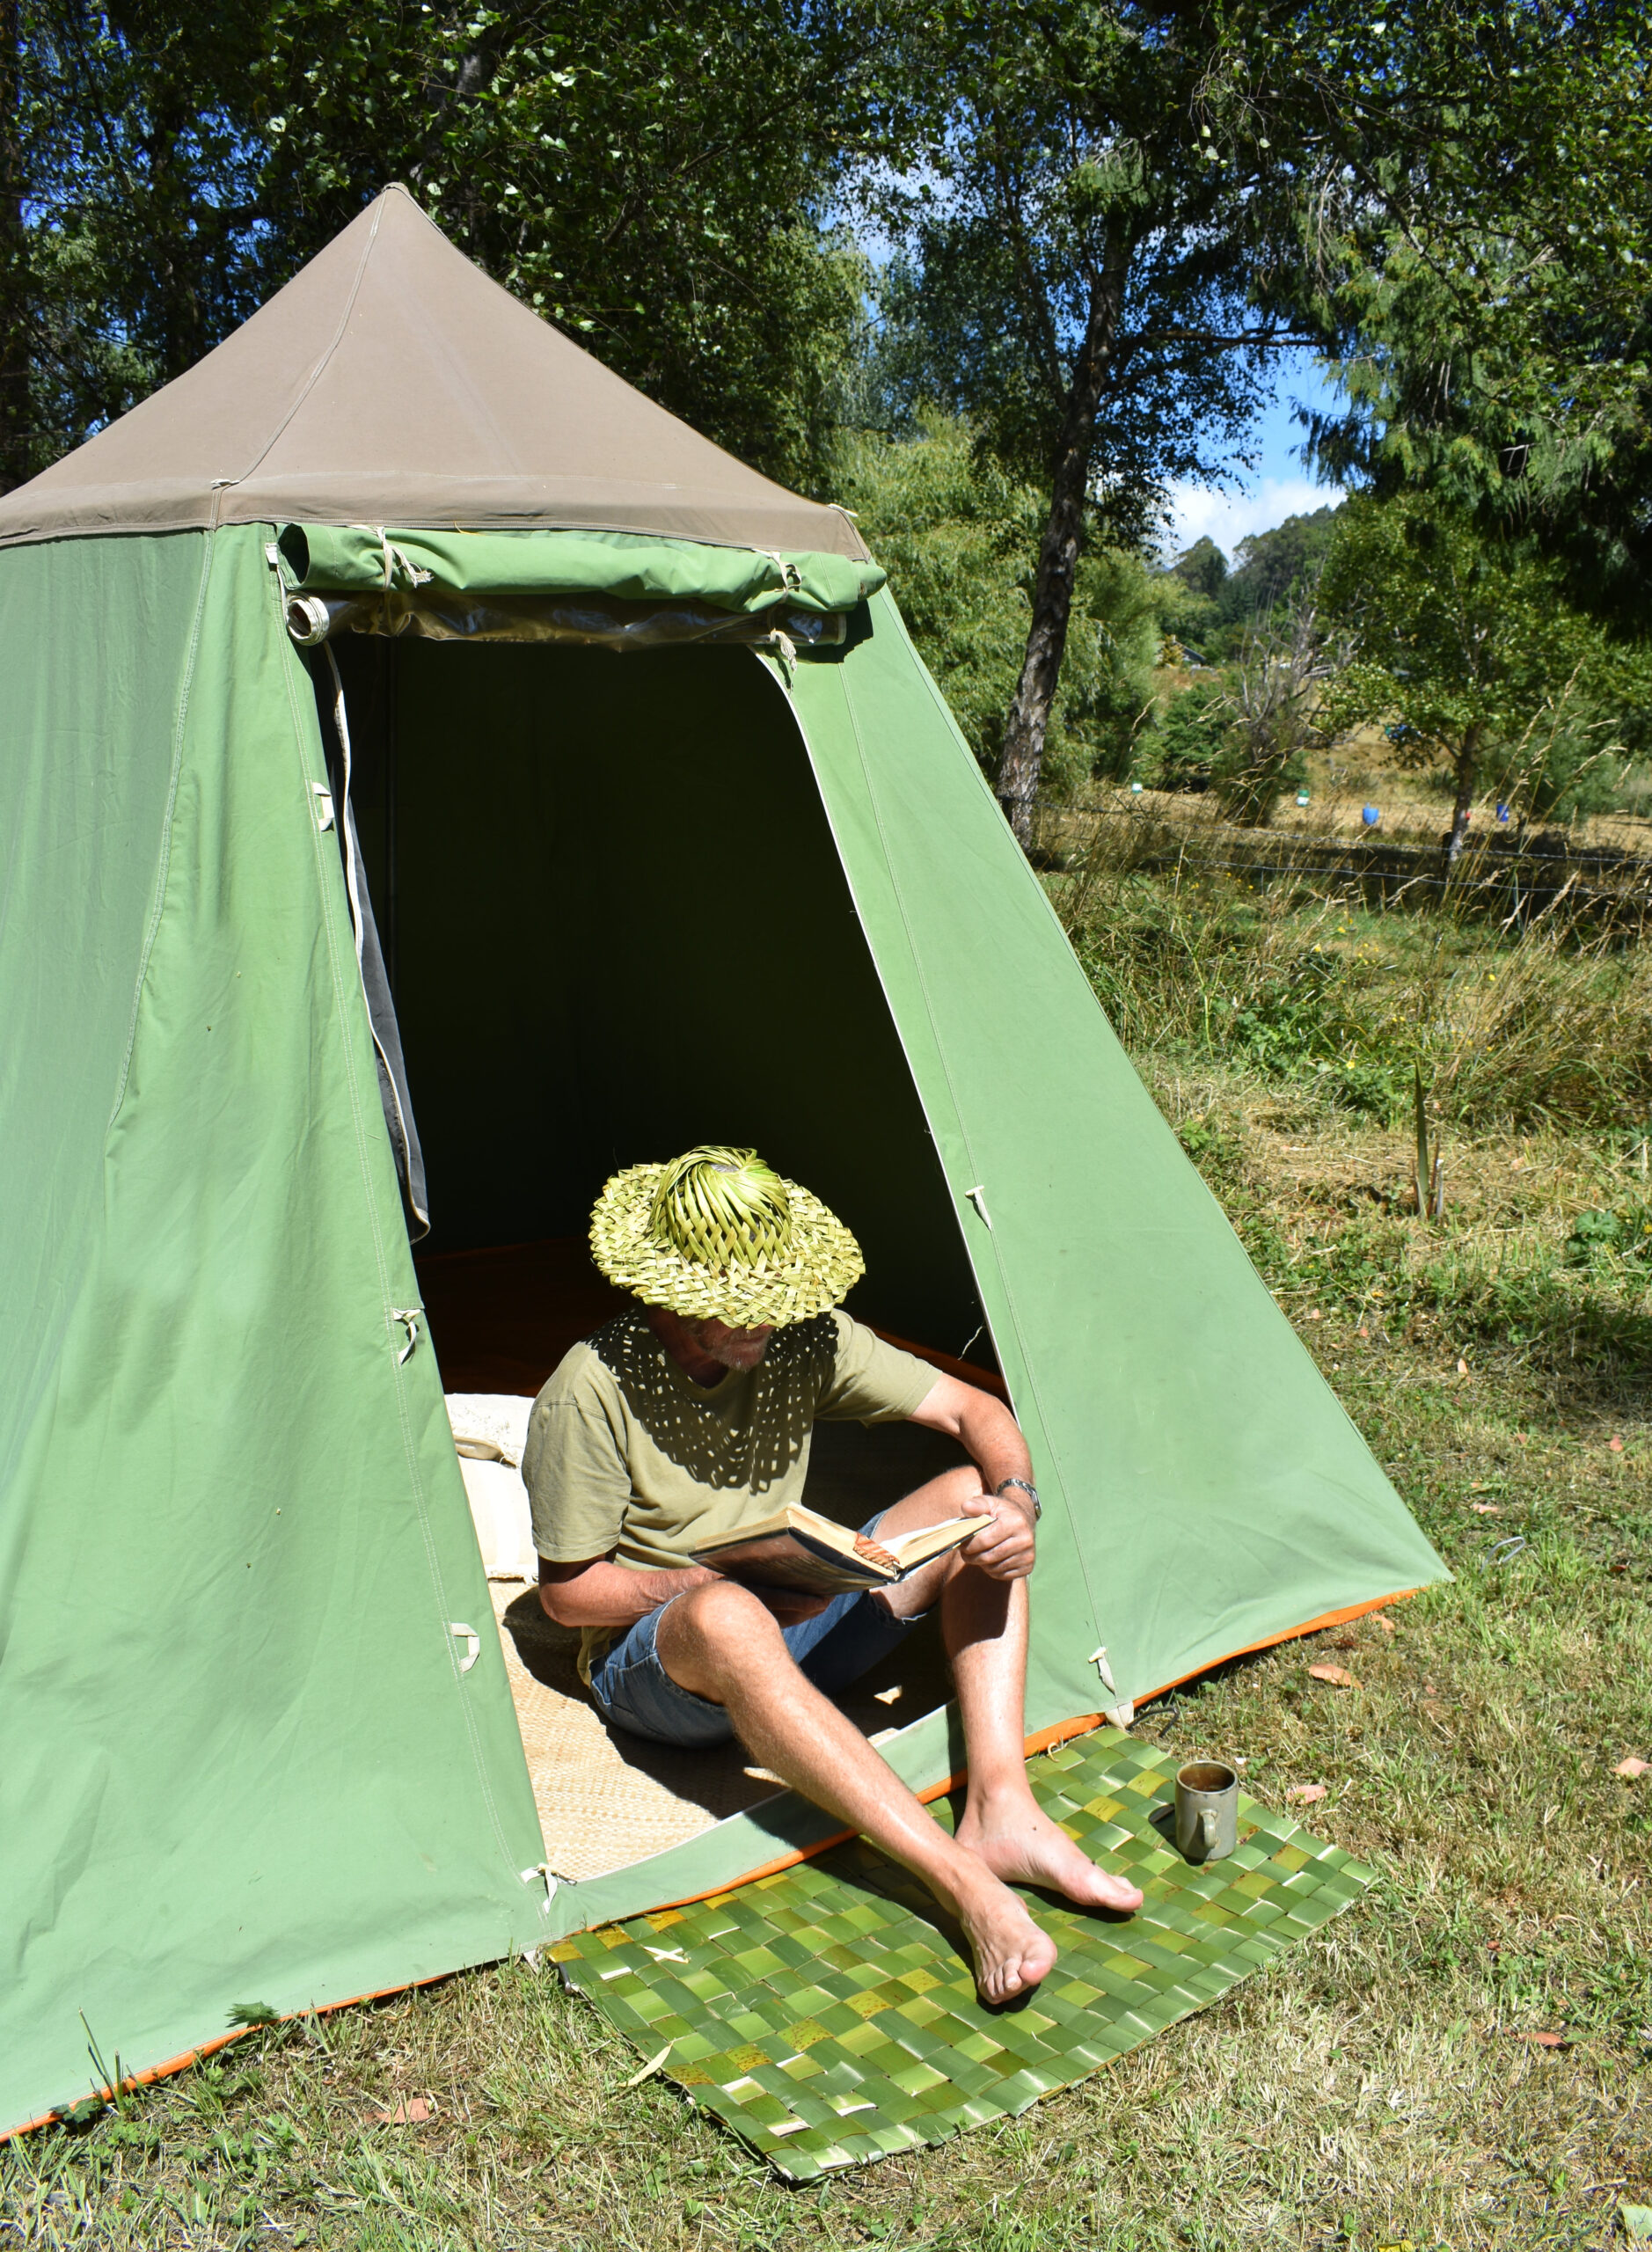 Buyers of my previous books have commented positively on their easy-to-follow, step-by-step illustrations beside the written instructions. You can see a link to these comments under each
 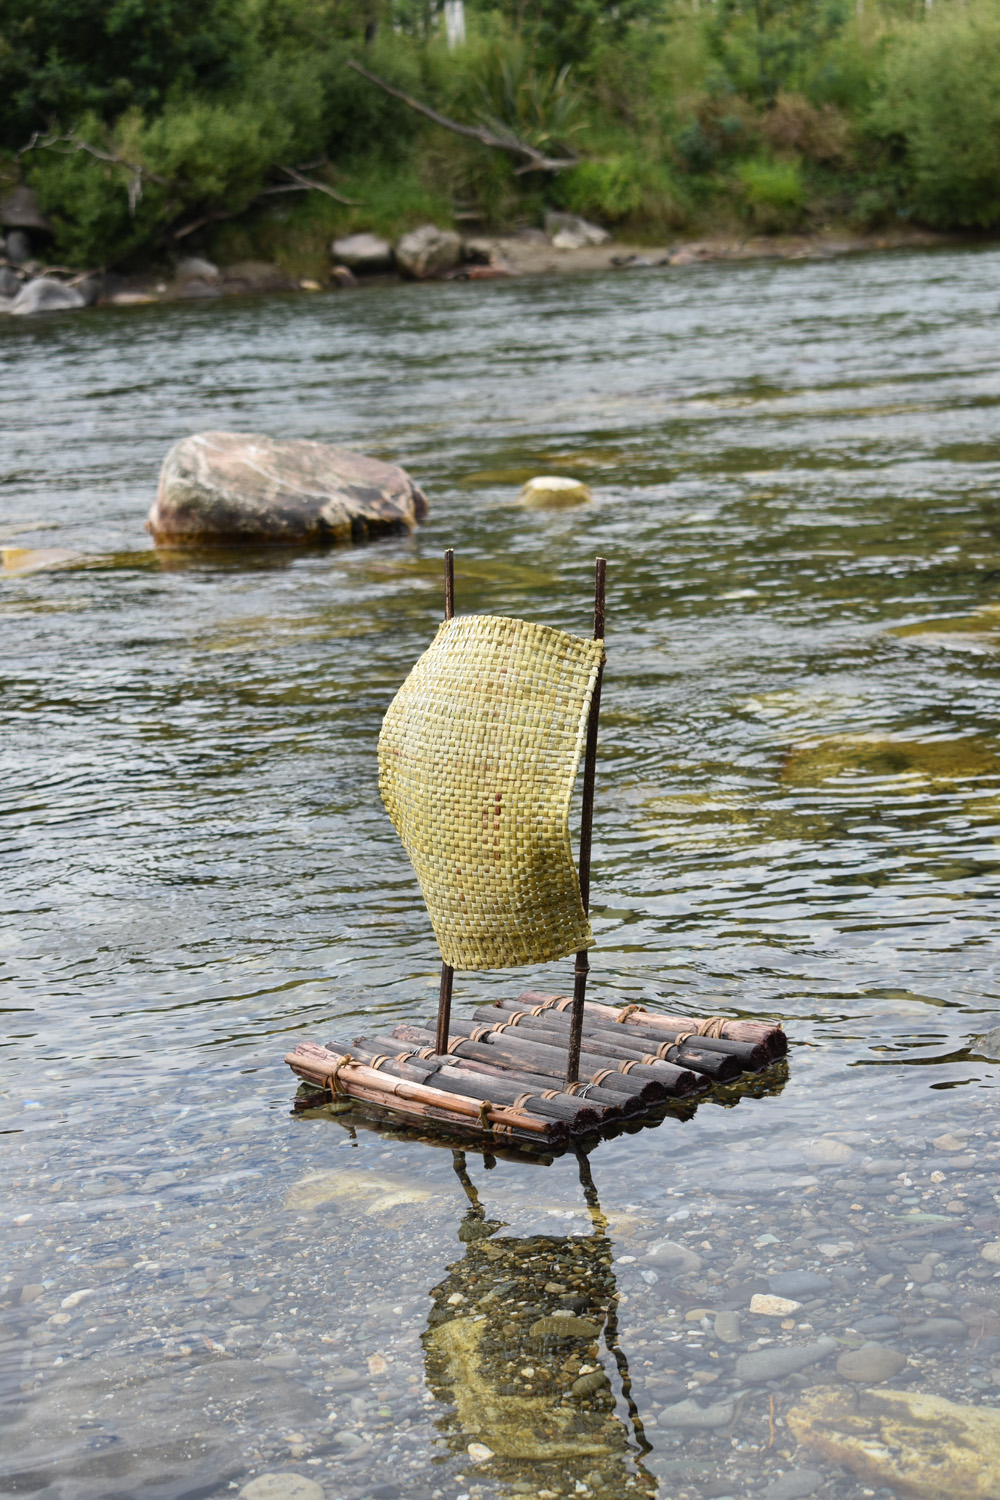 If you buy the book, do post a comment below if you can see how it might be improved, or post a question if any of the instructions are not entirely clear. Also if you have any photos of your weaving based on projects from this book, I’d love to see them.
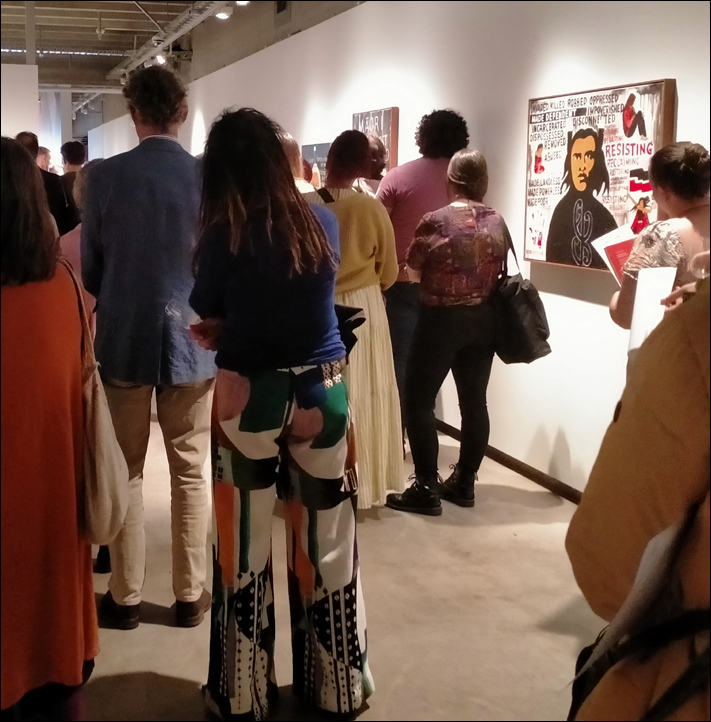 Having long been an admirer of Robyn Kahukiwa’s work, it was serendipitous for me that the opening of her art exhibition Tangata Whenua at The Centre of Contemporary Art Toi Moroki
 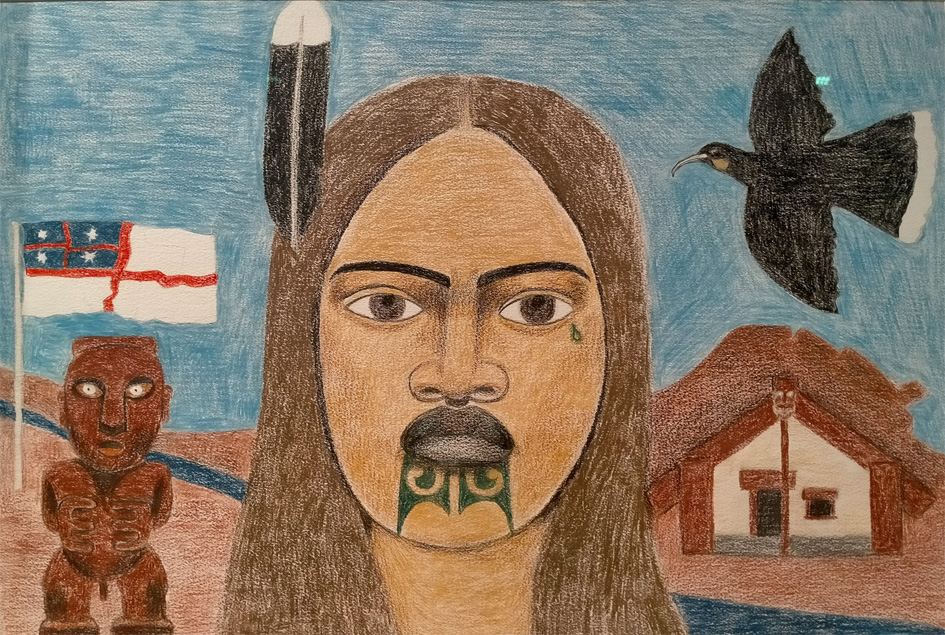 The exhibition included this painting, He Wkakputanga, 2023 Soveriegn Series, an example of the strong themes of the artist’s work. CoCA writes, “She is one of Aotearoa’s foremost artists, and is acclaimed internationally and known for her strong political commentary. The works emphasise the strength and vitality of iwi Māori. As Kahukiwa notes: Māori are living proof of the continuum of whakapapa, the power of our achievements, and the survival of an intact, dynamic culture.”
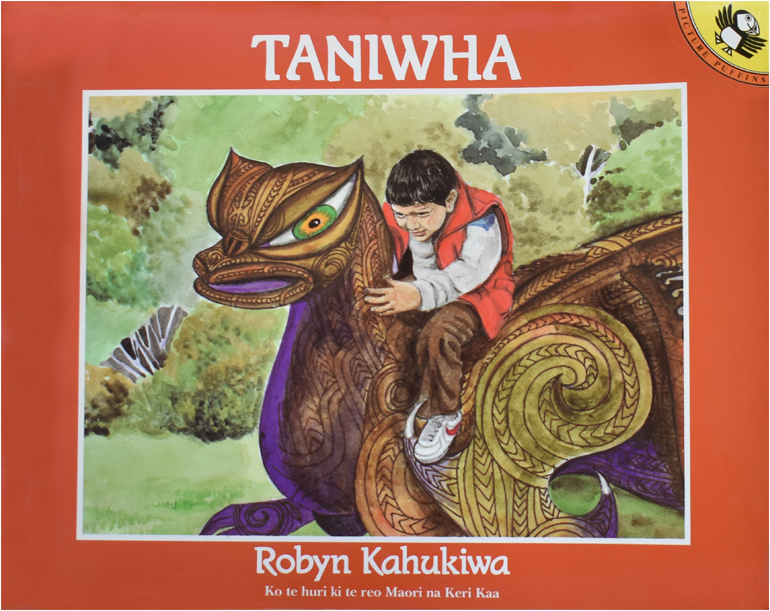 Robyn also writes and illustrates children’s books. I was first introduced to her art through her children’s book Taniwha and I have enjoyed her art since then. The book Taniwha became a firm favourite with my children in the 1980s and is still a favourite with children today. While I was designing and weaving flax taniwha samples for my latest book
 The images and storyline in the book resonated with weaving taniwha from harakeke / flax and by simply substituting flax and garden for log and river in the text, the story could easily be referring to a flax taniwha. I asked for, and graciously received, permission from Robyn to use, in a slightly changed form, this text from her book, to complement the woven taniwha in my book.
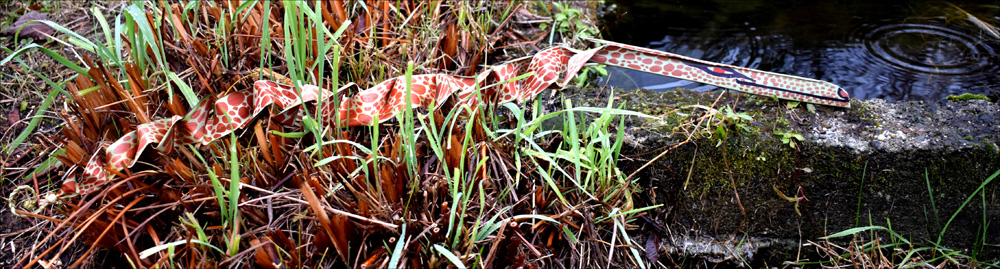
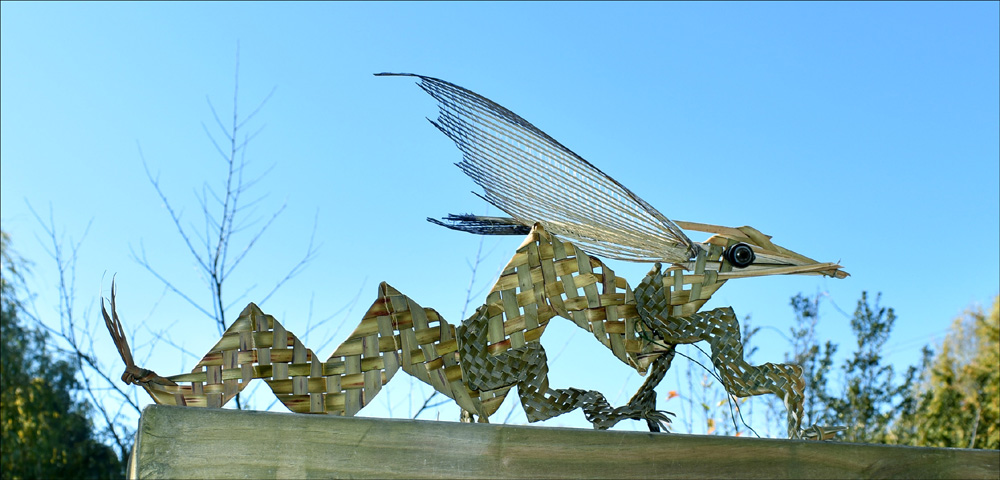
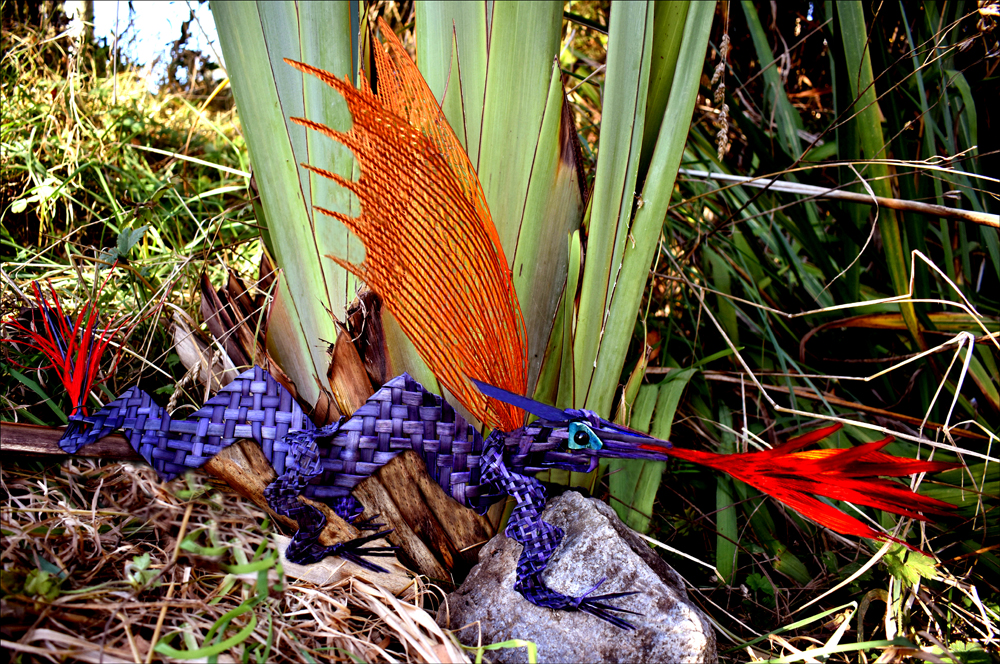 While the woven flax taniwha in my book have nowhere near the complexity of Robyn’s drawings, there is still a lingering reference to Robyn’s taniwha for me when I see them, and there is in my imagination a fantastical, three-dimensional, woven taniwha waiting to see the light of day. Whether it gets any further than being imagined, who knows. 🙂 The taniwha that I designed for my book range from the simple to more complex designs, with something for all levels and ages of weavers. For example the simple, orange-spotted taniwha sneaking though the grass to the pool pictured above by Robyn’s text is suitable for very young weavers, and the taniwha pictured here with orange wings has a more complicated construction.
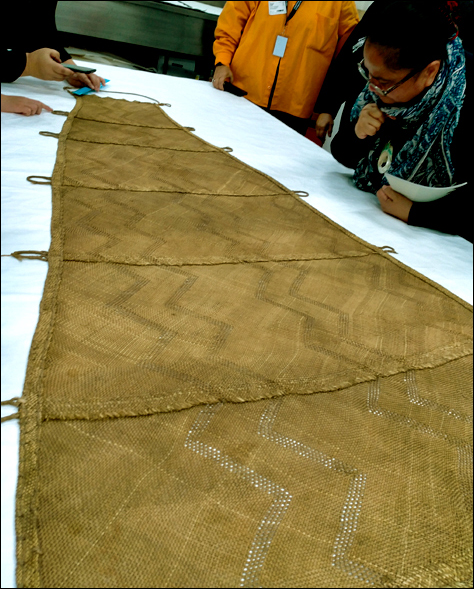 Te Rā, the only known surviving example of a traditional woven Māori sail still in existence is visiting Aotearoa New Zealand. As I and two other weavers from Te Āwhina roopu raranga (weaving group), Motueka, are about to embark on a project to weave a sail for a local waka (boat) business, we were keen to study this sail up close. We heard that the sail would be available to view at the Christchurch Art Gallery, so we quickly booked tickets to fly down to Ōtautahi Christchurch for a day visit. The sail, named Te Rā and personified as female by distinguished master weaver Ranui Ngarimu, has been in the British Museum for over 200 years, her provenance unknown.
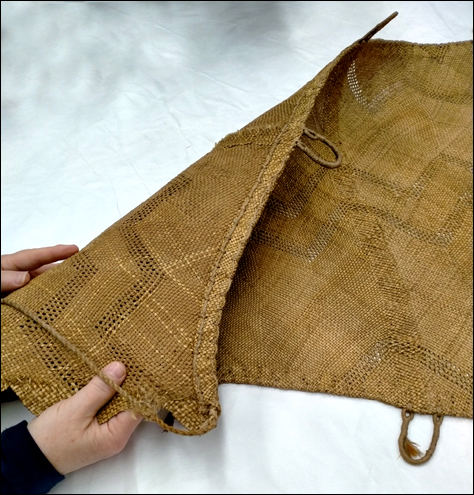 At the art gallery we were taken into a private study and work area where the sail was laid out on a long set of tables. What struck me at first sight was the beauty and fineness of the weaving, the width of the weaving strips being between 0.3cm and 0.4cm, unusual for such a large piece of weaving. For a piece that is 4.4 metres long, 1.0 m across the base and 30 cm across the top, this is a lot of fine weaving. Stripes of an openwork pattern running the length of the sail enhance the plain over/under weaving, adding to its delicate appearance.
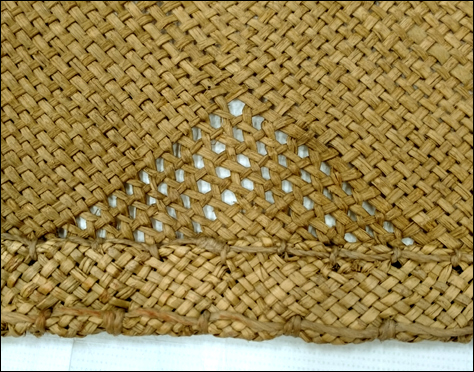
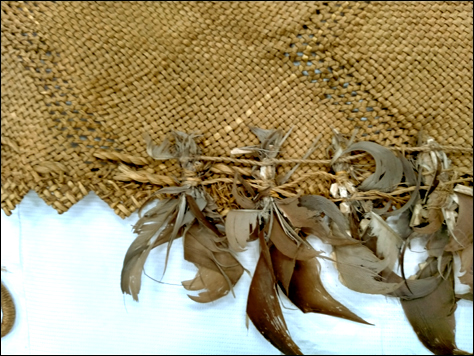 As we were able to see and handle both the front and the back of the weaving, we were able to study techniques that have either fallen out of use or were used specifically for the sail. For example, the edges are finished with a twice-folded hem which is stitched in place with twisted harakeke (NZ flax) cord, the panels are joined in an unusual way, and various types of cord are used to tie on the feathers. This was good information for our group as we work on weaving the replica sail.
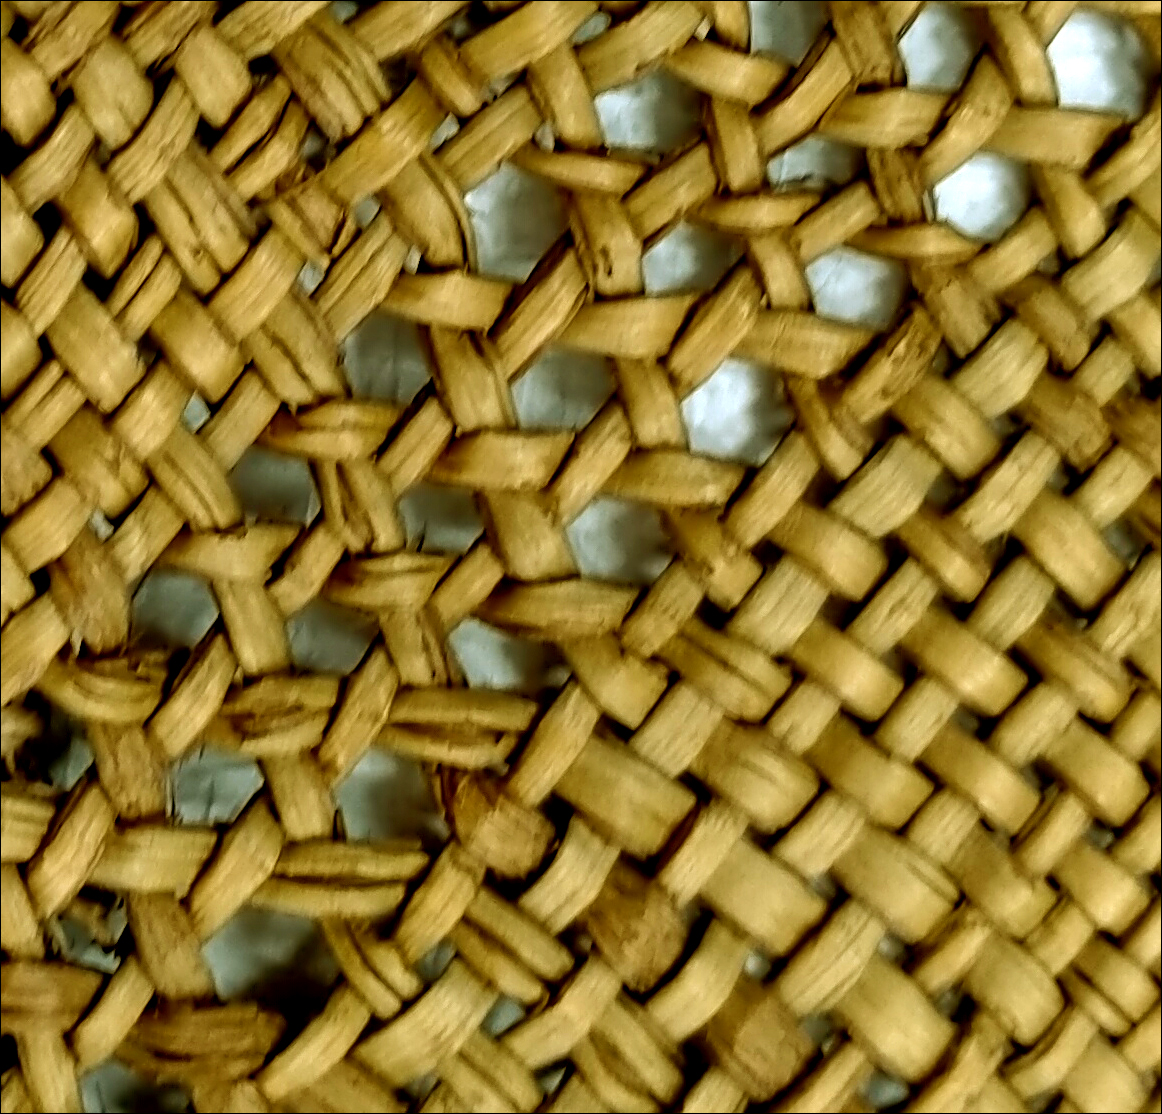 A number of other weavers and interested people, such as sailors and artists, were present to learn how this ancient sail has been woven, perhaps for the sake of weaving a sail themselves, or perhaps to use a technique in other weaving.
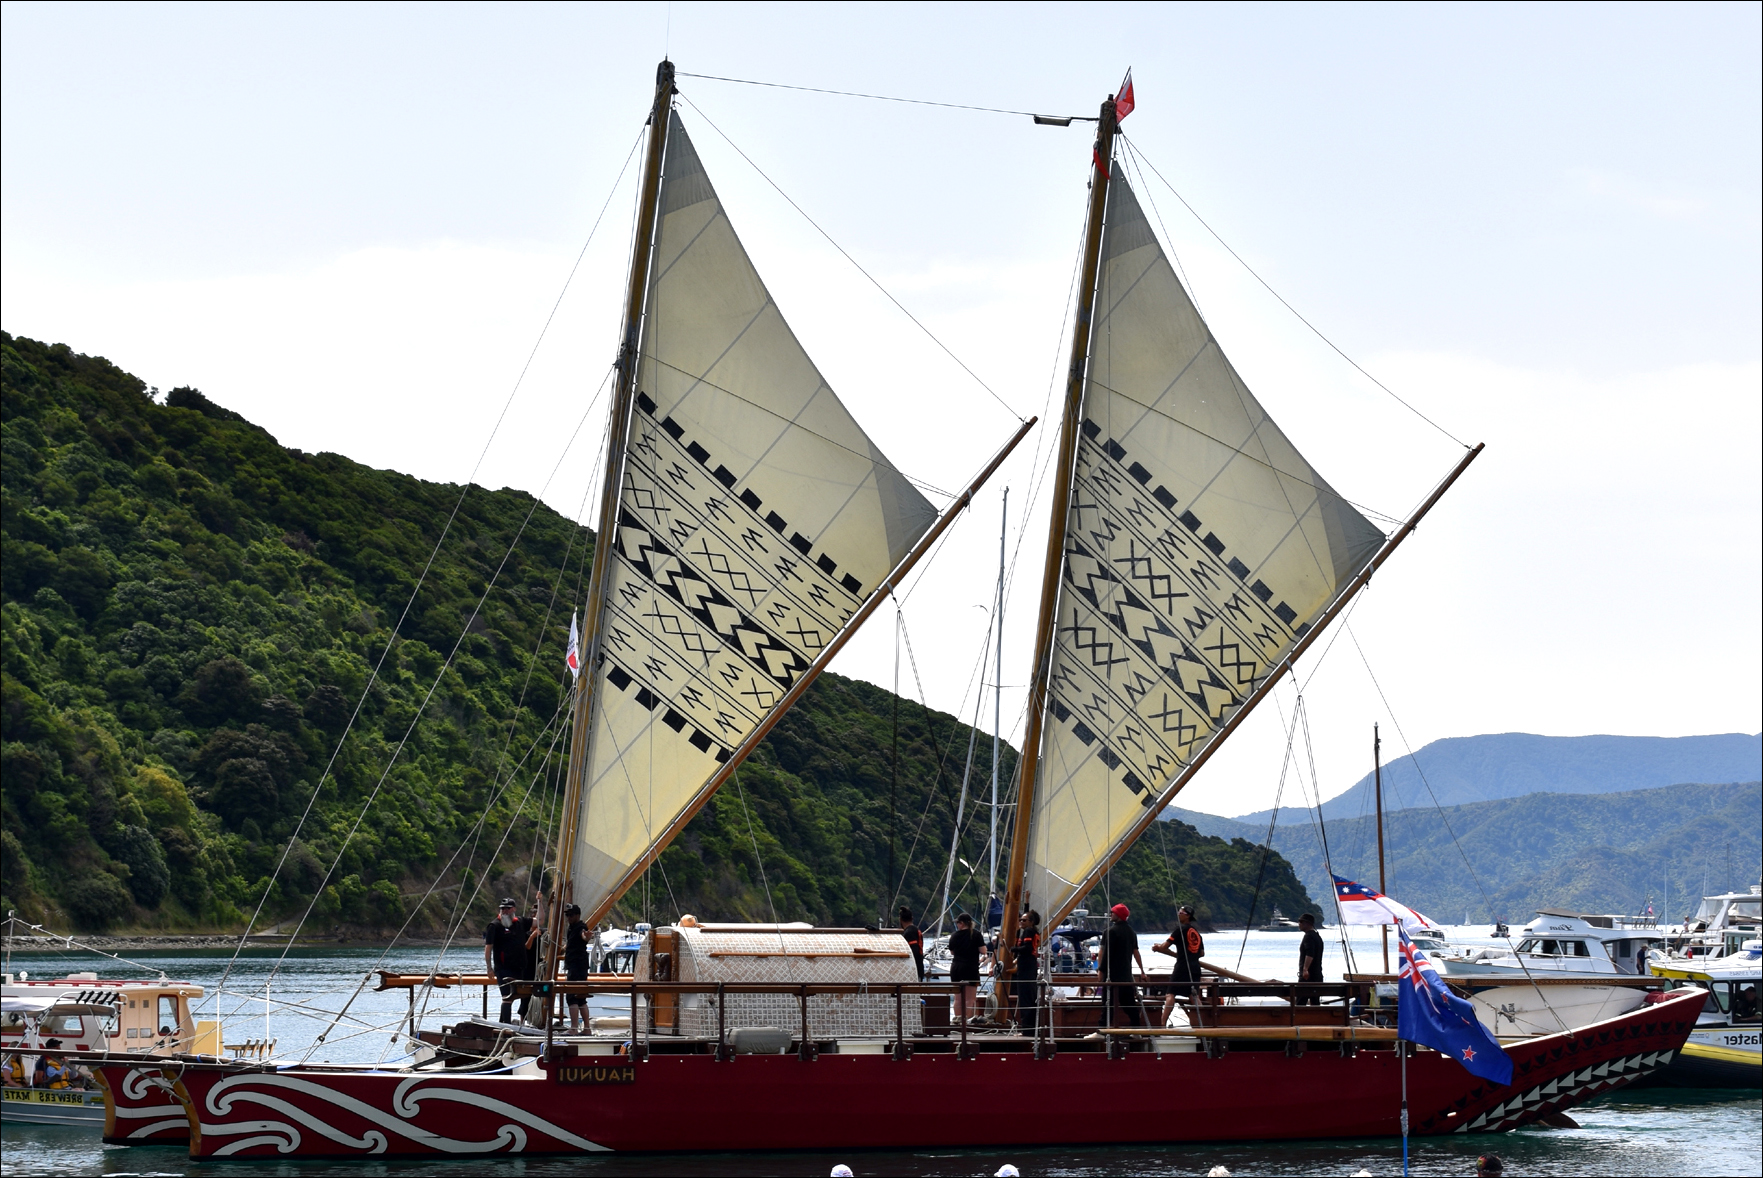
 In my
In my 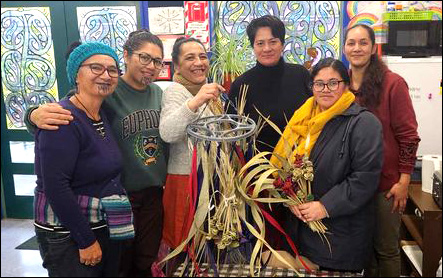 The first group is a group of eight learner weavers, who are all staff at Te Kura Kaupapa Māori o Te Ara Hou in Ahuriri / Napier, Hawkes Bay. Misty Hooper, at the back right in the image, applied on behalf of the group and says that their group just started this year and they meet monthly. We hope the books will guide you in your weaving and I look forward to seeing your weaving as it progresses.
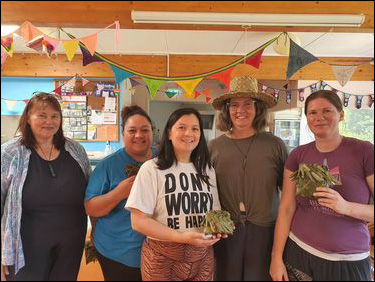 The next group is from Tāmaki Makaurau / Auckland. Cathy, wearing the pōtae, wrote, “I run a group called
 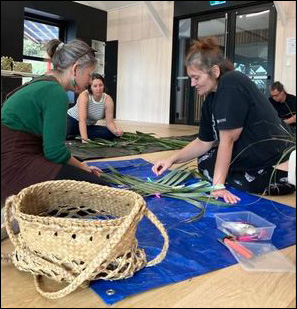 The third group is based in Te Whanganui-a-Tara / Wellington. Irihāpeti Hokianga Te Aho, on the right in this photo, wrote “I offered to run four weaving sessions, and due to their desire and having no funds, I was able to get the support of The Tuhunga Rau and Raukawa community centre to have a weekly free Sunday weaving session. I am offering my time for free … and am here to guide them in connection to harakeke and learn what they would like to learn. It is real beginners, but we do have a few advanced weavers in the mix.”
 Kenney Jean wrote in support of their application “It is the most beautiful atmosphere of people ranging from the curious to the ‘I’ve always wanted to try’, to proficient weavers, and every thing in between. It’s the first time there has been a gathering like this on Motukairangi / Miramar Peninsular. EVERYONE who attends would LOVE to be able to dip into your taonga pukapuka. Its a kind, safe space to explore ones journey into mahi raranga.” What a great-sounding roopu raranga this is.
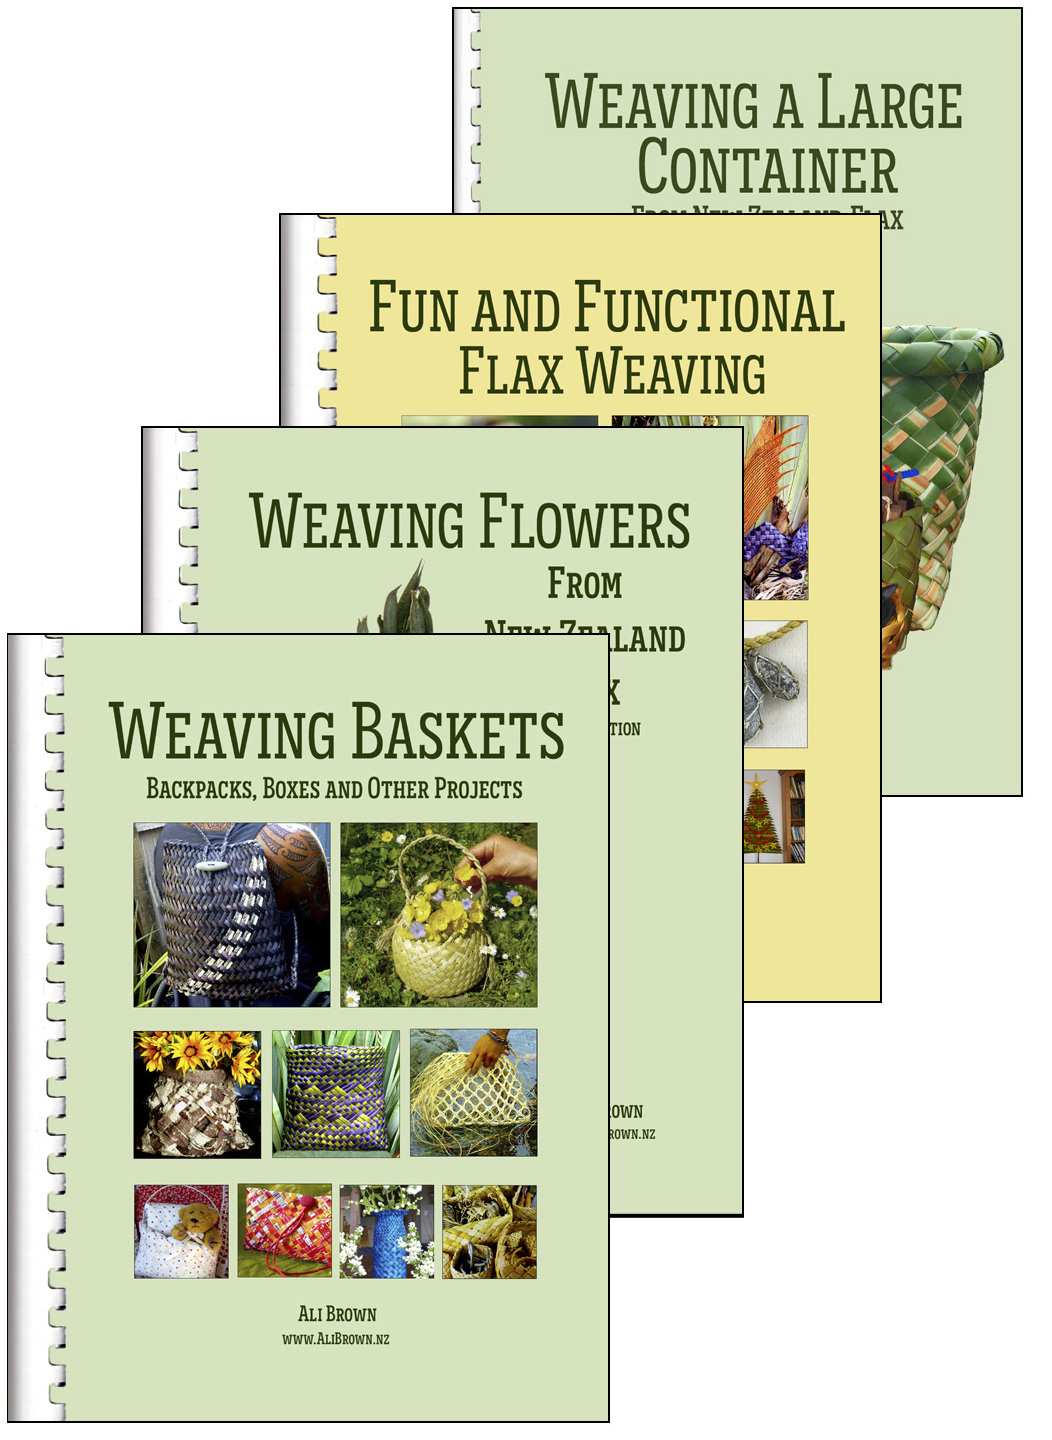 When I wrote a
 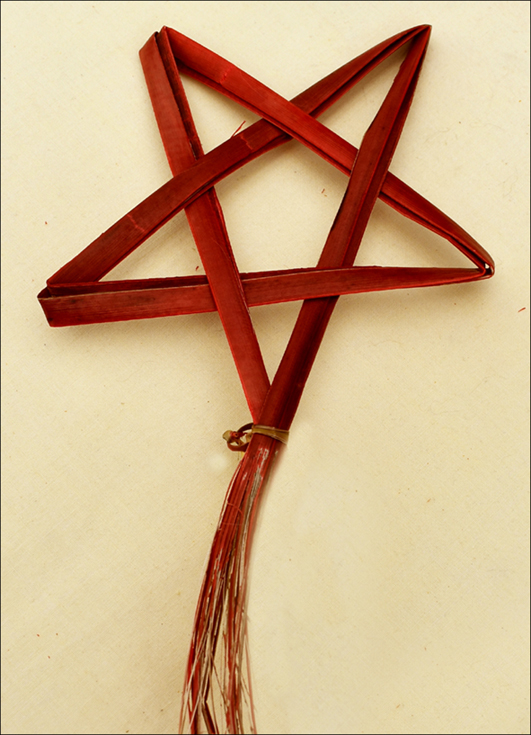 There are many ways to weave a star and I show a couple of them
 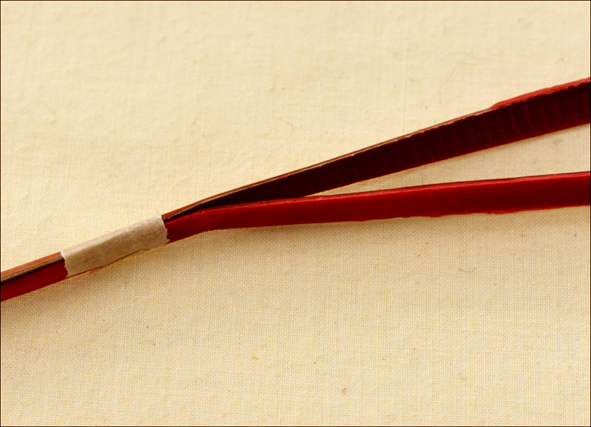 This method of making the star uses two strips of flax together so that each side of the star is shiny (flax has a shiny and a dull side), but it’s not necessary to use two strips. To make the star, (this one is about 12 cm across), select two long strips of flax that are .5cm wide and tape them together at the base, so that the shiny side is on the outside on both sides.
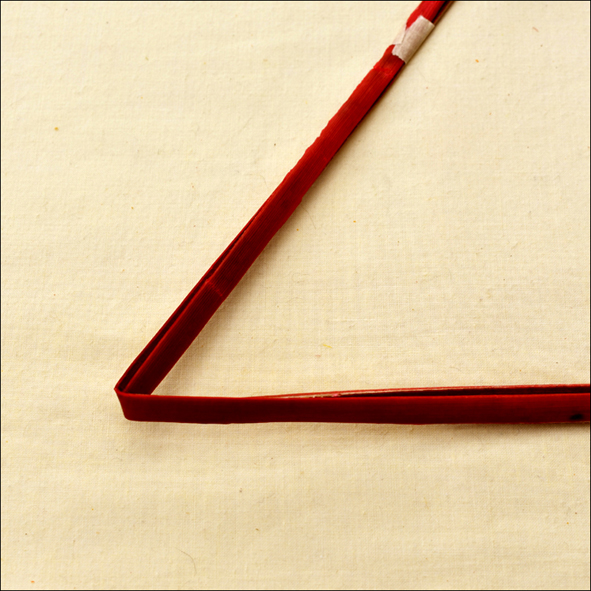 Using the two strips as if they were one strip, make a fold out to the left about 10 cm down from the tape.
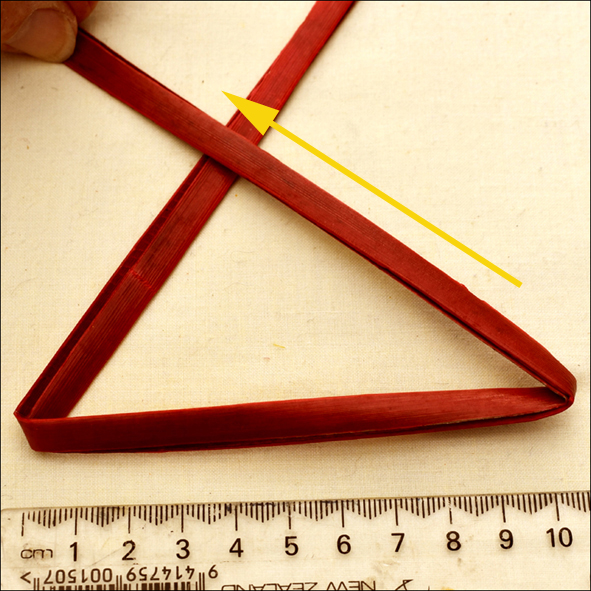 Next, measure across 10 cm from the fold and make another fold back up to the left at about the 10 cm mark, with the strips going over the top of the strips where you started.
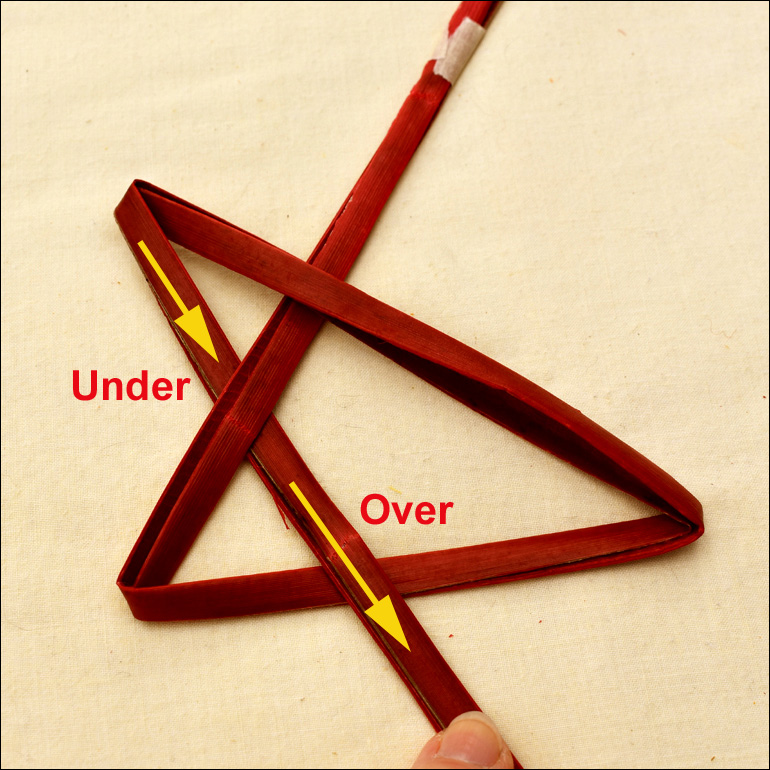 Fold the strips back down again so that there is a point made at the fold and take the strips under the first section of strips. Take it over the second section of strips, making a second point for the star. Make sure the points look the same size.
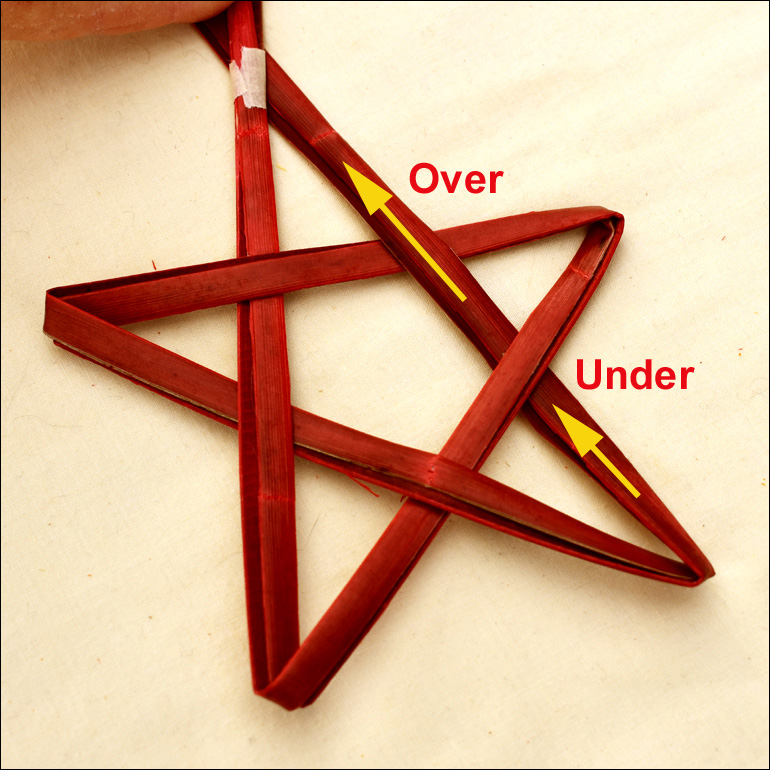 Fold the two strips, so that there is a point made at the fold of the strips, back up to the start where they are taped, going under the second section of strips and over the third. This makes the last three points of the star.
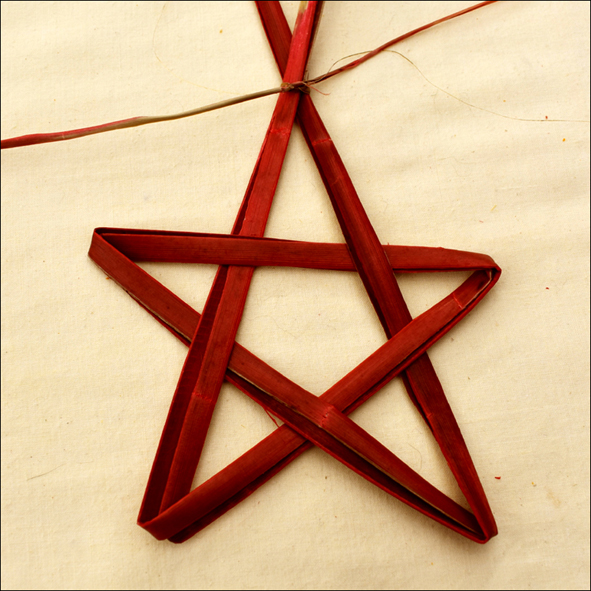 Adjust the points so they are all an even size and match each other.
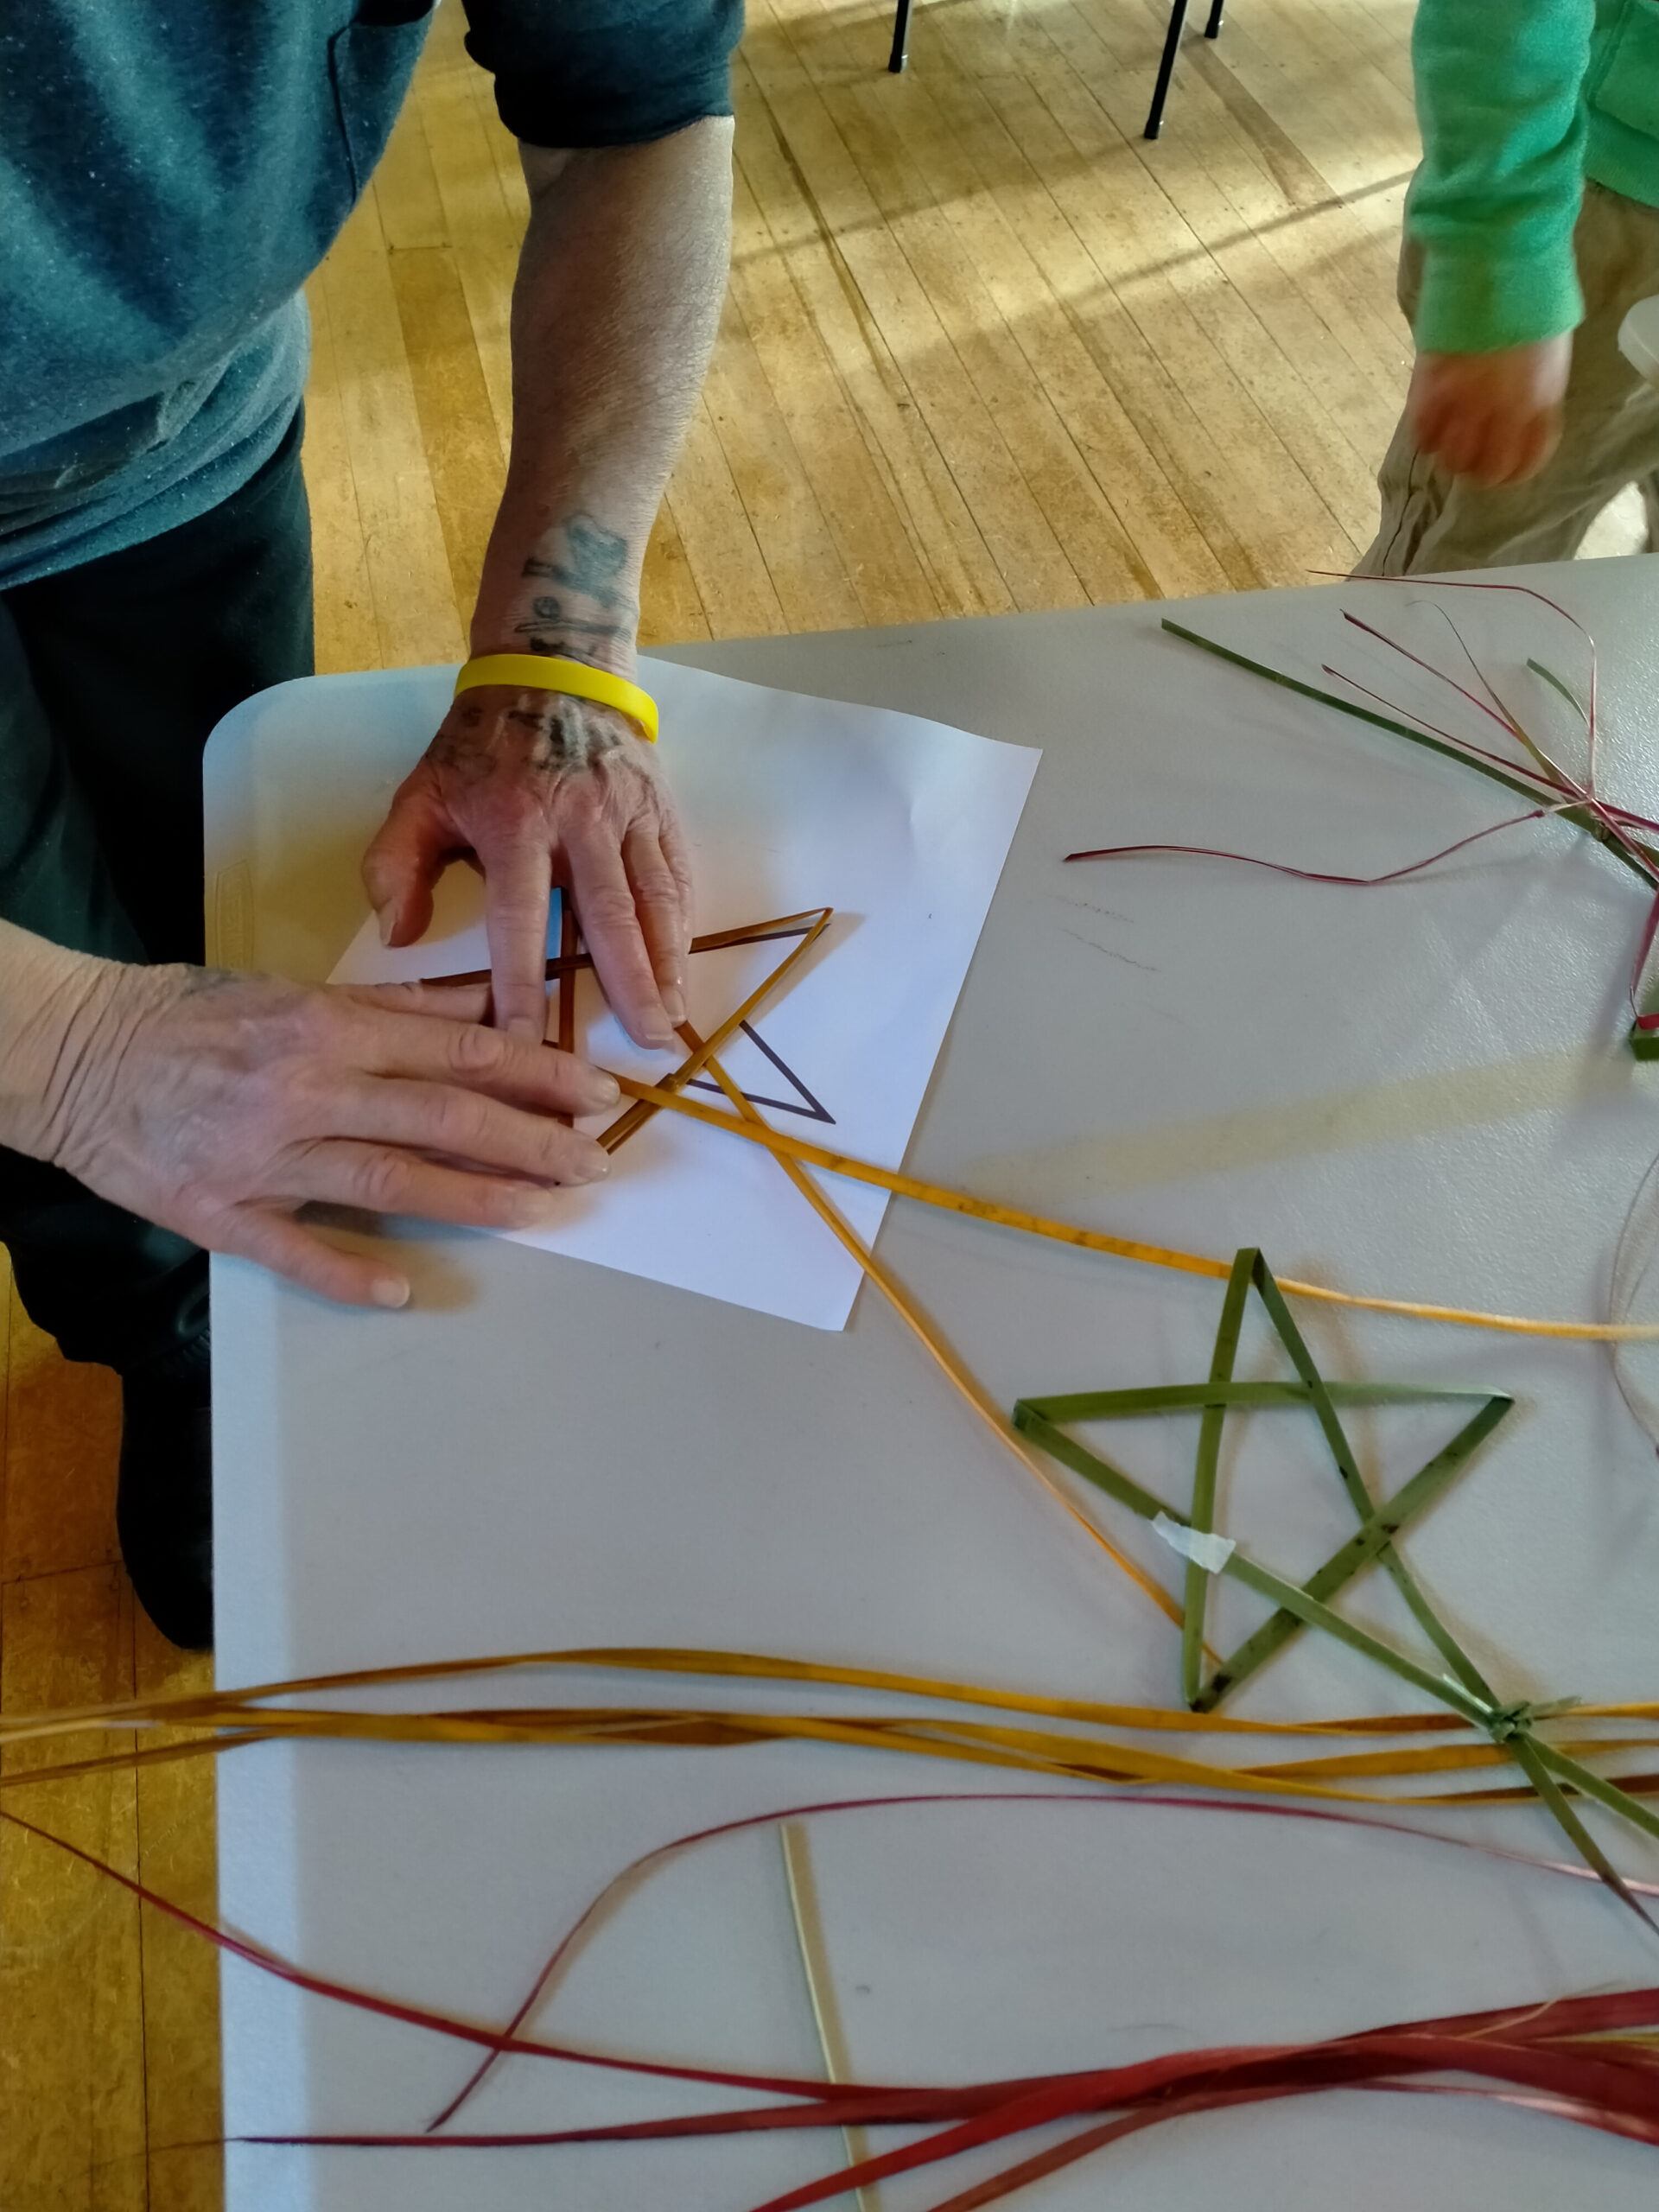 Addition July 2023: At a recent workshop for a Grandparents Raising Grandchildren group, I printed out some star outlines on sheets of paper for people to follow with their flax strips, which made it easier to keep to the star shape. One participant, Wai, also suggested using pegs to keeps the points in place which worked well and we used a little bit of tape here and there to keep the shape until the harakeke dried out. A great Matariki project for even young children with help on hand. It helps if two people work together for the first one or two.
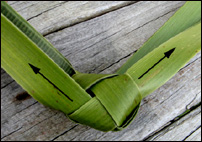 While upgrading the site, I decided to upgrade most of the hundreds of images so that more of their detail can be seen. Also, some of the images next to the instructions for flax weaving projects have had arrows added so that the project steps are easier to follow. For example, I think you’ll find the instructions for
  Some of the pages have a version in te reo Māori as well as English. Wi Pohatu has very generously been translating my webpages and these are available as a resource for people learning te reo Māori, the idea being that the images will help with understanding the text. I’ve found that I am starting to understand more of the translations the more I study te reo Māori myself.
 Do have a look at the