12 November 2007
 I ran my first flax weaving workshop for “at-risk” teenagers last weekend, and was a little nervous before the workshop, because I wasn’t sure that all the participants were coming to the workshop entirely of their own free will, and if they weren’t it might have made for an uneasy atmosphere. I needn’t have worried. It went off well and all the participants appeared to enjoy themselves.
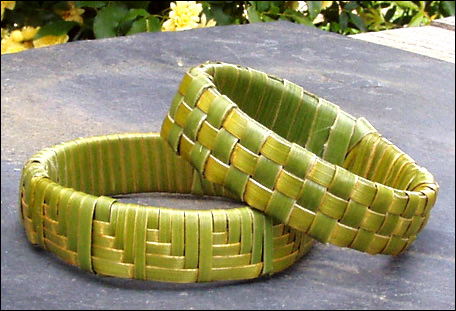
I decided that wristbands would probably be good to weave, as both boys and girls might find a use for them and they would easily be able to get them finished in the time we had.
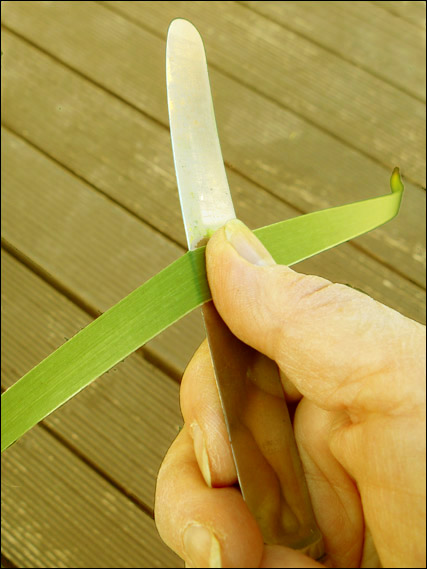 The wristbands are made with a strip of flax which is long enough to go around a wrist four times. Prepare this strip about 2 cm wide and as long as it can go without using the thicker white butt end of the strip. Soften the strip before using it by placing the blunt edge of a knife against the dull side of the flax strip (the underside of the leaf) about halfway along the length of the strip. Hold the strip against the knife with your thumb, and pull the strip through on about a 90 degree angle to the knife. Scrape the flax in each direction, pulling to the end of the strip each way.
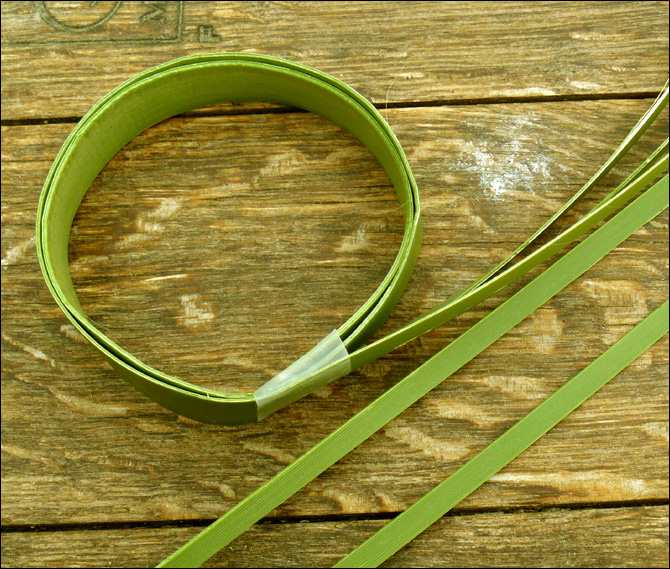 Wind the cut end of the strip around twice into a circle that is just big enough to fit over a hand. Secure the strip at this point with some tape. Split the free end into strips of an even width and make two extra strips that are the same width as these strips. These will be used to weave through the three strips of the main wristband.
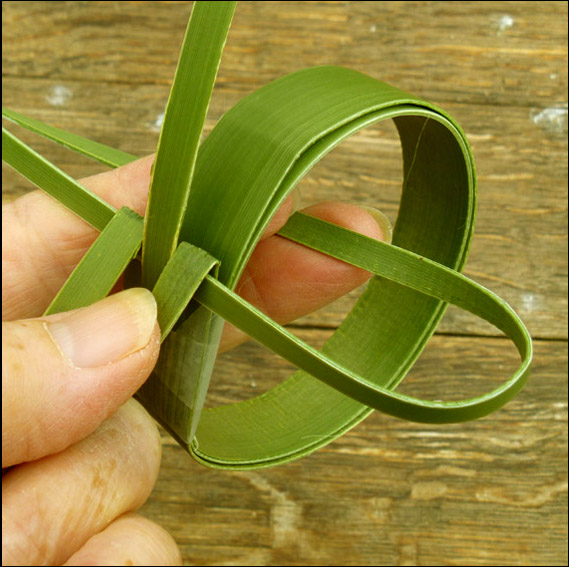
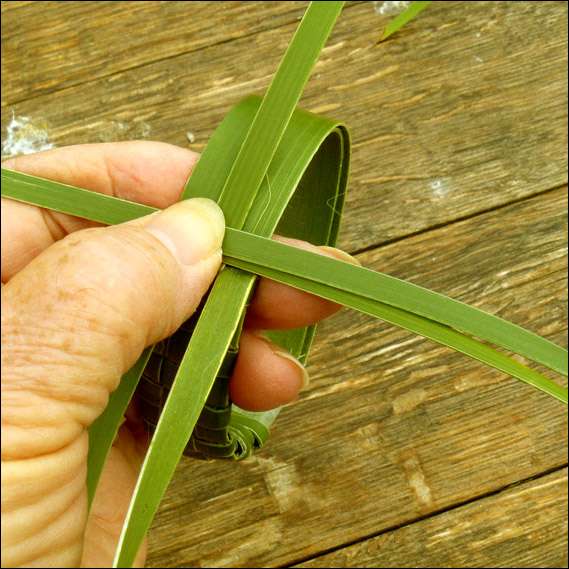
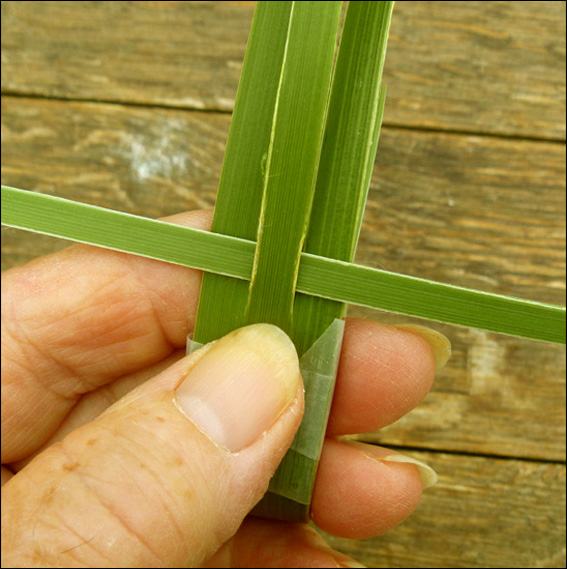 The simple wristband pictured here shows the circular strip split into three strips of the same width, with a separate weaving strip of the same width laid across them, going over the outer strips and underneath the middle one. Take one of the narrower strips and hold it with the thicker end out to the left. Position it under the middle strip of the three strips on the wristband. Leave about 10 cm poking out to the left and with the long length of the strip poking out to the right.

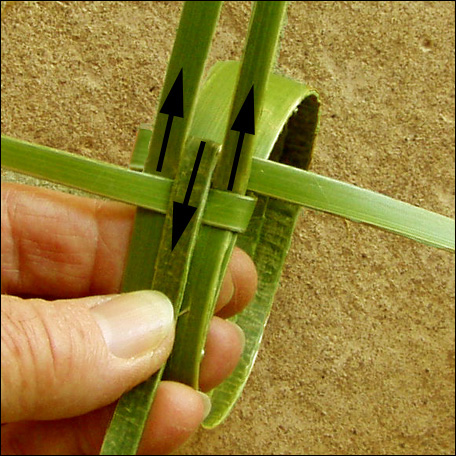
 As shown on the left, fold back the two outer strips over the top of the weaving strip, then hold them down with your thumb. As shown on the right, pass the end of the weaving strip through the middle of the wristband.
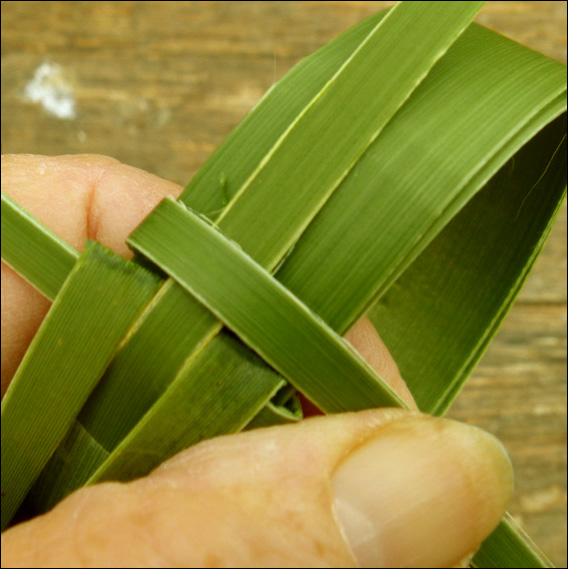
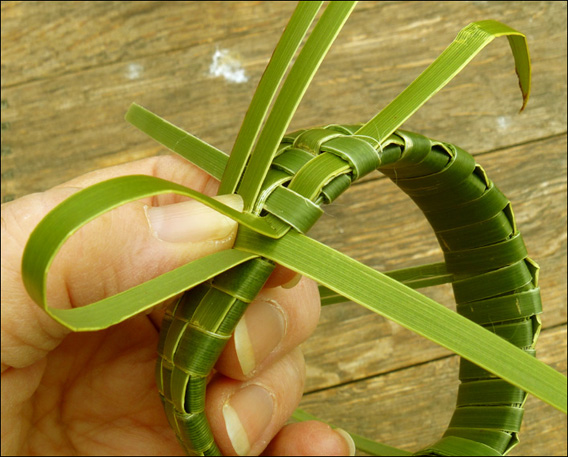
 As shown on the left, bring the weaving strip back around to the front and lay it across the top again, over the middle strip. As shown on the right, fold the two outer strips forward over the weaving strip, which is the strip pointing out to the right, and then fold the middle strip back, and hold it down with your thumb. (The end of the strip pointing out to the left is the start of the weaving strip and is not being used for weaving.)
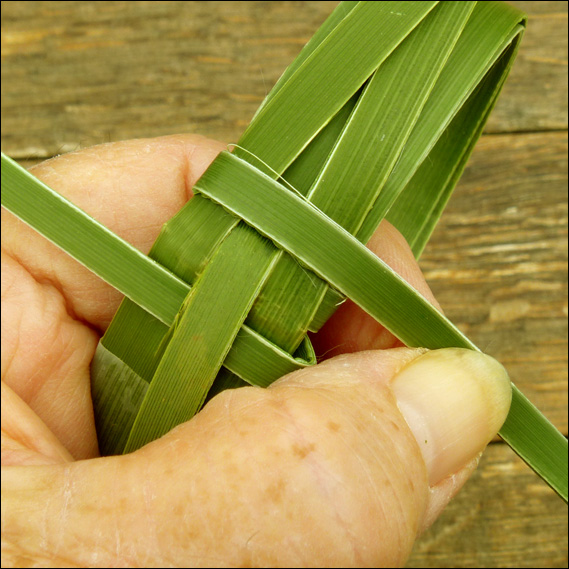
 Continue taking the weaving strip through the middle of the wristband and bringing it around over the top, while moving the central strips back and forwards. When the weaving strip gets short, lay a new strip over the top of the first strip and then use the new strip for weaving.
 When the strips have been woven all the way around, weave the ends of the strips into the start of the wristband. Thread any other ends through the inside of the wristband and cut them off. If the wristband is not quite circular, push it down over a glass or jar until it fits tightly. This will help it dry into a circular shape.
During the workshop the participants shared some of their own experiences with flax and weaving. A Tongan lad had used coconut palm leaves for weaving in his homeland. A Māori lad told how he used the gel from the flax leaf as a skin repair ointment. This gel is the sticky substance that glues the bottom part of the leaf together and is found when the two sides of the leaf are pulled apart. (Not all flax varieties contain appreciable quantities of gel, but most do). I was already aware that the gel was used in traditional Māori medicine (and is also used to glue two or three feathers together when they are woven into a traditional feather cloak), but for some reason I’ve never tried out the gel on skin cuts myself. However, after this personal recommendation about its effectiveness, I certainly will try it.
The wristbands are fun to make and you can make up your own patterns by weaving different numbers of strips into different sequences or by using different-coloured weaving strips. Instructions for another pattern are here.
Addition October 2010
Several commenters on this blog post mentioned that they found the instructions on the post a bit difficult to follow. It is one of my earlier posts and didn’t include as many steps in the instructions as my later blog posts. I’ve now added two more images, showing a more step-by-step process for weaving the wristband. I hope this addition makes the instructions clearer.
There’s also a te reo Māori version of these instructions.
© Ali Brown 2007-15.
Scroll down to leave a new comment or view recent comments.
Also, check out earlier comments received on this blog post when it was hosted on my original website.
thankyou for sharing much appreciated!
You’re very welcome Sheri
Clear and easy to follow instructions, ngaa mihi
Ngaa mihi Hanie, glad they are useful for you.