13 July 2020
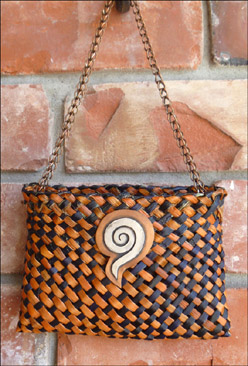 Traditionally flax weaving is woven on the diagonal rather than vertically and horizontally, as in many other weaving traditional weaving styles and I’ve noticed that new flax weavers often struggle when they’re trying to get tidy, even diagonal weaving. One of the trickier things for a new weaver is how to work out if the weaving is all at the same level — or how to find the ara or path of the weaving. As weaving is completed row by row, as in knitting for example, working this out is a basic skill that’s essential to master if you want to progress in weaving. It’s also essential if the weaver wants to achieve a straight edge at the top of the weaving, as illustrated in the kete here. Steps on how to achieve even, diagonal weaving are illustrated here using red and white arrows — the red arrows show the current movement and the white arrows show previous movements — as well as steps to take if a particular strip is too low or too high.
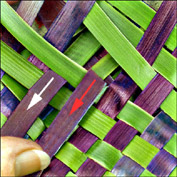
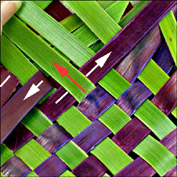
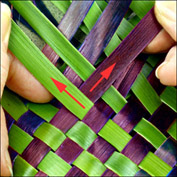 Select two strips so that the one pointing to the right (the purple one) is under the one pointing to the left (the green one). Pull the strips up gently but firmly to firm up and tension the weaving.
 Once the strips appear to be tensioned firmly, fold the purple strip that is pointing to the right back down to the left. This is the height that all the strips will be matched to.
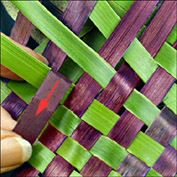
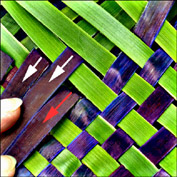
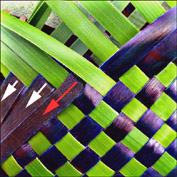
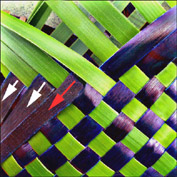
 Move on to the next set of two strips, one green and one purple and pull them up gently but firmly as before to tension them. (The white arrow shows the previous strip that was folded back.)
 Lay the strip pointing to the right back down, following the red arrow, checking that it’s at the same height as the previous strip folded back. Carry on doing this all the way around the top of the basket.
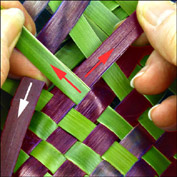
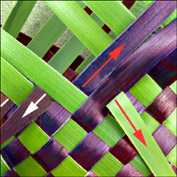
 If a strip folds down lower than the others, as the lower purple one has here, then it will need to be woven up to reach the same height as the others.
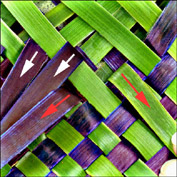 To weave it up to the right height, fold back the green strip from the right that is the second green strip above the strips that has folded down lower than the others.
 Bring the purple strip that was folded back forward again, so that it’s pointing up to the right.
 Bring the right-hand green strip over this purple strip so that it’s pointing up to the left. The two strips are now up to the same height of weaving as the rest of the weaving.
 When the purple strip is folded back down over the green strip, it is now at the same height as the others.
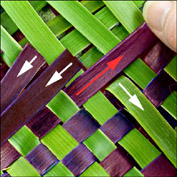
 If the strip folds down higher than the others, as this purple one has here, which is folded back over two green strips instead of one, then this bit of weaving will need to be undone and woven again.
 Bring the purple strip forward again and then pull the green strip pointing to the left back down out of the way.
 The purple strip can now be folded back down on the correct green strip and is at the same height as the other top purple strips. You can now carry on weaving, making sure you are weaving row by row around the item, and then moving up to start a new row. The weaving used in these diagrams is one over, one under weaving and is applicable only to this style.
© Ali Brown 2020
Scroll down to leave a new comment or view recent comments.
Also, check out earlier comments received on this blog post when it was hosted on my original website.
Hi thank you for sharing this video it’s a great help as I’m finding it difficult to find the Ara. Another question is are you able to show how to lock off this nd ara had stopped me from continuing.
Kia ora Newa, Glad you found it useful. Check out my blog post “a href=”https://www.alibrown.nz/finishing-with-a-straight-woven-edge-on-a-kete/”>Finishing with a straight woven edge, which shows how to do a neat edge. Also my book “Weaving Baskets, Backpacks, Boxes and Other projects” has illustrated instructions for different lock offs. You can purchase the book through my online Shoppage.