There’s also a te reo Māori version of these instructions
Links to sections of this page:
- Where to find flax
- Which species to use
- Māori Protocol
- Selecting the leaves
- Cutting the flax
- How many leaves to cut
- Storing the cut flax
- Disposing of flax scraps
Where to find flax
Flax grows plentifully in most parts of New Zealand. To find a source of flax for weaving, check for bushes growing in your own or friends’ gardens, or contact your local council or local Māori representatives, or iwi, for permission to gather flax in public places.
Which species to use
There are two species of native New Zealand flax: Phormium tenax and Phormium cookianum.
Phormium tenax: Harakeke
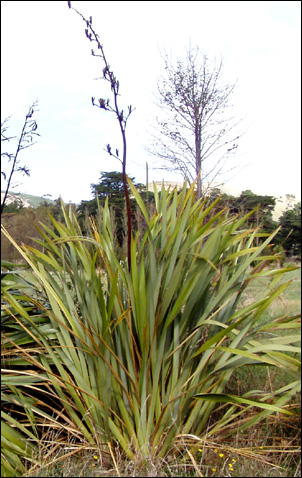
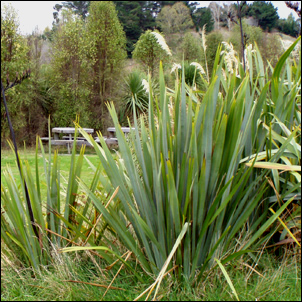
The main flax used for weaving is Phormium tenax, or harakeke, a lowland or swamp flax. It can be distinguished from Phormium cookianum by its deep red flowers, its seed pods which are thick and straight and the fact that its leaves, flowers and seed pods all point upwards. There are many different varieties of harakeke, all with different leaf qualities — the leaves can be long or short, and can have long fibre or very little fibre, and this variation results in different varieties being used for different weaving projects.
Information about the different weaving varieties, including flax cultivars and their uses is available from Landcare Research’s Te Kohinga Harakeke o Aotearoa — National New Zealand Flax Collection page and descriptions of these varieties are also included in the booklet “Harakeke: The Renee Orchiston Collection” as a PDF file from the Landcare website.
Phormium cookianum: Wharariki

Phormium cookianum, or wharariki, is a coastal or mountain flax, and is not generally used for weaving. It has softer leaves which bend over and outwards and which feel thinner than Phormium tenax leaves. The yellow or orange flowers point upwards but the thin, twisted seed pods droop downwards.
There are many coloured flax varieties ranging in colour from deep reds to yellow and soft green. Most varieties are variegated, and each variety can have a wide range of colours in its leaves.
Coloured flaxes are not usually used for weaving, although they can be used for smaller items such as woven flowers, or can be added as a feature to other weaving.
The colours will fade as the flax dries, with the deep red and yellow colours fading out to paler, more muted colours. Coloured flaxes are great to use for making a fresh bouquet of woven flowers.
Māori protocol
The weaving of flax follows a long and rich tradition established by Māori, the indigenous people of New Zealand. Māori tradition includes a protocol, or tikanga, that covers both harvesting and weaving flax. Although I have no Māori ancestry, I think it’s important to respect the protocol. This protocol can vary slightly in different parts of the country but here is my understanding of the most widely accepted protocol:-
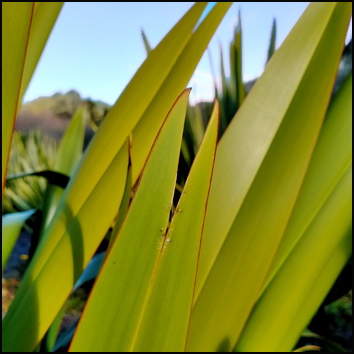
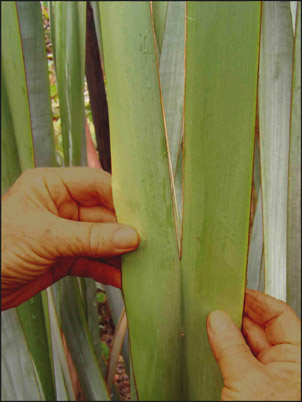
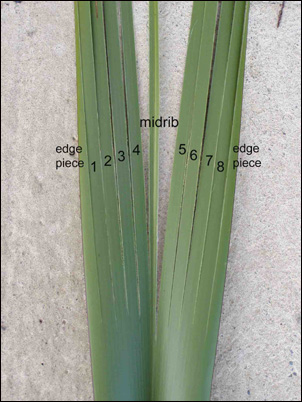
Before harvesting the flax, a prayer of thanks may be said. When harvesting flax, the central shoot of each fan of leaves, or rito, is not cut, nor are the two leaves, the awhi rito, on either side (see instructions and photo further down on this page). The outer leaves are cut in a downward motion as close to the base of the leaf as possible. (This will keep the flax plant healthy and it will keep growing, so that it can be harvested again.)
Flax is not cut at night or in the rain or snow and only enough flax is cut to complete the weaving project. Traditionally, flax is not cut by women who are menstruating, but I understand that — in light of changing views on women’s health — this protocol is no longer observed by everyone. The cut flax is not stepped on or over and food and drink are kept away from the weaving area. Hands are washed after weaving and before eating. (If you don’t, you’ll soon learn that even a small quantity of the sap from freshly-harvested flax is highly laxative!)
When the weaving is finished, discarded pieces of flax are not burnt but returned to the ground to rot. Traditionally it was returned to the ground underneath the flax plant it was cut from, but now it is often recommended that waste flax is returned to the ground some way from the flax plants to avoid setting up conditions conducive to disease. Weaving projects that have been started are finished and the first weaving project a person completes is given away.
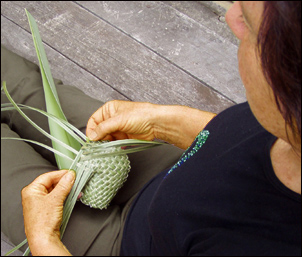
Selecting the leaves
As it is often difficult to know which variety of Phormium tenax you are cutting, and therefore what uses it is best suited for, you will need to select the leaves with the characteristics required for your weaving project.
Softer, thinner leaves with a shorter useable weaving strip, up to about 50cm in length, are good for smaller items. Larger items require thicker, stronger leaves and longer strips, although the leaves should still be soft enough to weave with.
If your weaving project starts with a fibre plait where all the new strips are added one by one by plaiting in the fibre end on the strip, then the leaves will need to have a long fibre length. To check for length of fibre in the leaf, use the technique for making fibre ends described in the Preparing flax page. Finally, check that the leaves are not damaged by pests and diseases as you cut.
Cutting the flax
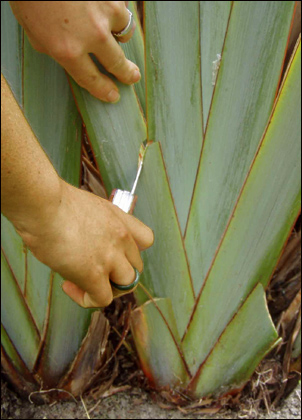
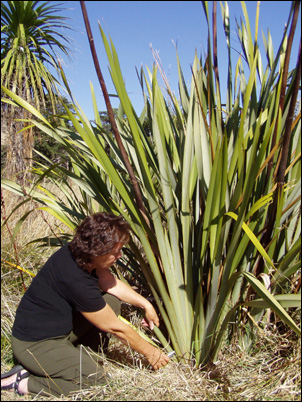
The leaves on the flax plant grow in separate fans with leaves fanning out from a central new leaf. Leave this central leaf and the leaf each side of it so that the flax plant can keep growing. Cut the leaves on either side of these three central leaves, in a downward angle, away from the plant, and as close to the base of the leaf as possible. In this way, water can’t run into the centre of the plant and rot it.
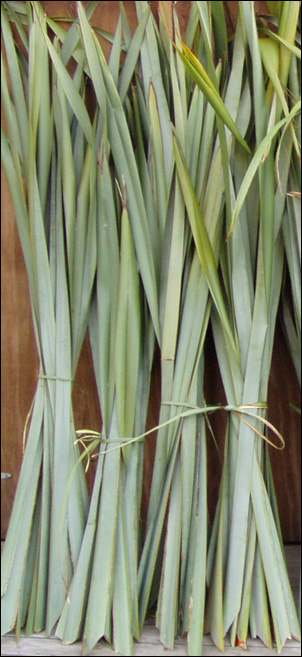
When you have cut the leaves for your project, tie them together in bundles, keeping the leaves from each bush together. If possible, it’s best to use leaves from the same bush in one piece of weaving. Before leaving, cut away any dead or diseased leaves from the plant to encourage new growth and to help keep the plant healthy.
How many leaves to cut
To work out how many leaves to cut for your weaving project, first decide on the width of the weaving strips and how large the item will be that you are weaving. Smaller items look better in strips with smaller widths, such as half a centimetre to one centimetre, and larger items can be made with greater widths, up to one and a half centimetres wide.
Next decide how many strips the majority of leaves on your flax plant will provide, and determine the number of leaves to be cut by dividing the number of strips each leaf will provide into the number of strips required for the article, allowing a few extra leaves for good measure.
Storing the cut flax
Flax can be woven immediately, stored for two to three weeks before weaving, or boiled for long-term storage. It’s best to weave flax when it is neither too wet nor too dry. If it is too wet, it will shrink after weaving and leave gaps between the strips. For some weaving effects you may want gaps between the strips, but in most cases you will want a close weave, so that the woven item retains its shape in use. If the flax is too dry, it will be hard to weave and is likely to crack.
In the height of summer, cut flax will only keep a few days at the most until it becomes too dry to weave with. In winter flax will keep for several weeks after being cut as the moisture in both the flax and the surrounding atmosphere is usually high.
Store unboiled flax standing upright in a cool place, in a bucket of water. If the flax is to be kept for more than a few days, wrap it with a tarpaulin to slow down the drying process.
Disposing of flax scraps
When weaving is completed the discarded pieces can be returned to the ground to compost. Cut the scraps into small pieces as composting takes a long time and it’s best to keep the discarded flax well out of the way of lawnmowers. Traditionally the flax scraps were returned to the ground by the bush they were cut from. A more recent trend is to compost the flax scraps in a place away from the flax bushes to avoid the spread of pests and diseases.
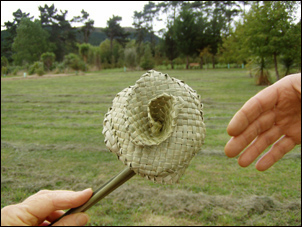
Alternatively, keep the butt ends, or take, and use them in the various projects that are shown in Fun and Functional Flax Weaving.
© Ali Brown 2006. Last updated April 2021