 Weaving a flax flower is a good project for a beginner in flax weaving. Flowers are quick and easy to weave and can be woven from any variety of New Zealand flax or from any number of other plants that have reasonably long, strong leaves. These instructions show how to weave and shape this type of flower, which I have called a hibiscus flower, in several different ways, and are taken from my book on weaving flax flowers.
 If you are making the hibiscus from flax, you will only need one leaf. Fold the two sides of the leaf together. If you are using a plant without a two-part leaf, skip this instruction and the next. Depending on the width of your leaves, you may need to use two or more leaves held together at the bottom with sticky tape or florists’ wire.
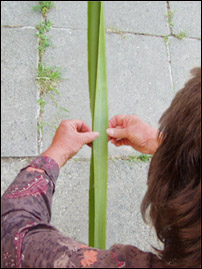
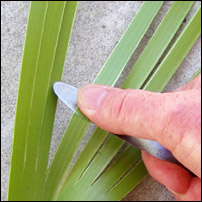
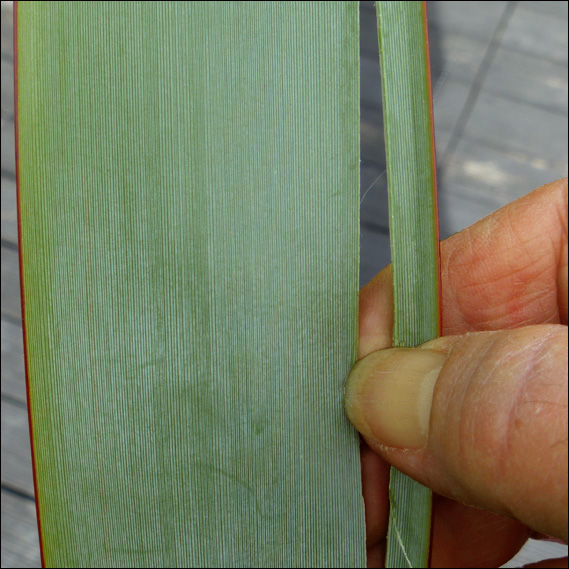 Push your fingernail, or a sharp point, through both sides of the leaf about five millimetres in from the join. When you’ve pierced the leaf, it will split. Tear off the split portion along the full length of the leaf.
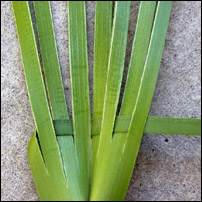
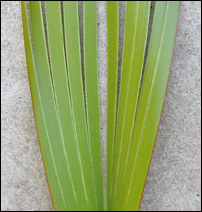 Split the leaf into strips of an even width right across the leaf. Take the splits down as evenly as possible to the part of the leaf where it joins. Remove the outer edge strip each side if it is narrower than the other strips.
For the sake of these instructions, I have used strips about one centimetre wide so that the steps are clear in the photos. A more attractive flower is made with narrower strips. The number of strips is not important but if the strips are not of an even width, then the weaving will be uneven.
 Use the blunt edge of a knife to scrape the underside (the dull side) of the strips several times. The strips will soften and curl a little. Scraping also removes some of the moisture from the leaf so it won’t shrink as much when it dries.
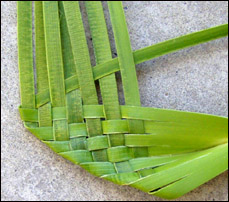
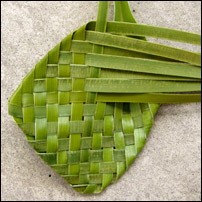
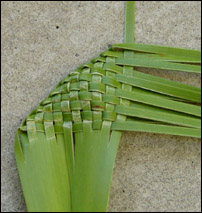
 Hold the shiny side of the leaf facing you with the stem pointing downwards. Fold the left outside strip back behind the strip next to it and then fold it across to the right. Weave it over the next strip and under next strip and repeat this weaving across all the strips to the right.
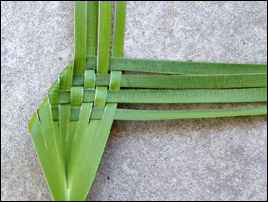 Go back to the left side of the leaf and using the new outside strip, fold it back behind the strip next to it and then fold it across to the right. Weave it over and under to the other side as before. Carry on weaving the next strips.
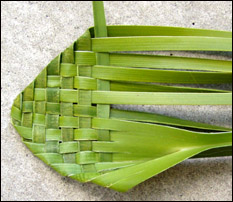
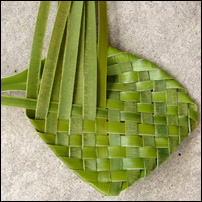
 Continue folding each strip back behind and weaving to the other side until all the strips have been woven across except the last one.
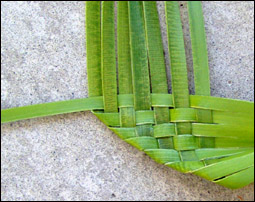 Turn the leaf around so that this strip is pointing out to the left and the other strips are pointing upwards.
 Fold the strip pointing to the left back behind the others and then weave it over and under to the other side.
 Go back to the left side of the leaf and using the new outside strip, fold it back behind the strip next to it and then fold it across to the right. Weave to the other side as before. Carry on weaving all the strips across until only one strip is left.
 Turn the leaf around so that this strip is pointing out to the left and the other strips are pointing upwards.
 Fold the strip pointing to the left back behind the others and then weave it across to the other side making sure that you don’t weave into the stem.
 Continue folding each strip back behind and weaving to the other side until all the strips have been woven across except the last one.
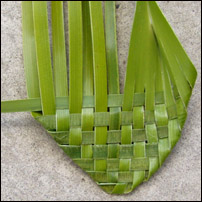
 Turn the flower around so that you can continue weaving the next section. The ends of the strips are now pointing up to the top of the weaving.
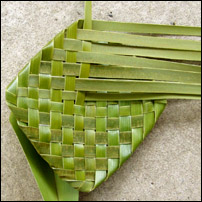 Weave this section and then turn the flower around again and continue weaving the next sections.
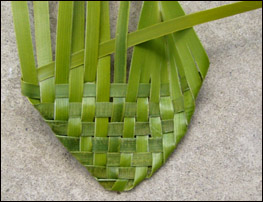
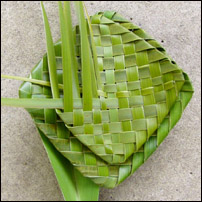 Continue weaving around the flower until the strips are just long enough to tie a knot around them. Leave out any strips that become too short. Poke them to the back to keep them out of the way of the weaving and cut them off at the end.
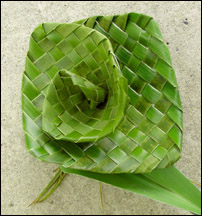
 Tie one outside weaving strip around the other ends of the other weaving strips twice. The basic flower is now finished and can be left like this as a flat flower. The ends can be shredded or curled to give a different finish.
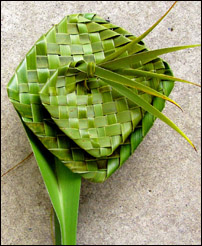
 Another way to finish the flower which gives it a more three-dimensional and natural shape, is to push the tied ends through the centre to the back of the flower and then twist these ends around so that the front of the flower curls up. The curled-up flower can then be tied in place with a separate strip looped into the back of the flower and tied over the twisted ends.
An alternative start
 An alternative way of starting is to twist the strips so that the shiny side stays up before weaving them across. This keeps the same shiny side of the flax uppermost all the time in the flower and so the flower has a more even appearance when it dries.
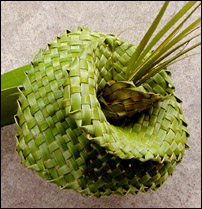 Also, this way of starting makes an edge that curls under and creates a different shape to the finished flower. Again, the tied ends of the weaving can be taken though to the back and twisted around so that the flower curls up, or you can just take a couple of the ends through to the back for twisting and tying, and leave the rest at the front.
 Different effects
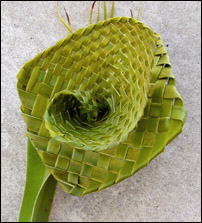
1. Split the strips after several sections have been woven and then continue weaving the split strips as before. This changes the weave from coarse to fine as shown in the photo on the right.
2. Weave across two leaves side-by-side to make larger flowers.
3. Weave two smaller flowers on the same stalk by using half a leaf for each, starting them at different levels for a staggered effect.
4. Cut the stalk off the woven flower and lay the flower on its back as a table decoration.
If you enjoyed weaving the hibiscus, you may be interested in my book on flax flowers, which includes many more flower designs, and includes another way of weaving the hibiscus that is a bit more long-winded but produces a tighter weave. This alternative way of weaving works with both the folded-over edges and the curled-under edges.
There’s also a te reo Māori version of instructions.
© Ali Brown 2006. Last updated 2019