June 2025
 With mid-winter approaching in Aotearoa / New Zealand, thoughts turn towards the heavens in a search for the star cluster of Matariki, which heralds the Māori New Year, a time for Māori and others to remember those who have passed, celebrate the present and plan for the future. I like to develop new weaving ideas and this year, to celebrate Matariki, I’ve worked on a woven star, the instructions for which I’m sharing here, with illustrations for guidance. Try weaving a star, either on cardboard as shown here or on a piece of weaving. Another suggestion is to weave nine stars in different sizes representing the nine stars of Matariki and attach them to a backing to make a Matariki wall chart.
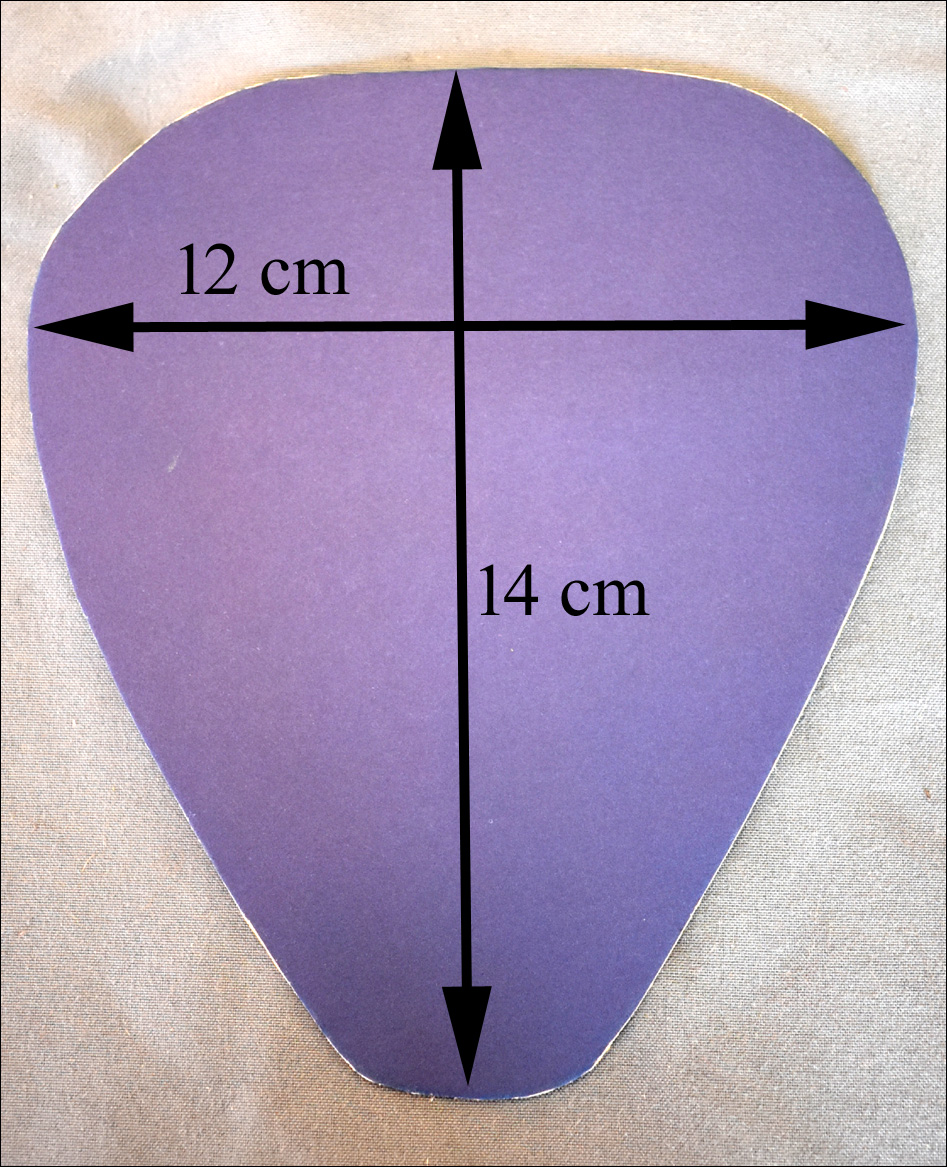 The star is made by wrapping thin flax strips around a cardboard shape as shown here. The strips stay in the right place on this shape — I found that a circle is too round for the strips to be able to hold in place while being wrapped. To start, draw this shape on a piece of dark-coloured cardboard and cut it out. Your shape can be smaller or bigger than this one, which is 12 cm across and 14 cm high. Prepare three long strips of flax 4mm wide and soften them by pulling a knife along the underside of the flax. If the shape much bigger, then you’ll need to cut more strips as one strip won’t be long enough to wrap around the shape three times.
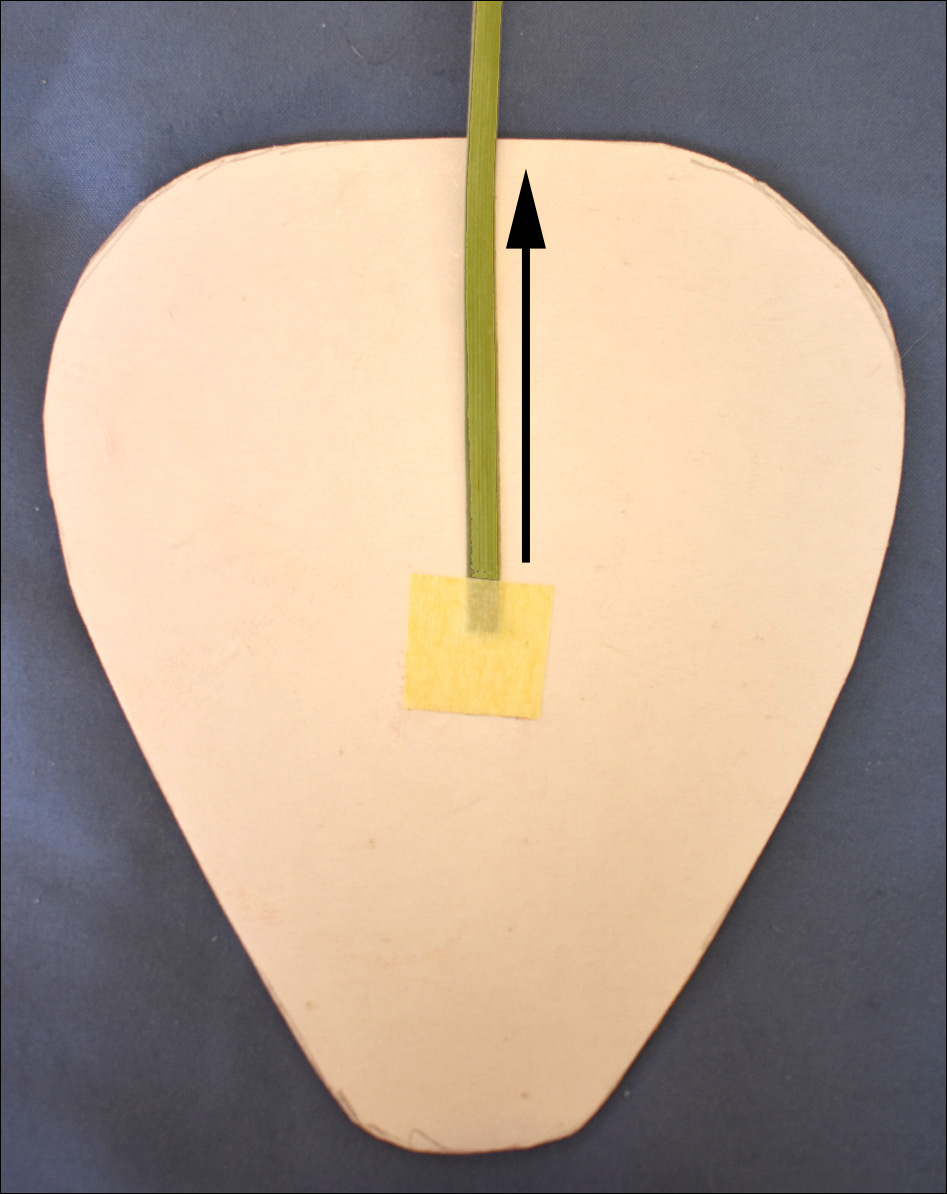
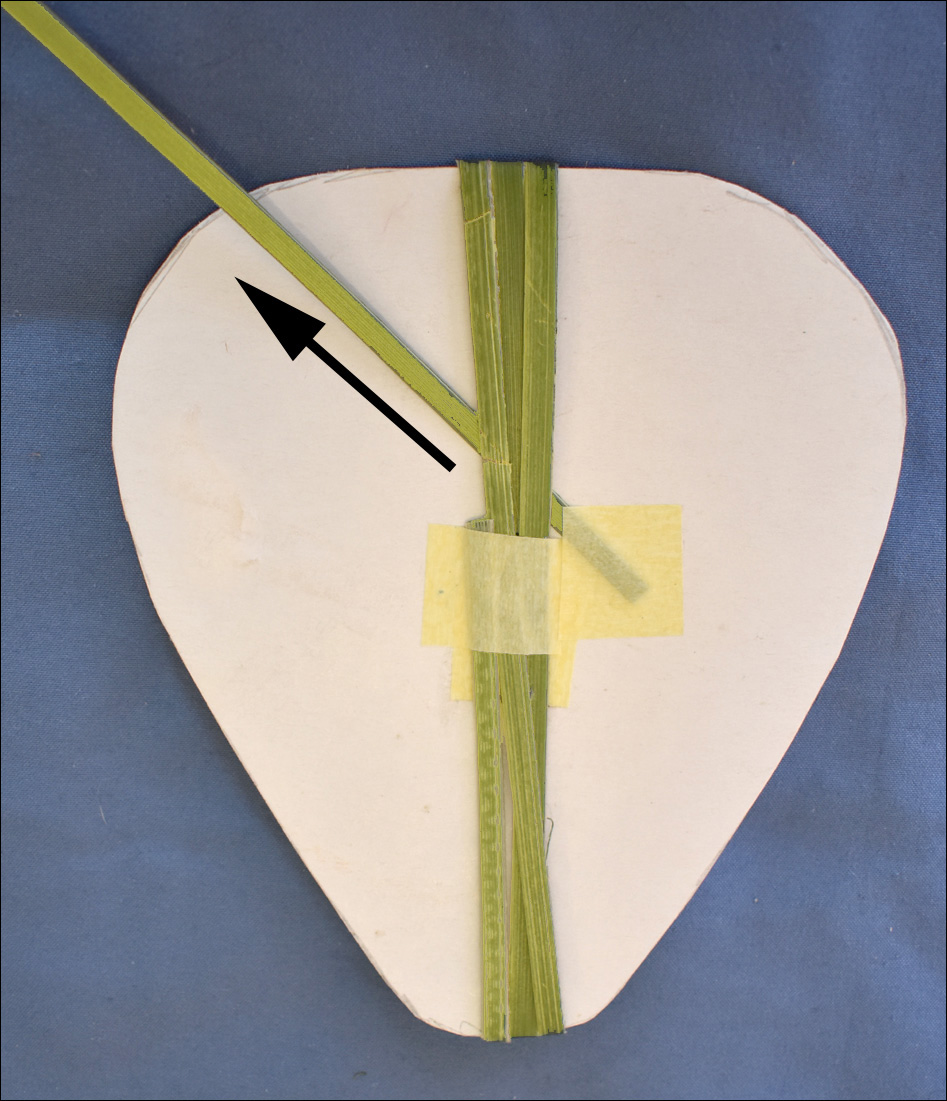
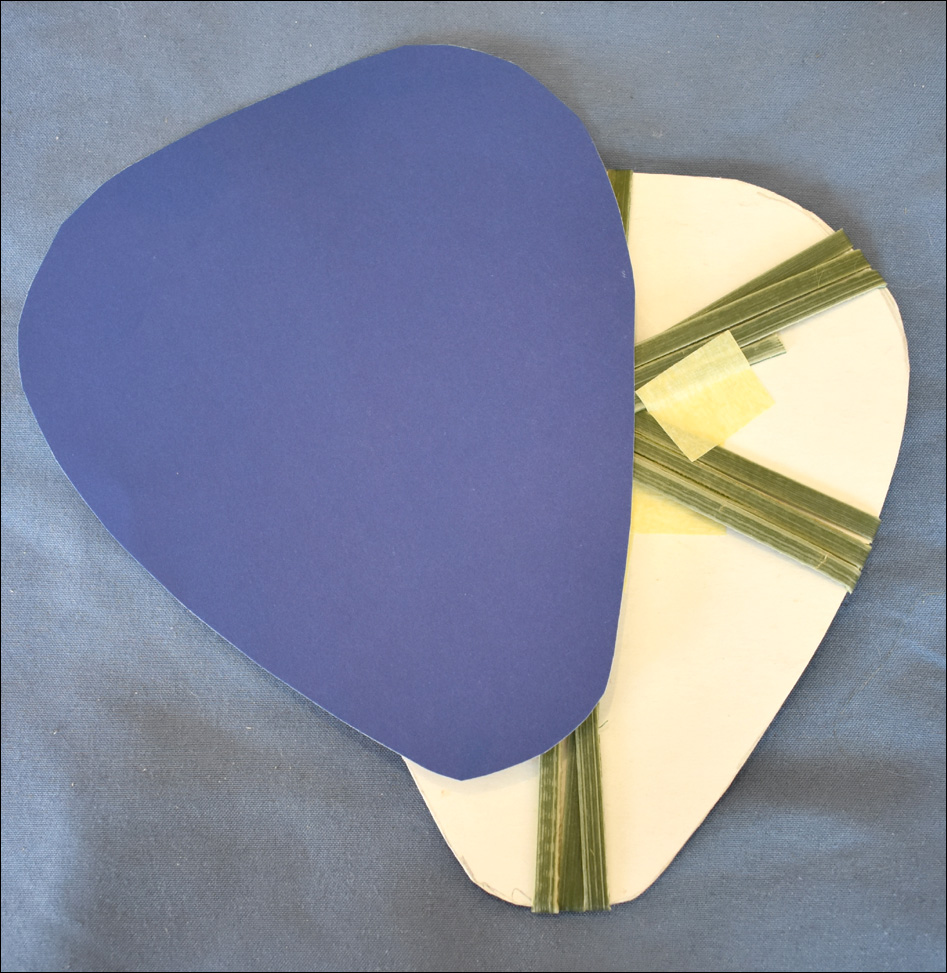
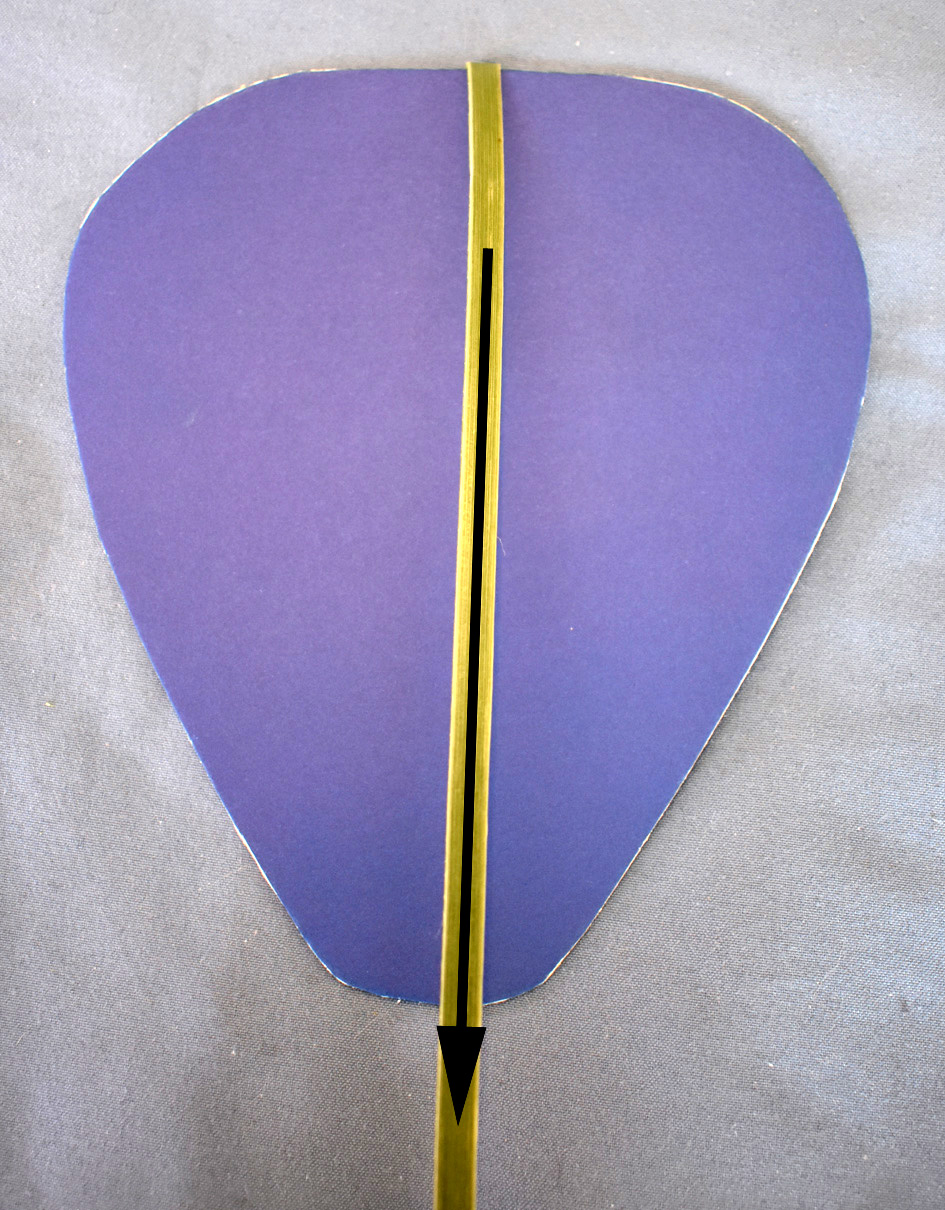 Take one of the strips of flax and attach it with tape to the back of the cardboard shape as shown here on the left. Attach it in the middle of the shape with the long end going up to the top. Fold it over to the front of the shape, shown here on the right, and take it straight down to the base of the cardboard shape.
 Next, fold the strip around the back of the cardboard shape and take it up to the top.
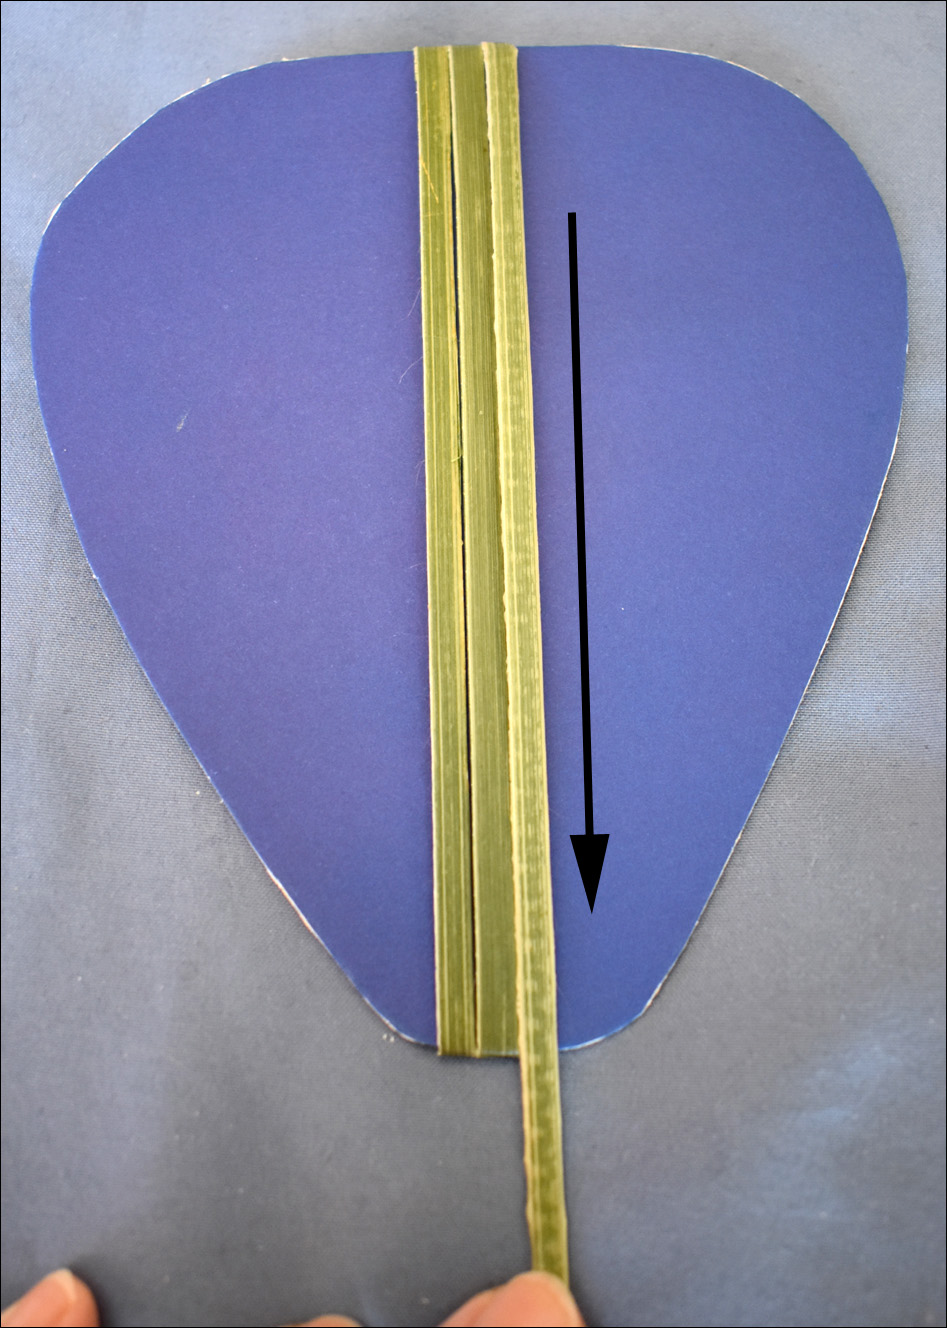 Now, bring the strip over to the front of the shape and back down again. Take it around the cardboard shape one more time, so that there are three strips sitting side by side on the front of the shape.
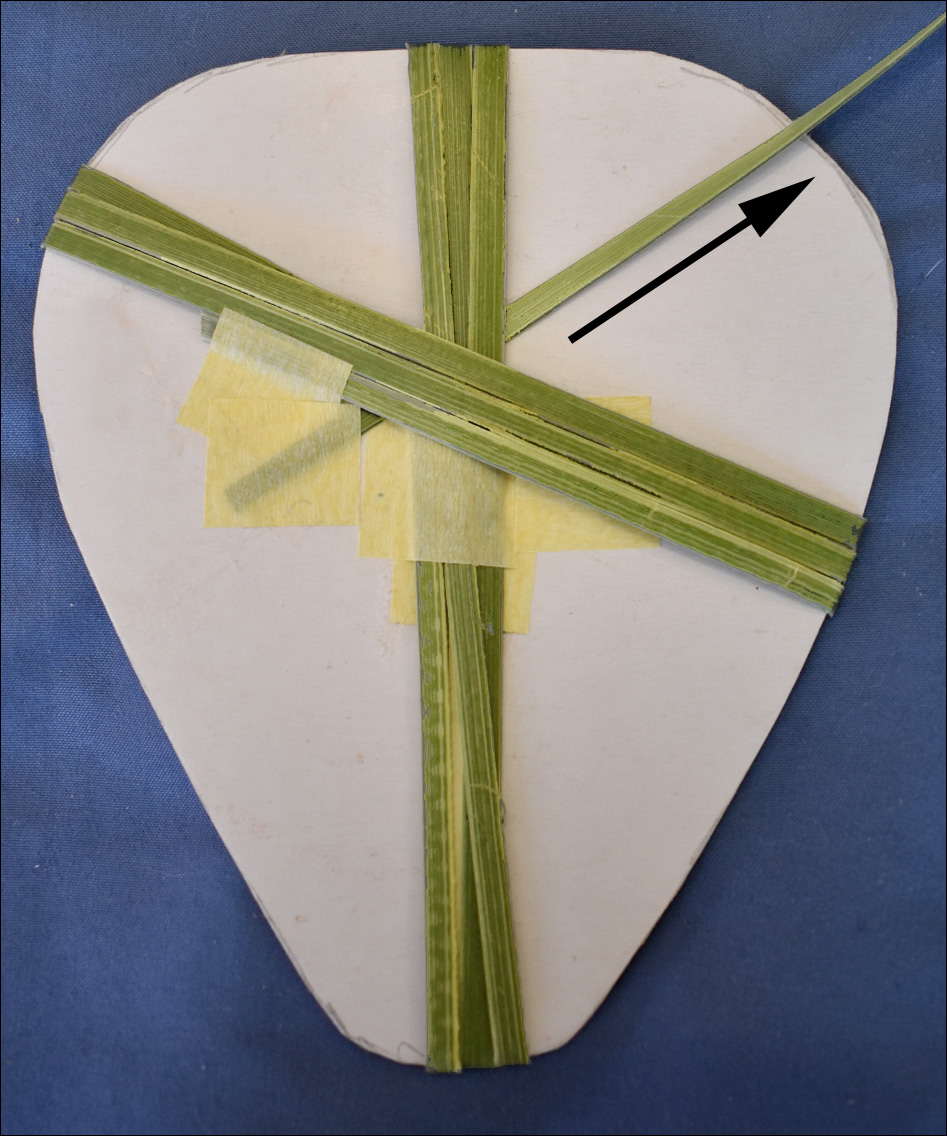
 Wind the strip around to the back and pull the strip up to tighten it all the way around. Tape the end in place. Take the second thin strip of flax and tape it in place on the back of the cardboard. Tape it so that it is on an angle pointing out to the left and it will come over to the front of the cardboard shape at the top right.
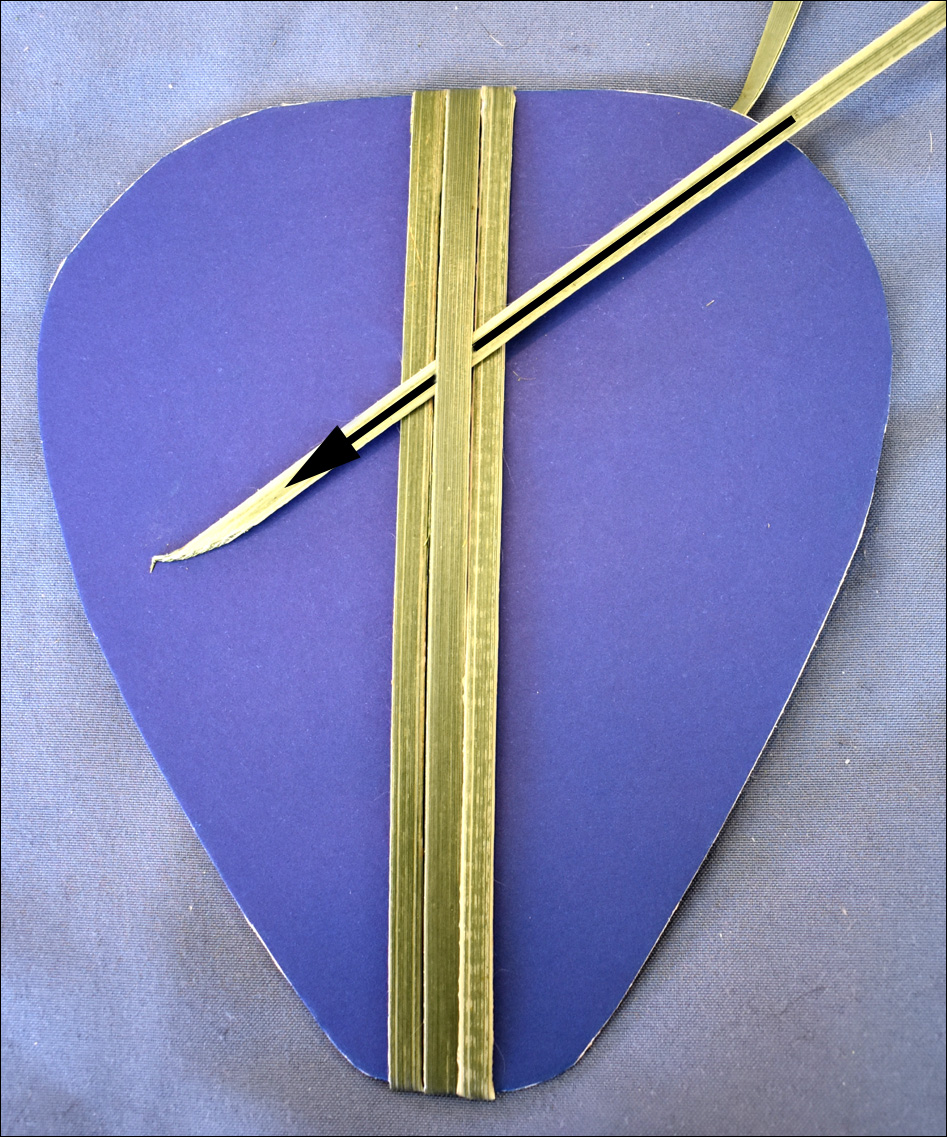 Bring the new strip down over the front of the cardboard shape and then weave it under the middle strip of the three strips. It can be useful to have a small instrument like a curved needle to lift the middle strip up to assist the new strip to slide easily underneath.
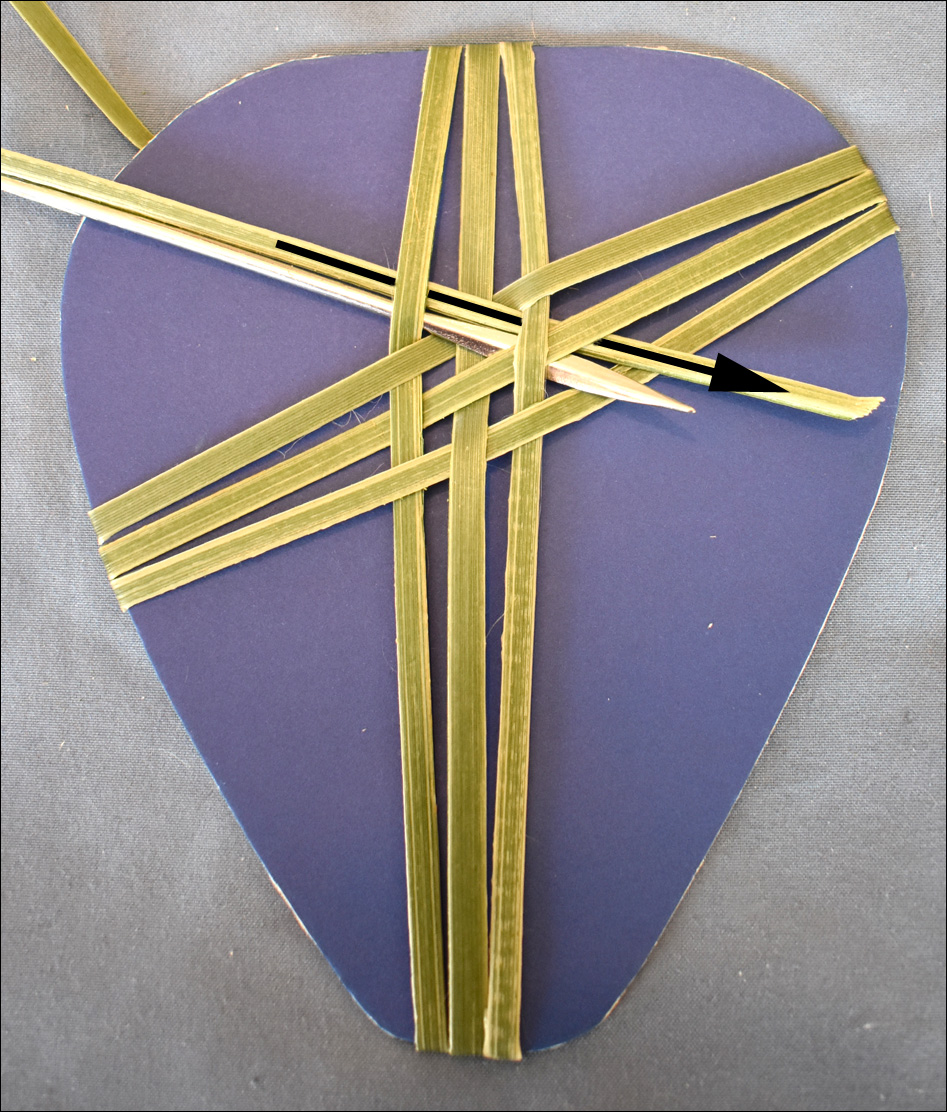
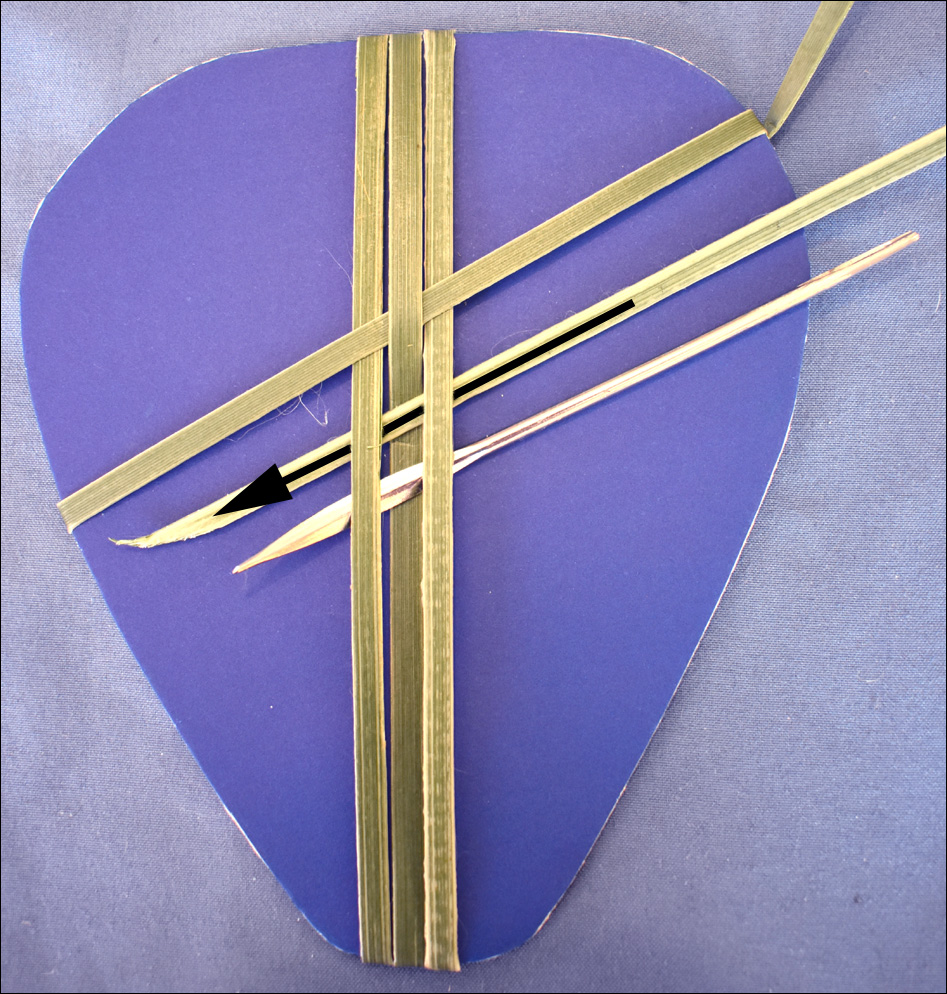 Take the new strip nearly halfway down the side of the cardboard shape, fold it to the back, and then bring it around to the front again. Weave it under the first strip, over the second and under the third strip. Again I’ve used a curved needle to hold the vertical strips in place so the the new strip slides easily underneath. Pull the new strip all the way through, keeping it tight up against the previous strip. Take the strip around the back of the cardboard shape, and bring it to the front, beside the previous strip.
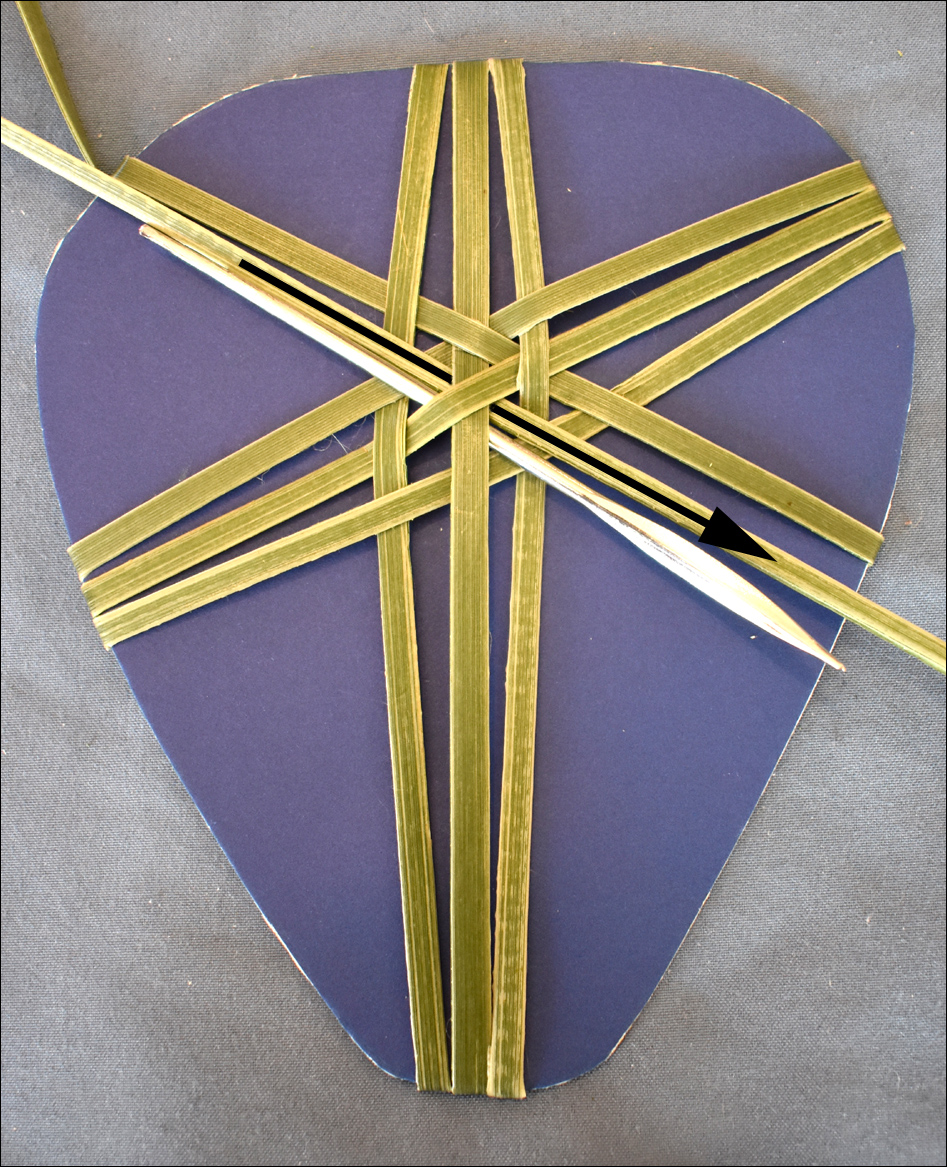
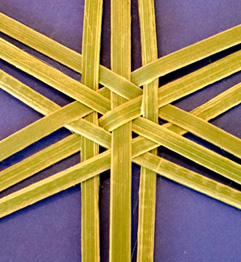
 Weave the strip under the middle strip, pull it fully through and take it around to the back of the cardboard shape. Pull the strip up tight, make sure the strips are sitting neatly together on the front, and tape the end in place on the back. The weaving on the front of the cardboard shape will now look like this image on the right.
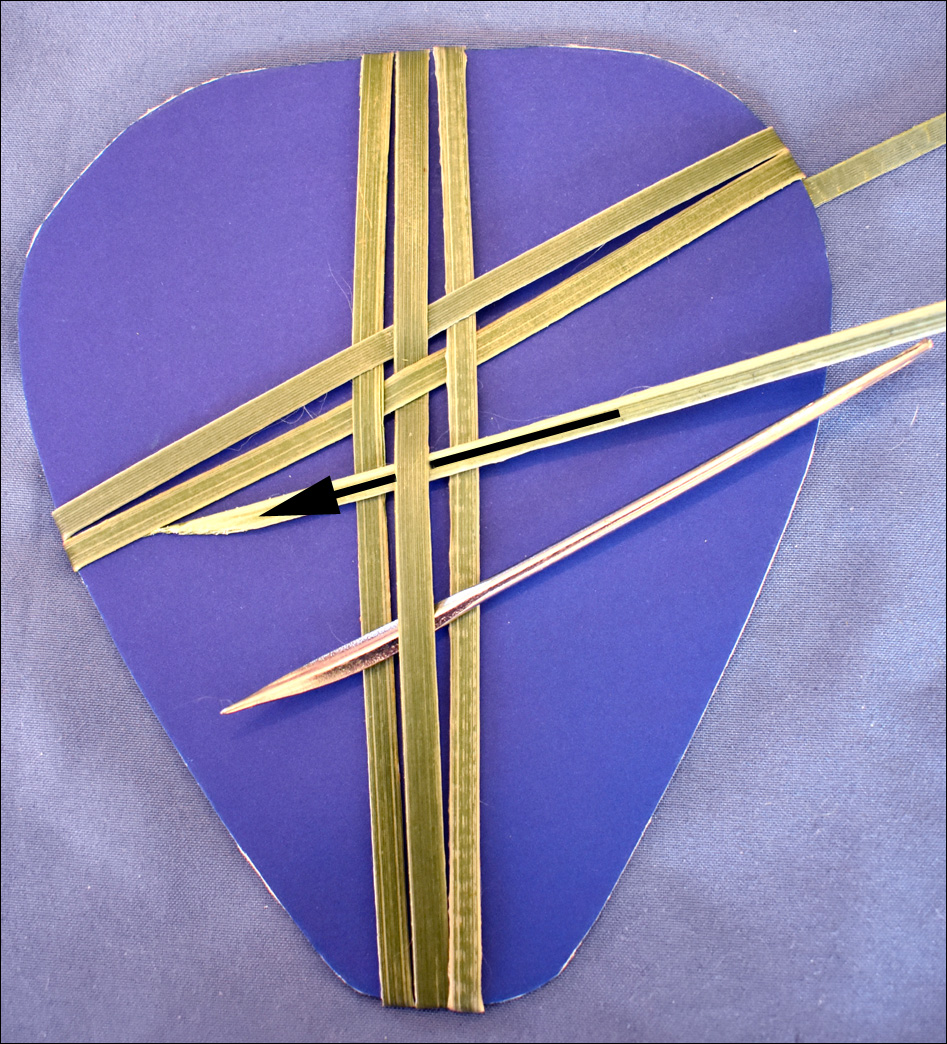
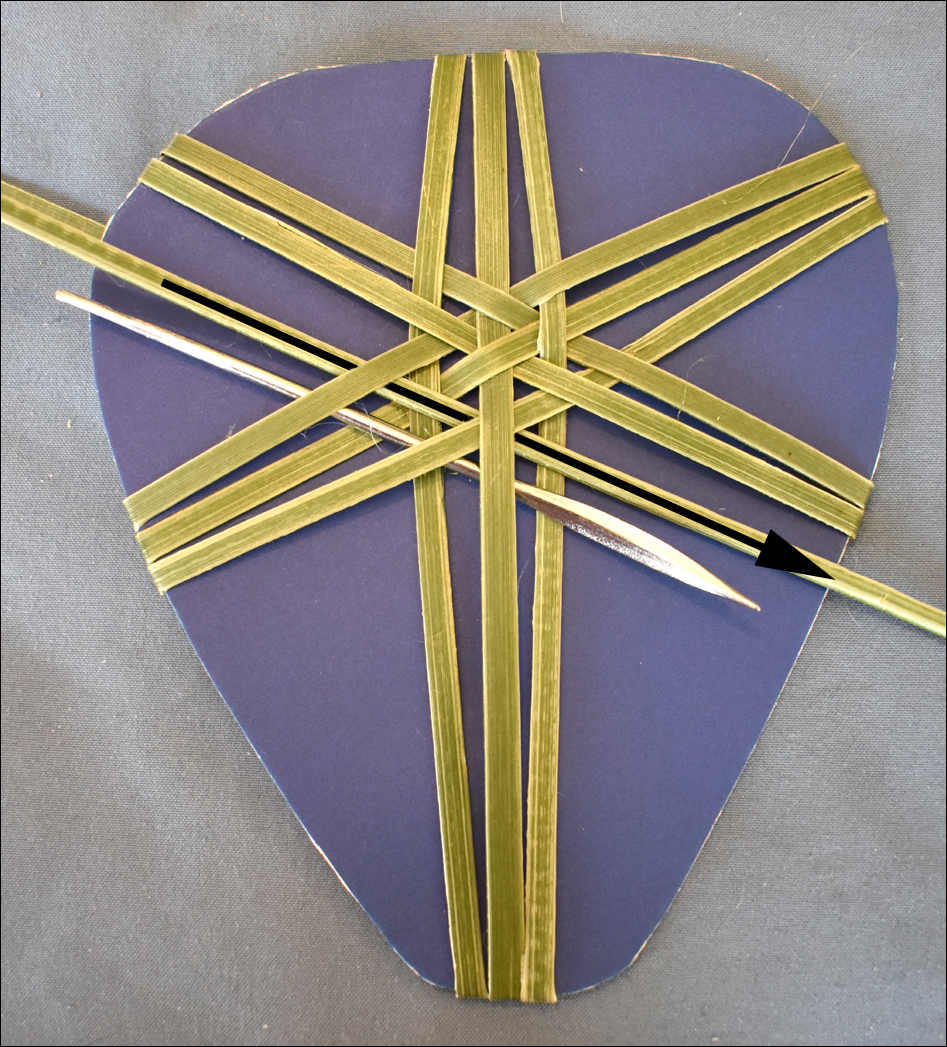
 Tape the third thin strip of flax on the back of the cardboard shape, postioning it so that it is on an angle pointing out to the right, and coming over to the front of the cardboard shape at the top left. Bring the new strip down over the front of the cardboard shape, weave it under one strip, over two strips, under two strips and over one strip. Note that each set of the two strips that is being woven under is made up of one strip from the first set of strips wound around the cardboard shape and one strip from the second set of strips wound around the cardboard shape.
 Pull the weaving strip up tight, take it around the back of the cardboard shape and around to the front again so that it is alongside the previous strip. Weave the strip over two strips, under two strips, and over two strips.
 Pull the weaving strip up tight, take it around the back of the cardboard shape and back around to the front so that it is alongside the previous strip. Weave the strip under one strip, over two strips, under two strips, and over one strip. Take the strip around to the back and tape it in place.
 Adjust the strips so that they are sitting neatly together to make a pleasing woven star. If the flax strips slip around on the edge of the cardboard shape, tape them in place on the back.
 Tidy up the back of the star by covering the back of the cardboard shape with another piece of card or paper. Alternatively you may want to stick it onto a larger art work or Matariki chart.
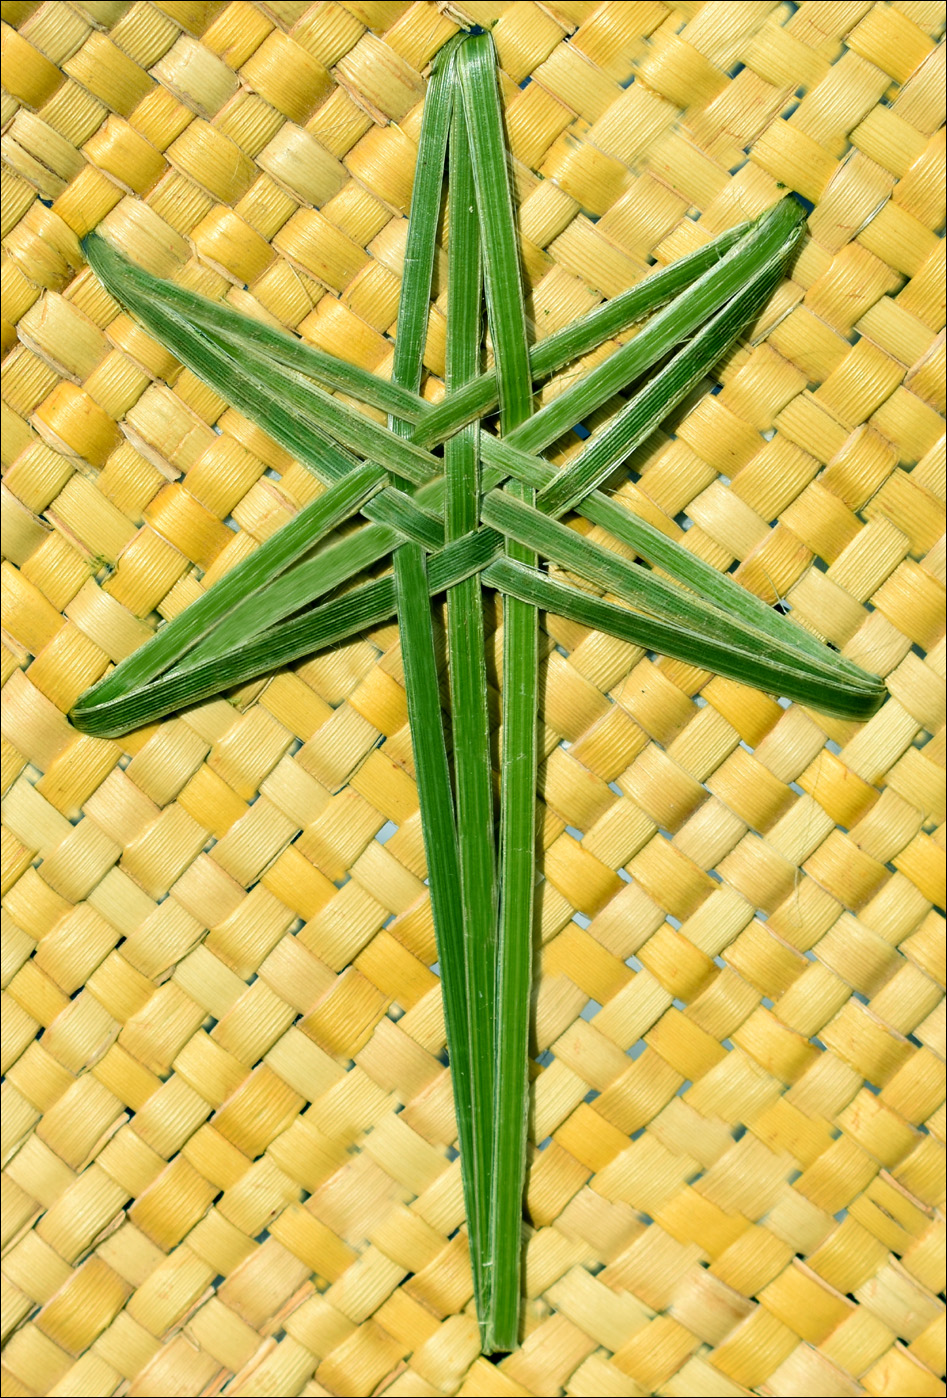 This woven star can also be added to a woven flax piece as shown here. It can be tricky to get the right shape when adding it to weaving so plan it out before you start by using short strips and laying them in place to see which position looks best. When adding the star to the woven background, I’ve used the same gap in the weaving to thread the strip through three times, which makes more detailed points. Weave the ends of the strips in at the back for tidiness. The long point at the base of the star is an integral feature, giving it an elegant appearance. Although I’ve used green flax here, using dyed flax in a contrasting colour will make the star, or stars, stand out more for a better effect.
© Ali Brown 2025.
Scroll down to leave a new comment or view recent comments.
Kia ora Ali. What a beautiful elegant star. Thank you for your clear instructions and illustrations. Looking forward to making it as soon as it stops raining.
Nice to hear from you Ann. Hope all is well. Thanks for your comments about the star. Have fun making it. 🙂
Kia Ora Ali, thank you for your latest book Creative Flax Weaving. As always your illustrations and instructions are clear and easy for any beginners to follow. Over the years I’ve enjoyed all your books and always recommend them to people wanting to start their weaving journey. Even as experienced weavers we can always learn something new. I particularly like your Kupu Maori – Maori words at the back of the book and they way you look outside the square. Thank you Ali.
Thank you Carrol, glad you have had enjoyment and learning from my books over the years. Yes I agree with you, we are all always learning. Happy weaving!